
Table of Contents

Hive Scum Build - Warhammer 40k: Darktide
Hive Scum “Crit-Immortal” Hybrid
Hive Scum Build - Warhammer 40k: Darktide
Class

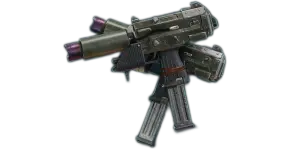
Weapons


Shred
+4% Bonus Critical Chance on Chained Hit. Stacks 5 times.
Wrath
+25% Cleave on Hit. Stacks 5 times.

Blaze Away
+8% Strength for every 10% of magazine spent during continuous fire. Stacks 5 times.
Speedload
+10% Reload Speed for 2 seconds after Close Kill. Stacks 5 times.
Curios

+13-17% Toughness
+13-17% Toughness
+1-3 Max Stamina
Talent Tree
Stimm Lab
Description
to date as of (1.10.2) on december 9, 2025.
Hive Scum “Crit-Immortal” Hybrid — Dual Autopistols + Bone Saw (Updated Summary v2)
This build looks like a hybrid, but it really isn’t: I live on the dual autopistols and I survive by chaining mobility + crits into the keystone modifier Vulture’s Dodge (ranged crits = 1s immunity). If I’m firing, I’m basically fine. If I’m not firing, I’m fixing that problem.
Hive Scum’s natural advantage is stamina: more stamina, fastest stamina regen in the game, and talents that reward you for having a lot of stamina. So I lean into what’s broken: movement, dodge uptime, and never running out of ammo.
(many things in this build are subject to change such as the curios, weapon talents, weapon blessings, ect. still tweaking the fine details, but everything that IS here, is here for a reason and is not random)
TL;DR (what the build actually is)
- Dual Autopistols are my lifestyle: ~55% crit + stupid reload speed → constant Vulture’s Dodge immunity uptime while shooting.
- Enhanced Desperado is the main engine: ranged immunity + reload rules + extension on highlighted kills = nonstop uptime.
- Ammo is basically infinite: Ammo Jack + Pickpocket + Desperado + Gunslinger aura.
- Patch change improved mobility: pistols out went from 3 dodges → 4 dodges, and with Nimble you’re flagged is_dodging for ~0.3s per dodge instead of ~0.2.
- Bone Saw is the “break armor / apply DOT / emergency button” melee.
- Blitz choice is flexible:
- Chem Grenade if you’re scared of big crowds
- Boom Bringer if you’re scared of bosses and carapace (and it’s better this patch)
Core combat loop (the engine)
- Default cycle: Dual Autopistols → farm crits → keep Vulture’s Dodge immunity rolling → delete everything that isn’t carapace.
- Enhanced Desperado is the safety/offense button:
While it’s active you’re impossible to hit by ranged attacks, reloads don’t reduce your ammo reserve, and highlighted enemy kills extend stance. Less reload downtime = more uptime = more kills. - Ammo loop: Ammo Jack + Pickpocket + Desperado + Gunslinger Improved aura means you basically never run out:
- If you’re low: kill an elite/special and Pickpocket pops your reserve back up (your example: 132 ammo on the pistols).
- If you’re at zero: hit Desperado and you’re back online.
- Ult ↔ Stimm loop:
Desperado helps you get safe kills → kills feed Sample Collector (stimm cooldown) → stimm boosts ability cooldown (and spikes it hard after ranged kills) → you get Desperado back faster. You should almost never be without one unless it’s a “double boss, game hates me” situation.
Stimm (mine): 20% Strength, +15% additive crit, 25% faster ability cooldown, plus +75% ability cooldown for 1s after ranged kill. 20s duration with Long Lasting. 75s cooldown (maxed).
Dodging update (and why it matters)
They yoinked Jittery from my route and I gained Moving Target instead, which gives +1 dodge count while wielding ranged.
So with pistols out I went from 3 dodges → 4 dodges.
Also important: dodging isn’t just “movement.” The game literally flags you as is_dodging, and that window matters for dodge-triggered stuff.
Confirmed dodge flag behavior: you’re counted as is_dodging for ~0.2 seconds per dodge (base).
With Nimble (+50% time considered dodging) that becomes ~0.3 seconds per dodge.
Because your dodge cooldown is ~0.15s, those windows overlap hard, meaning you spend a stupid amount of time “counted as dodging” just by playing normally. Combine that with:
- 4 dodges (bigger chains before you hit the dodge limit)
- and a faster reset option (less downtime between “fresh dodges”)
…and you get exactly what this build wants: constant movement while you keep shooting to keep crit immunity rolling.
Weapons (and why they matter)
Dual Autopistols (main weapon)
With talents + blessings + perks you hit around:
- Up to ~90% reload speed
- ~55% crit chance
Those stats are the build. Reload speed keeps you shooting. Crit chance keeps you “immune” constantly via Vulture’s Dodge.
Patch also fixed autopistol animation jank while taking damage and reduced sprint camera animation—QoL that helps keep uptime smooth.
Bone Saw (emergency tool + anti-armor setup)
The Bone Saw has two modes:
Chem Toxin Mode (Green)
- Applies the same Chem Toxin DOT as your grenade.
- Applies 1 stack normally, 2 stacks on crit (weapon mechanic).
- Each stack is flat 15 damage.
- As far as you can tell: bypasses resistances.
- Helps stimm cooldown if you’re forced into melee and the target ends up toxin infected.
Brittleness Mode (Purple)
- 7.5% brittleness on normal hits
- 10% brittleness on crits
- Over 4 hits:
- 0 crits = 30%
- 1 crit = 32.5%
- 2 crits = 35%
- 3 crits = 37.5%
- 4 crits = 40% cap (possible, but not consistent unless you’re in a juiced crit window)
This is what makes Crushers manageable:
4 brittleness slaps → swap to pistols → mag dump crusher head → dies in less than one full mag
Normally not possible.
Patch also fixed a Bone Saw issue where it could get stuck in a blocking animation—big QoL for the “oh shit” plan.
Blitz (choose based on what you’re afraid of)
Default: Chem Grenade (crowd panic button)
If your team struggles with big rooms, Chem Grenade is still the funniest button in the kit:
- it turns a huge area into a f* you zone**
- it gives you breathing room to keep shooting, keep crit immunity rolling, and not get surrounded
Optional swap: Boom Bringer (boss/carapace insurance)
If you’re more worried about bosses and carapace than you are about raw crowds, swap Chem Grenade for Boom Bringer.
This patch made Boom Bringer way better than it used to be (buffs to damage profile/radius and it gets more value now), and with Extra Pouches:
you get 4 total Boom Bringer shots
So if your personal nightmare is Crushers, bosses, and “why is there a Mauler convention in this hallway,” Boom Bringer is the better blitz.
Trade-off:
- Chem Grenade = crowd control and reset button
- Boom Bringer = “kill the tough thing now” button
Toughness + “oopsie daisy” survival kit
This build is still a glass cannon, but it has enough “save me” layers that it doesn’t evaporate instantly:
- Voice of Tertium (toughness on kills, better on elites/specials)
- Tis but a Scratch (ranged chip damage turns into toughness return)
- Burst of Energy (stun immunity + big toughness restore when broken)
- Precision Violence is also more reliable now (bug fix), as your melee fallback
How to actually play it (don’t grief your team)
- Stay close to allies. You do not want to be in front. You want a real tank (Ogryn / Arbitrator) to eat the room.
- Ideal comp: 2 tanks + you + stun psyker (Palpatine mode).
Your damage is so high it covers the missing DPS slot, and the tanks + CC let you keep firing safely.
MOST IMPORTANT OF ALL TO REMEMBER!!!!!!!
YOU ARE NOT A SINGLE TARGET DPS!!!!!
your job is to get rid of the crowds so that your team mates have breathing room. there are options that certainly help you deal with big targets if you HAVE to, but thats the zealot or veterans job. not yours. DO NOT BUILD AGAINST THE CLASS and then complain that it doesnt work well. like trying to build a ranged DPS arbitrator, sure you CAN do it. but you are building against everything hat makes that class so good.
you are the crowd deleter. you wipe out everything short of carapace, and with desperadoes rending, any carapace short of full on crushers are manageable to a reasonable extent.
FOR THE LOVE OF GOD DONT TRY FACE TANKING. play the class as it is meant to be played.