Table of Contents

Veteran Build - Warhammer 40k: Darktide
Veteran: Squad Leader
Veteran Build - Warhammer 40k: Darktide
Class
Weapons


Cranial Grounding
Reduces Heat buildup by -6% and increases weakspot damage by +4% for 3s on chained weakspot hits. Stacks 5 times.
Heatsink
Weakspot Kills and Critical Strike Kills reduces Heat by +10% over 3s.

Rising Heat
Up to +20% Strength scaling with Heat Level.
Gets Hot!
Critical hit chance scales by your current heat level up to +10%. Also increases critical ranged attacks damage by +10%.
Curios

+13-17% Toughness
+13-17% Toughness
+17-21% Max Health
Talent Tree
Description
GUIDE UPDATED: Bound by Duty 23SEP2025
Please refer to the 'Hammer of the Emperor' guide by path and friends if you want THE definitive guide to all things Veteran build crafting!
- Link here: steamcommunity.com/sharedfiles/filedetails/?id=3367063781
Rather than push this guide and the site's formatting further than is really necessary, I figure it's best I leave you with the folks who have truly done the work in class theory and damage calcs. I'll still update this every now and then, but in scope it will remain as it was always intended: a simple reference for me :^)
May the Emperor guide your lasguns. o7
-----
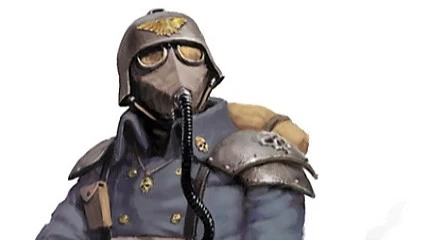
VETERAN SQUAD LEADER
-----
This guide will go over the skills and details necessary for playing a 'support' Veteran, which fundamentally, provides you and your team with excellent crowd control options and a metric kark-ton of team coherency buffs: toughness regen, ammo efficiency, and several sources of team damage boosts. With no hard requirements on the weapons you can bring, you are free to engage in frontline horde fights or flex into backline positions for high-threat management as necessary. More than anything, this is a build where playing for your team benefits everyone, enabling you to not only become an effective operative of the warband, but a cornerstone of every high-level auric and havoc team.
** While the following guide will focus on key skills, there is some flexibility depending on the talents. I think this build will serve as an excellent stepping stone for newer players while staying mostly optimal in terms of damage and utility, but once you're more experienced, start tweaking some of these talent picks per your needs and playstyle, further suggestions under the 'Alternative Talents' section. **
-----
BLITZ: Shredder Frag Grenade
-----
This blitz is used less for dealing damage and more as a crowd control tool thanks to it's ~8m AoE bleeds and stagger, which if used properly, can create clutch openings and even prevent damage and deaths in high pressure fights. The closer to the initial blast's epicenter the higher the amount of impact inflicted, which will face-to-floor everything but mutants and monstrosities. As such, the best practice is tossing the shredder nearest the toughest targets in a horde (ragers, maulers, crushers, etc.) to maximize that crowd control potential.
- With a maximum of three Shredders to use at the start of most fights, paired with a boost in damage, radius, and regen from Grenade Tinkerer and Demolition Stockpile, will make for a deadly crowd control weapon with enough uptime to last you throughout a mission.
- The applied bleed stacks are effective for softening chaff and non-heavy armored targets, but will also synergize with any allied Ogryns and Zealots who utilize bleed talents for extra crit chance and toughness dmg reduction!
- Fill in the gaps for every fight: the blitz by itself is a wonderful filler in case of ability downtime or a general lack of hard CC options from your other teammates. It's ease of use, larger effective radius, and respectable damage makes it a tool to be used both offensively and defensively, and is something you can and should abuse for every tough encounter.
P.S. - There is some technique in maximizing the damage of the 'bleeds' applied by a Shredder, which is a touch complicated for a short summary. If you're curious, I have some details about it listed in the 'tips' section at the bottom of this guide.
-----
ABILITY: Voice of Command
-----
The core defining ability of this Veteran build, a 'shout' which staggers all enemies within 9m and instantly replenishes your toughness to full, even when toughness is completely empty. Similar to shredder grenades but without the harsh range falloff, and sporting strong enough impact to stagger every Elite unit and Monstrosity, a well timed shout can force an opening for your team to break any and every enemy offensive.
- Duty and Honour enables your shout to overheal toughness by +50, while additionally replenishing that same amount to your team, essentially converting the ability into a team 'heal' similar to Zealot's chorus relic.
- Use this reflexively and often: with a short 30s cooldown and further reduction earned from Tactical Awareness, it's the ultimate all-in-one tool to create space, replenish toughness, and buff team damage with very little downtime.
-----
KEYSTONE: Focus Target!
-----
An amazing keystone that alters the Veteran's default tag function: any specialist/elite/boss enemies that you tag will now be marked by a golden outline, as opposed to the default red. Not only does this help more visually challenged teammates prioritize these threats alongside you, it will also apply a debuff which the entire team benefits from. Higher 'focus' stacks will apply a stronger debuff for even greater damage bonuses.
- Securing a kill on a focused target can grant further coherency bonuses through Target Down! and Redirect Fire! . So long as targets are being marked, even teammates can secure the kill for both bonuses to trigger, allowing for easy and consistent regen/dmg buffs throughout a fight.
- Pick your focus targets carefully, but also quickly: the moment a focus mark is applied to a new enemy, a previously marked target will instantly lose their applied debuff. That means it's wasteful to spam tag an entire patrol, but that doesn't mean you want to hold a focus target for too long, either. Prioritize the toughest enemy as your first mark, and be ready to switch to whatever might be the next most immediate threat. The faster you decide what's most important in those moment to moment changes, the better this keystone will serve you.
-----
ALTERNATIVE TALENTS
-----
As you consider following section, just remember that any changes should be picked for what suits you and your loadout the most. Whether that's a Vet who likes to provide more team buffs or one who will min/max personal DPS, every build's damage and utility needs can shift dramatically depending on the weapons you bring. When down to the individual weapon damage stats, a mere 5% difference can bring an enemy who can tank two hits down to a one-shot kill.
Otherwise, just go for what's fun - that's what this build is for me, with quite a few changes since the class rework update. What I have outlined below are the talents I think can be reasonably adjusted.
BLITZ: Shredder Frag Grenade -> Krak Grenade
- Krak Grenades have some reputation of being 'better' than Shredders, which is a bit of a misleading sentiment; besides direct damage, they fundamentally serve different purposes in a fight, and ultimately it's up to you on whether you prefer single-target damage vs. AoE crowd control.
- I'd recommend loading Kraks if you want extra damage for monstrosities, or you're looking to cover anti-armor options elsewhere in your loadout.
TEAM AURA: Survivalist -> Fire Team
- The Survivalist aura is a priority pick for T5+ difficulties, where Elite & Special unit spawns are frequent enough to proc a consistent ammo return. It's often the difference for an entire team never being too low and hungry for ammo.
- Fire Team can be considered if it helps push a particular weapon breakpoint, if you're practicing below T5+, and/or you're playing with another Veteran who can cover Survivalist.
- ** As of the Path of Redemption update, the Survivalist aura now requires a 5s cooldown in between each successful proc. This means that the ammo return is less efficient when facing elite/specials in groups, such as during hazard missions with the Shock Troop Gauntlet modifier. Regardless of the nerf, a team's overall ammo economy will still greatly benefit from a Veteran who stays locked in on elite/special kills throughout a mission.
KEYSTONE SUB-TALENT: Target Down!
- Target Down will replenish 5-40% toughness/stamina, and can be a steady supply of regen if marks are managed properly in high density fights, and is invaluable for stubborn randoms who don't know how to dodge.
- A little less important for a premade team that can reliably defend themselves.
KEYSTONE SUB-TALENT: Focused Fire
- As of the Bound by Duty update, this keystone sub-talent was adjusted to have a slightly lower dmg bonus, but much faster uptime. Since the dmg difference is much smaller compared to the original, you can consider this a flex point to help push a breakpoint, or if you'd rather have some utility elsewhere in the tree.
- This increased dmg maximum (25% -> 30%) might be useful in certain situations, but is only kicking in every 6-9s. In a realistic T5+ scenario where you're more likely to switch focus targets often and as needed, it will be harder to get consistent use of that increase the more a mission staggers elite/special spawns in drawn out fights.
- If provided with any sort of downtime however, you can effectively view this talent as a buff to the opening shots of a fight, as well as an increase in team dps against monstrosities, where you ought to keep a focus mark for longer anyway.
- Optional if you'd prefer more consistent talent picks.
OTHER TALENTS TO CONSIDER
- Any minor talent node (melee damage, crit chance, toughness, etc.)
- Agile Engagement for a flexible dmg buff
- Marksman for extra weakspot dmg on VoC use
- Close Quarters Killzone for extra close dmg on VoC use
- Grenadier for more fun with grenades
- Deadshot + Shock Trooper for crit chance and lasgun ammo efficiency
- Only In Death Does Duty End ... (Good for challenge modes like hard mode twins and 30+ Havoc missions; otherwise wasted if you're with good players!)
-----
GEAR LOADOUT
-----
First and foremost: Nothing wrong in using what you like.
While I am listing the weapons I personally run below, none are hard requirements; because this build boosts so much team damage, virtually every weapon available to the Veteran is viable, and what matters more are the right stats, perks, and blessings to push them to their highest potential. I really only recommend choosing a set of weapons that complements each other. Ex: A melee weapon that can easily sweep through hordes, and a ranged weapon that can quickly kill Elites/Specials.
Also I'll be honest I'm too lazy to update the rest of the weapon details so maybe one day I'll find the motivation to draft all that up lmao. for now u guys just get ez perks/blessings
-----
RANGED WEAPONS
-----
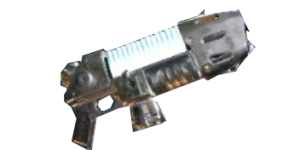
M35 MAGNACORE Mk II PLASMA GUN
Gets Hot & Rising Heat/Blaze Away | +Flak +Maniacs +Unyielding +Carapace
An iconic piece of tech in the 40k universe and a signature weapon of the Mourningstar's Veterans, few guns are as powerful and versatile as the Plasma Gun, which can fire in charged and non-charged states.
The fearsome power of this weapon additionally comes with a unique mechanic: each shot accumulates heat, which if mismanaged at high levels may result in unplanned downtime, or a fatal explosion when overloading the charged state.
- STATS:
- Priority 80% stats will be Damage and Stopping Power.
- 60% on either Charge Rate or Thermal Resistance, or as close to a 70/70 split as possible.*
- Important Note: As of the Traitor Curse Anniversary update, Charge Rate no longer affects the PG's damage as it used to, i.e. weirdly scaling damage with charge states and very specific charge rate values. Additionally, partial charges are virtually the same as a non-charged shot, so you either commit to a full charge for that high powered shot or don't.
- To give some context to the above, the pre-fix PG's charge rate stat would technically affect even non-charged shots, where essentially more damage was applied to each shot depending on that particular value - having too low or too high of a Charge Rate stat actually resulted in worse damage per shot, and it was a cursed middle ground of 71% Charge Rate that somehow gave the best damage per shot.
- With that same principle, 'partial' charging (firing less than halfway into charging the powered shot) had previously added some damage per shot without the heat buildup of a fully charged powered shot. All of this is no longer the case, as per my own testing and several other testimonies, the difference in damage is negligible if non-existent.
- * However, as Charge Rate STILL governs the charge speed of the PG's hip-fired, non-charged shot, the funny 71/69 split on Charge Rate and Thermal Resistance remains the best split for retaining heat efficiency while technically min-maxing the weapon's DPS, if for a very marginal, less than a half second's difference in charge speed.
- BLESSINGS:
- Gets Hot is the PG's anchor blessing, as the expanded 'magazine' only encourages you to fire several shots in sequence long before you ever need to reload. With a high base damage, this will only lead to some funny high critical numbers as you stay on the trigger and ramp up the heat.
- If you tend to pace your shots, Rising Heat is an excellent secondary blessing to synergize with Gets Hot, where both damage and critical rate will increase as your PG accumulates heat. It's the 'easier' and more flexible combo since both charged and non-charged shots will benefit from these blessings, which will help you meet breakpoints on heavier threats while conserving ammo on weaker ones.
- Blaze Away will provide a higher DPS throughput due to the higher damage bonus maximum, but this of course requires you to lay on the trigger and exclusively fire non-charged shots. Because the PG doesn't have 'automatic' functionality like other weapons that roll this blessing, the timing can be finnicky and it's very easy to lose stacks if you hesitate for even a fraction of a second; if you have fast target acquisition and can manage the clicking (or you use the FullAuto mod from Nexus Mods) the results will serve you well in high density fights.
- PERKS & BREAKPOINTS:
- WIP
- MISC:
- It takes about ~8 seconds to reload.
- Manually venting heat to 0%, no matter how much heat is accumulated, takes ~4s total.
- Heat will always manually vent in portions, each by 1/5 of the current heat percentage.
- With 80% Thermal Resistance, you can fire up to 8 non-charged shots (or 3 charged shots) before needing to vent.
- With 80% Ammo, you can fire up to 45 non-charged shots (or 15 charged shots) before needing to eat that long reload.
-----
ZARONA Mk IIa REVOLVER
Surgical & Hand-Cannon | +Flak +Maniacs
- STATS:
- BLESSINGS:
- PERKS & BREAKPOINTS:
-----
LOCKE Mk IIb BOLTGUN
Pinning Fire & Puncture/Surgical/Shattering Impact | +Flak +Unyielding +Carapace +Elites
- STATS:
- BLESSINGS:
- PERKS & BREAKPOINTS:
-----
ACCATRAN MG Mk II & KANTRAEL Mk X HEAVY LASPISTOL
Infernus & Reassuringly Accurate/Dumdum | +Flak +Maniacs
- STATS:
- BLESSINGS:
- PERKS & BREAKPOINTS:
-----
GODWYN-BRANX Mk IV BOLT PISTOL
Surgical & Deadly Accurate | +Flak +Manics +Elites
- STATS:
- BLESSINGS:
- PERKS & BREAKPOINTS:
-----
KANTRAEL MG Ia, MG IV, & MG XII INFANTRY LASGUN
Headhunter & Deadly Accurate | +Flak +Maniacs +Unyielding
- STATS:
- BLESSINGS:
- PERKS & BREAKPOINTS:
-----
MELEE WEAPONS
-----
SCANDAR Mk III POWER SWORD
Power Cycler & Slaughterer | +Flak +Unyielding +Carapace +Elite
- STATS:
- BLESSINGS:
- PERKS & BREAKPOINTS:
-----
ACHLYS Mk VI POWER SWORD
Power Cycler & Brutal Momentum | +Flak +Unyielding +Carapace +Elite
- STATS:
- BLESSINGS:
- PERKS & BREAKPOINTS:
-----
MUNITORUM Mk I SAPPER SHOVEL
Decimator & Skullcrusher/Uncanny Strike | +Flak +Unarmored +Infested
- STATS:
- BLESSINGS:
- PERKS & BREAKPOINTS:
-----
MUNITORUM Mk III & Mk VII SAPPER SHOVEL
Uncanny Strike & Thrust/Decimator | +Flak +Unyielding +Carapace +Elite
- STATS:
- BLESSINGS:
- PERKS & BREAKPOINTS:
-----
CADIA Mk IV & Mk XIIIg ASSAULT CHAINSWORD
Savage Sweep & Rampage | +Flak +Unarmored
- STATS:
- BLESSINGS:
- PERKS & BREAKPOINTS:
-----
ORESTES Mk IV & Mk XII ASSAULT CHAINAXE
Headtaker & Slaughterer | +Flak +Unyielding +Carapace +Elites
- STATS:
- BLESSINGS:
- PERKS & BREAKPOINTS:
-----
RASHAD Mk II COMBAT AXE
Brutal Momentum & Headtaker | +Flak +Unyielding
- STATS:
- BLESSINGS:
- PERKS & BREAKPOINTS:
-----
CATACHAN Mk IV DEVIL'S CLAW
Savage Sweep & Rampage | +Flak +Unarmored
- STATS:
- BLESSINGS:
- PERKS & BREAKPOINTS:
-----
CURIOS & TRINKETS
-----
A standard setup for Veterans will be x3 Toughness OR x2 Toughness & x1 Health. Frontloading your Veteran with toughness will synergize with talents such as Exhilarating Takedown, Close Order Drill, and Iron Will, providing more value to those damage reduction and toughness replenishment talents.
Beyond that, plan for perks that suit your playstyle and needs.
CURIO BLESSINGS:
- Build for more Toughness to help with chip damage (horde melee & shooters).
- Build for more Health to help survive harder hitting attacks (Snipers, Maulers, Crushers etc.).
- Wounds are like training wheels, especially if you're a newer player venturing into T5+ missions. As a Vet, you should never take more than one, and be sure to replace it once you're confident you can defend yourself proper!
- Stamina is a hard sell to make for most Veterans, and is often memed as the 'optimal' pick for players who just never take damage. If you're reading this, I'm sorry - you're not that guy lol
CURIO PERKS:
- +Toughness/+Health as above.
- +Sniper Resistance is a primary recommendation, often cited by the community as non-Ogryn insurance against being one-shot. Considering that a Veteran will often come with the best guns to effectively counter enemy Snipers, you may consider this optional if you're confident in dealing with them quickly.
- +Gunner Resistance is another primary recommendation given that they are some of the most common Elite units, and will not only cover Scab/Dreg Heavy Gunners, but Ogryn Reapers as well. As with Snipers, you may consider this optional if you can deal with them quickly, though in this case I would recommend against it, as they're common enough that you won't always catch all of them.
- +Toughness Regeneration Speed will only affect passive regen when in team coherency, and not any amount replenished through other sources. However, x3 of this perk can improve the passive regeneration speed by a ridiculous amount.
- +Stamina Regeneration Speed will affect your efficiency to sprint, block, and push more often, but can be notably useful when using the Deadshot talent.
- +Cooldown Reduction may be considered if you really want to push for ability uptime at the cost of slotting any of the above. When x3 are applied for Voice of Command, you're only reducing that 30s cooldown by 3.6 seconds. For reference, that's barely over half of what you can earn from kills that proc the -6s cooldown of Tactical Awareness.
-----
General guide ends here.
-----
TIPS & MISC
Tips, tricks, and useful stat breakdowns for the big nerds below
Shredder Grenades:
- Shredders have three acting components in that single ~8m detonation: stagger, blast damage, and bleed.
- Both the shredder's stagger and blast damage have an effective range of ~5m, with major falloff around ~2m.
- The Shredder's bleeds have zero falloff range, and will inflict full damage/bleed application within the default max radius of ~8m.
- BLEED DAMAGE is not a simple additive value, and instead scales with higher bleed stacks (to a total of 16 bleed stacks).
- If that doesn't make sense, here is a simple example:
- A single Shredder applies 6 bleed stacks, totaling for 302 bleed damage.
- Two Shredders will apply 12 bleed stacks, totaling for 1442 bleed damage.
- (This isn't even considering the damage enhanced by Grenade Tinkerer btw)
- With the above in mind, Shredders can then be used in two ways:
- delaying between each detonation to make use of stagger animations, grounding tougher enemies for longer
- chaining them more closely to massively increase bleed damage, clearing any surrounding chaff while softening tougher targets. A lucky proc of Twinned Blast can do just the same!
- Another important note: bleeds have differing damage values on all armor types, but I won't get into that here. Instead, Ryken has more in-depth testing on Shredder damage values if you're that curious: _CmIQzYhc?si=g4266z1p9-Ue3_Ov&t=34
- Some info in the video, like Longshot affecting grenade damage, have since been patched. insofar as I know and from my own testing, the stagger, blast damage, and bleed values all function the same as was in patch 13. I'll update as I learn more/any changes come.
Voice of Command:
- VoC will still replenish the Veteran's maximum toughness and the full +50 overheal even when completely empty. Teammates will only receive a standard toughness heal of +50.
- This overheal can also stack with another Veteran's VoC and Zealot's Chorus Relic.
- This overheal alone is often enough to protect health from moderate forms of chip damage, such as the mutant body slam, the kaboom from a Bomber, or the initial pounce of a hound.
- With that in mind, the best practice when using this ability is preventing damage, not replenishing toughness after the fact. Shield the team when making pushes through a horde or into risky open spaces, or even shield a teammate if you're too far to stagger the enemy that's about to attack them.
Focus Target:
- A focus mark stays applied for ~25s (default tags only stick for ~10s). That's more than enough time to secure a kill on tougher elites, but also a generous window of bonus damage to inflict on monstrosities.
- Once a focus mark is applied, the focus target will always retain the highest focus stacks. (ex: if the first focus mark applies 8 focus stacks, then it cannot be overridden by any lower value, if say, you were to accidentally re-mark the target sooner than you wanted).
- Conversely, if you were to mark a target too early with low stacks, you are able to 'refresh' the mark to get that higher damage bonus. Note that applied focus stacks are not additive. (ex: the first focus mark applies 3 stacks, but is followed up with another 5 stacks. This does not suddenly yield 8 total stacks on the focus target, and will instead refresh with the higher 5 stack debuff.)
- If the above is looking a touch complicated, I wouldn't worry too much. In the grand scheme of things, this is really only important to remember for monstrosities, the one enemy type where you'll always want to maximize Focus Target's bonus damage.
- TL;DR if you want full bonus damage on an enemy, you must always apply at full stacks, period.
- The Redirect Fire modifier has a curious if not confusing disconnect from the normal behavior of the keystone, and does actually work as an additive buff, meaning that any kills that which reward stacks of Redirect Fire will refresh the duration and cumulatively reach the 8 total stack maximum.
Misc:
- Aside from the lads and ladies in the official Darktide discord, a lot of the information I get to supplement my own buildcrafting comes from incredibly useful guides like the Hammer of the Emperor, the Ogrynomicon, and the Psyker's Atheneum, and Zealot Compendia, as well as YT creators Reginald and Ryken XIV, all of whom do some excellent numbers and damage testing. I highly suggest giving their stuff a gander if you're interested!
- Hammer of the Emperor: steamcommunity.com/sharedfiles/filedetails/?id=3367063781
- Ogrynomicon: steamcommunity.com/sharedfiles/filedetails/?id=3044646170
- Psyker Atheneum: steamcommunity.com/sharedfiles/filedetails/?id=2917274959
- Zealot Compendia: docs.google.com/document/d/16W_MhzUGXv9WRVjXjowIyqlktqrJ8U5wxVlgX3X5TU8
- Reginald: www.youtube.com/@Reginald-sc9tk
- Ryken: www.youtube.com/@rykenxiv