
Table of Contents
Zealot Build - Warhammer 40k: Darktide
Meta Havoc Zealot
Zealot Build - Warhammer 40k: Darktide
Class

Weapons



Savage Sweep
Hitting at least 3 enemies with an attack, increases your cleave by +200% for 3 seconds.

Skullcrusher
Target receives 4 Stack(s) of +10% Damage if already Staggered. Lasts 5s.


Sustained Fire
+20% Damage on Second, Third and Fourth shots in a Salvo.

Punishing Salvo
+50% Weakspot Damage on Second, Third and Fourth shots in a Salvo.
Curios


+1-3 Max Stamina
+17-21% Max Health
+1 Wound(s)
Talent Tree

Description
Introduction
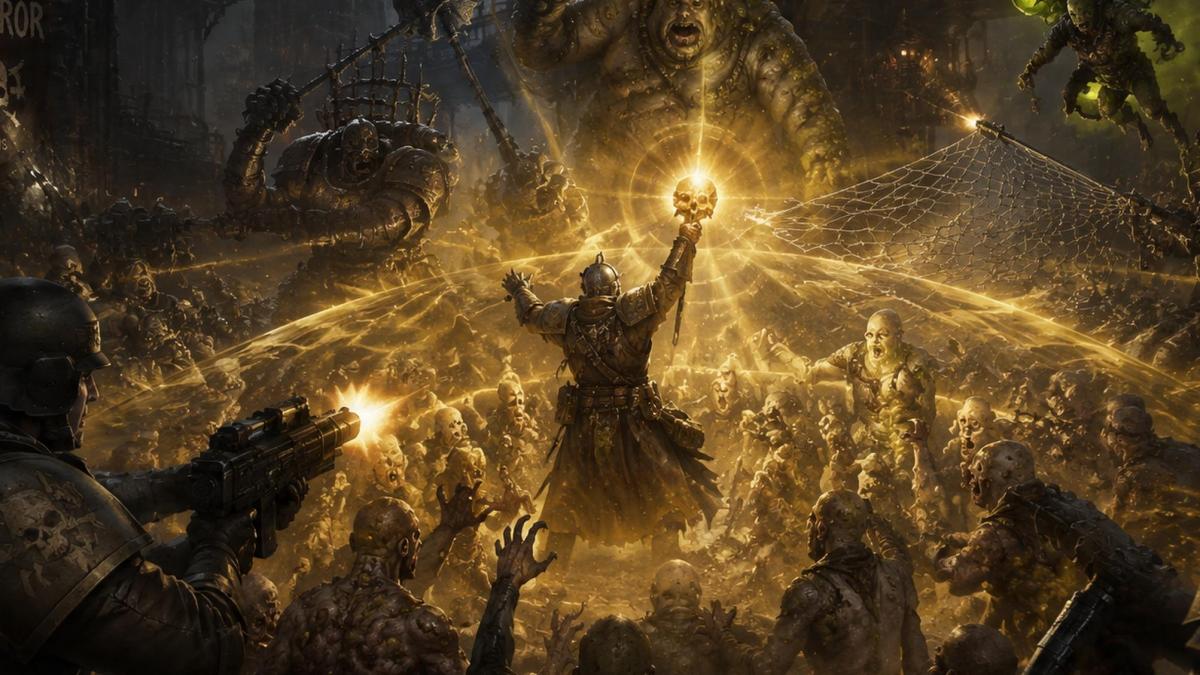
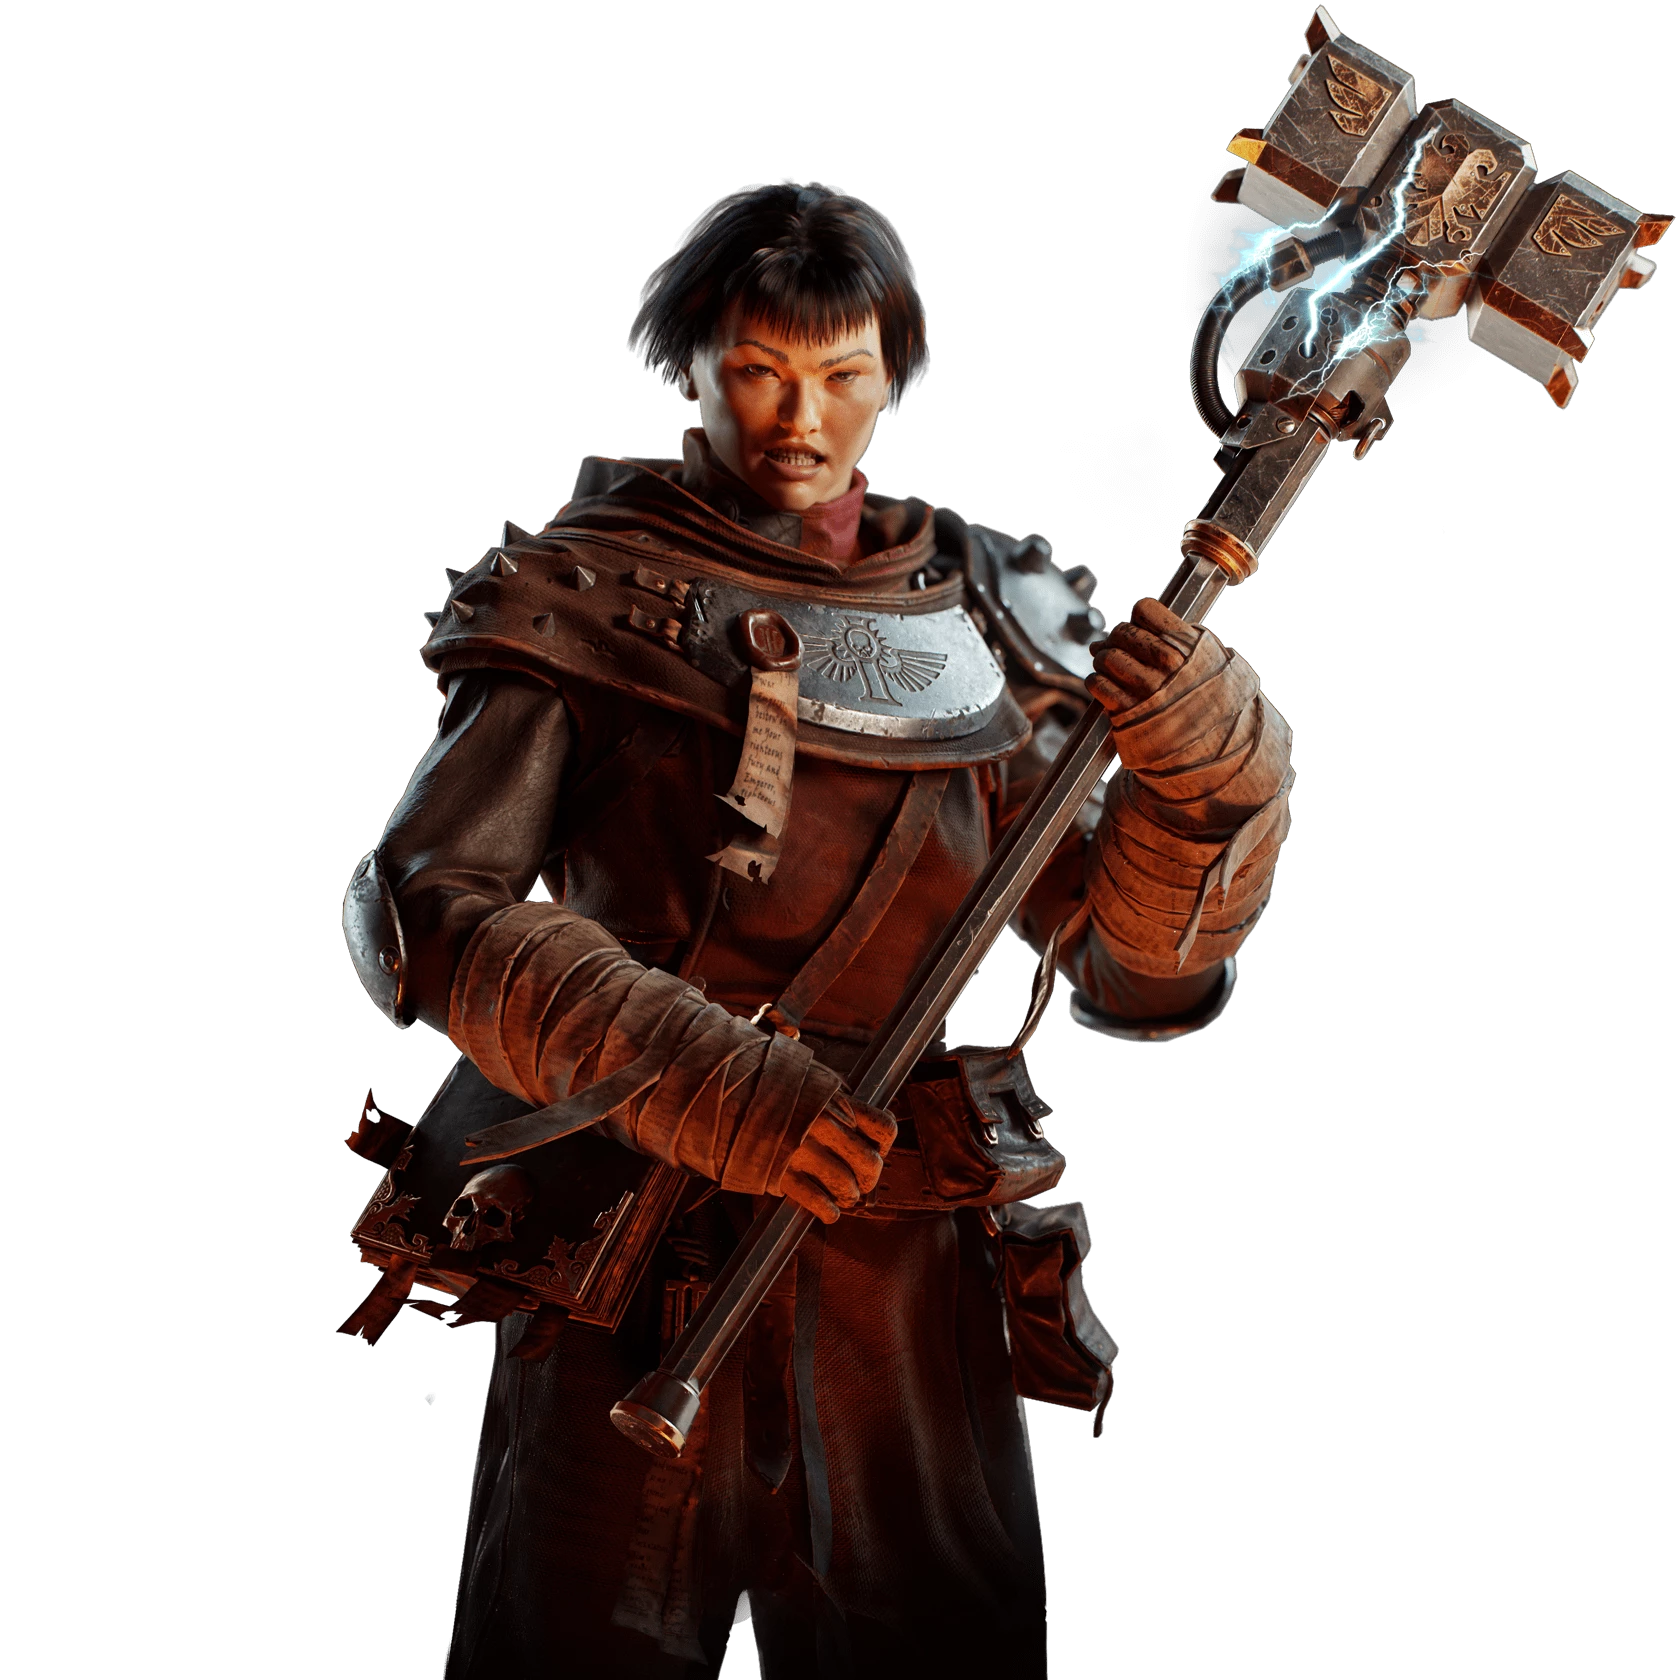
The Zealot has always been one of the most aggressive classes in Warhammer 40,000: Darktide, thriving in the middle of the fight where relentless melee pressure keeps the enemy on the back foot. While many Zealot builds focus on maximizing burst damage or chaining together massive critical hits, this build takes a different approach. Rather than chasing the highest damage numbers possible, it emphasizes consistency, survivability, and complete battlefield control while still dealing excellent damage against every enemy type.
This build is designed to be the backbone of your team. Whether you're carving through a horde of Poxwalkers, holding a choke point against waves of elites, deleting dangerous Specialists before they become a threat, or protecting your squad with Chorus of Spiritual Fortitude, you'll always have the right tool for the situation. Every choice in the talent tree, weapon selection, Curios, blessings, and perks has been made with one goal in mind: creating a Zealot that is incredibly reliable regardless of mission type or difficulty.
Instead of forcing one weapon to perform every role, the build splits its responsibilities between two highly specialized tools. The Catachan Mk IV "Devil's Claw" Sword serves as your primary melee weapon, providing exceptional horde clear, powerful stagger, and one of the strongest defensive mechanics in the game through its unique parry. The Accatran Mk VIc Recon Lasgun complements this perfectly by acting as your dedicated ranged weapon, capable of deleting Specialists, shredding Crushers, and dealing impressive sustained damage to Monstrosities while remaining remarkably ammunition efficient.
One of the more unusual aspects of this build is that it intentionally skips a Keystone altogether. While many Zealot builds invest heavily into Blazing Piety or another Keystone, this setup instead spends those points on the left side of the talent tree, picking up Scourge, Enduring Faith, Blinded by Blood, and several other powerful utility talents. The result is a build that gains more consistent critical strikes, stronger defensive uptime, and better overall survivability without sacrificing meaningful damage.
Whether you're playing standard Damnation, pushing Auric Maelstrom, or taking on Havoc missions, this build remains effective because it doesn't rely on gimmicks or short-lived power spikes. Instead, it combines reliable melee control, excellent ranged damage, outstanding survivability, and exceptional team support into a package that performs well in virtually every scenario Darktide can throw at you.
Why Play This Build?
Darktide is at its most challenging when multiple threats appear at once. A simple horde quickly becomes dangerous once Crushers begin pushing through the front line, Bombers start denying space with fire, and Specialists attack from every direction. Many builds excel in one specific area but begin to struggle once combat becomes chaotic. This build avoids that weakness by ensuring you always have an answer, regardless of what the Director decides to spawn.
The Devil's Claw dominates melee combat and allows you to comfortably control large hordes without becoming overwhelmed. Its wide sweeping attacks effortlessly cut through groups of Unarmoured and Infested enemies, while its exceptional mobility allows you to reposition without sacrificing offensive pressure. Unlike many slower melee weapons, the Devil's Claw encourages constant movement, making it much easier to weave dodges, pushes, and blocks into your attack chains while maintaining control of the battlefield.
Whenever priority targets appear, the Recon Lasgun takes over. Specialists can be removed before they disrupt your team, Crushers fall surprisingly quickly thanks to your Carapace damage bonus, and Monstrosities take consistent damage through controlled bursts that maximise both your blessings and ammunition efficiency. Instead of forcing your melee weapon to solve every problem, the Recon Lasgun fills the gaps perfectly, allowing each weapon to excel in the situations it was built for.
The build also places a huge emphasis on survivability. Rather than relying on a single defensive mechanic, it layers multiple forms of protection together. High stamina, increased block efficiency, constant Toughness generation, multiple sources of damage reduction, frequent critical strikes, reliable stagger, and regular Chorus activations all combine to create a Zealot that is remarkably difficult to bring down. Even if one defensive layer isn't active, several others continue protecting you, making the build both forgiving and extremely consistent.
Perhaps most importantly, this setup rewards good fundamentals rather than flashy mechanics. Good positioning, intelligent stamina management, proper target prioritisation, and knowing when to support your team are all far more valuable than simply chasing damage numbers. If you're looking for a build that performs well in every mission while making both you and your teammates significantly harder to kill, this is an excellent choice.
Strengths
One of the greatest strengths of this build is its consistency. There are very few situations where you'll feel like you're using the wrong weapon or lacking an answer to a particular threat. Every part of the build has a clearly defined role, allowing you to transition naturally between controlling hordes, eliminating dangerous Specialists, and supporting your team without dramatically changing your playstyle.
The Devil's Claw gives you one of the strongest frontline presences available to Zealot. Its sweeping attacks clear hordes with ease, while its mobility makes it comfortable to use even during the most hectic engagements. Combined with the weapon's unique parry mechanic, you'll often find yourself surviving situations that would overwhelm many other melee weapons. Being able to completely negate dangerous melee attacks before immediately counterattacking gives the Devil's Claw an incredible amount of defensive value, especially against enemies like Ragers and Maulers.
Despite its defensive focus, the build doesn't sacrifice damage. The Recon Lasgun provides some of the highest sustained ranged damage available to Zealot, particularly against heavily armoured enemies and Monstrosities. Thanks to its excellent ammunition economy and carefully chosen blessings, you're able to contribute meaningful damage throughout an entire mission without constantly worrying about running out of ammo.
Team utility is another major advantage. Chorus of Spiritual Fortitude remains one of the strongest support abilities in Darktide, capable of instantly stabilising difficult fights by restoring Toughness, staggering nearby enemies, and giving your team precious seconds to recover. Combined with Stunstorm Grenades, which can disable entire groups of enemies, you'll frequently create opportunities for your teammates to safely eliminate threats that would otherwise require much riskier plays.
The build also scales exceptionally well into higher difficulties. Auric Damnation and Havoc missions often overwhelm players with dense mixed hordes, constant elite spawns, and multiple Specialists attacking simultaneously. Those are exactly the situations this build was designed to handle. Rather than becoming weaker as the difficulty increases, the value of your crowd control, survivability, and support tools only becomes more apparent.
Weaknesses
While this build is extremely versatile, no build is completely without weaknesses. Understanding what threatens you most is just as important as understanding your strengths.
Bombers are by far the most dangerous Specialist you'll encounter. Unlike most enemies, Bombers don't directly challenge your survivability through raw damage. Instead, they attack your mobility. The Devil's Claw performs best when you're constantly moving, dodging, blocking, and controlling the flow of melee combat. Fire forces you out of favourable positions, slows your advance, and can quickly separate you from your teammates. Whenever a Bomber appears, they should immediately become your highest priority target. Swap to your Recon Lasgun and eliminate them as quickly as possible, or use a Stunstorm Grenade if you need time to safely reposition.
Flamers deserve similar respect. Their flames deal considerable damage while repeatedly staggering you, making escape far more difficult than many players realise. Even a highly defensive build like this can quickly find itself overwhelmed if a Flamer is allowed to establish a firing position unchecked. Fortunately, your Recon Lasgun is more than capable of dealing with them before they become a serious problem, provided you're paying attention.
Perhaps the biggest weakness isn't the build itself, but overconfidence. With so many defensive tools at your disposal, it's easy to begin believing you're invincible. While your survivability is exceptional, good movement remains your strongest defensive mechanic. Continue dodging, sliding, blocking, and using the Devil's Claw's parry whenever possible. This build rewards intelligent aggression, not reckless aggression, and maintaining good habits will always produce better results than relying solely on your defensive talents.
General Playstyle
Although the Recon Lasgun is incredibly powerful, this is fundamentally a melee-focused build. For the majority of every mission, your Devil's Claw should remain equipped. Your primary responsibility is to stand on the frontline, keeping hordes under control before they overwhelm your team while preventing melee elites from reaching your more vulnerable allies.
Think of the Recon Lasgun as a specialised tool rather than your primary source of damage. Whenever a dangerous Specialist appears, quickly swap weapons, eliminate the threat, and immediately return to melee. The same applies to Crushers that can't safely be engaged in close combat or Monstrosities that benefit from sustained ranged damage. The less time you spend standing at the back shooting into hordes, the more value you'll provide to your team overall.
Boss encounters slightly change your priorities. Instead of remaining glued to the boss in melee, create some distance whenever possible and begin firing controlled four-round bursts with your Recon Lasgun. This takes full advantage of your blessings while allowing you to safely deal impressive sustained damage without exposing yourself to unnecessary risks. Once the boss has been dealt with, immediately return to controlling the frontline and protecting your teammates.
Supporting your team is just as important as dealing damage. Chorus of Spiritual Fortitude should be viewed as a proactive ability rather than a panic button. Waiting until multiple teammates have already gone down often means you've waited too long. Instead, activate Chorus whenever a fight begins slipping out of control. Preventing a disaster is almost always easier than recovering from one.
Likewise, don't be afraid to use your Stunstorm Grenades aggressively. Darktide provides plenty of grenade pickups throughout most missions, making them a resource that should be spent rather than hoarded. If a grenade secures a revive, stops a Crusher patrol, or allows your team to safely reposition, it has already generated tremendous value. A grenade sitting unused in your inventory contributes nothing.
Overall, the gameplay loop is straightforward. Hold the frontline with your Devil's Claw, switch to your Recon Lasgun whenever high-priority targets appear, use your grenades to control dangerous engagements, and activate Chorus before situations become overwhelming. By constantly rotating between these responsibilities, you'll provide enormous value to your team while remaining one of the hardest players in the squad to kill.
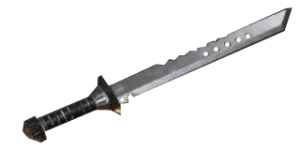
Melee Weapon – Catachan Mk IV "Devil's Claw" Sword
The Devil's Claw is the foundation of this build and the weapon you'll spend most of your time using throughout every mission. While many Zealot players gravitate towards weapons with higher burst damage, the Devil's Claw offers something arguably more valuable: unmatched consistency. Its combination of excellent horde clear, strong stagger, outstanding defensive utility, and simple attack patterns make it one of the most reliable melee weapons available, particularly in high-difficulty content where surviving is often more important than dealing one massive hit.
Against standard hordes, your attack pattern couldn't be simpler. Spam light attacks. The Devil's Claw naturally chains together wide horizontal swings that effortlessly cleave through large groups of enemies, making it exceptionally effective against the countless Unarmoured and Infested enemies you'll encounter during every mission. This is precisely why the weapon is rolled with +25% Damage to Unarmoured and +25% Damage to Infested. Since those armour types make up the overwhelming majority of enemies in Darktide, these perks noticeably improve your horde clear and allow you to remove trash enemies before they become a threat to your team.
The weapon becomes surprisingly effective against tougher enemies thanks to Skullcrusher. Every time you stagger an enemy, Skullcrusher increases the damage they take, allowing your heavy attacks to deal increasingly meaningful damage against elite enemies and Monstrosities. Many players don't realise that bosses can also be staggered during certain parts of their animations, allowing Skullcrusher to provide consistent value even during longer boss encounters. This interaction is one of the main reasons the build invests into talents like Grievous Wounds and Punishment, both of which significantly increase your ability to stagger enemies. More stagger means better crowd control, safer engagements, and more opportunities to benefit from Skullcrusher's damage bonus.
Perhaps the Devil's Claw's defining feature, however, is its unique parry. Unlike a standard block, the weapon's special action allows you to completely negate many incoming melee attacks before immediately counterattacking. Mastering this mechanic dramatically increases both your survivability and your confidence in melee combat. Ragers become much less intimidating, Mauler overheads can be safely punished, and even dense mixed hordes become easier to control when you're able to selectively shut down the most dangerous attacks instead of constantly retreating.
The build's Curio setup further strengthens this playstyle. The additional stamina provided by your Stamina Curio, combined with Block Efficiency and the Impassible talent, allows you to block, push, and parry for much longer than most Zealots. This creates a feedback loop where your defensive tools become just as valuable as your offensive ones. Instead of relying purely on killing enemies before they can attack, you're fully capable of absorbing pressure, creating space for your team, and patiently waiting for the right opportunity to strike.
The Devil's Claw may not deliver the biggest single hit in the game, but it excels in every situation that matters most. It clears hordes effortlessly, controls elite enemies through stagger and parries, contributes meaningful boss damage through Skullcrusher, and provides an unmatched level of survivability. When combined with the rest of the build, it becomes one of the safest and most dependable melee weapons available to the Zealot, making it the perfect centerpiece for a build focused on consistency, control, and keeping your team alive.
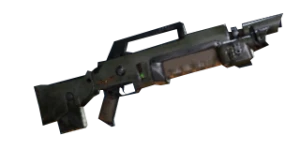
Ranged Weapon – Accatran Mk VIc Recon Lasgun
While the Devil's Claw forms the backbone of the build, the Accatran Mk VIc Recon Lasgun is what allows it to handle virtually every threat in the game. Although many players overlook the Recon Lasgun in favour of weapons like the Boltgun or Zarona Revolver, it has quietly become one of the strongest ranged options available to Zealot thanks to its incredible sustained damage, outstanding ammunition efficiency, and excellent synergy with the talent tree.
This weapon exists for one purpose: deleting high-priority targets.
The majority of every mission should still be spent fighting with the Devil's Claw, but the moment a dangerous Specialist, Crusher, or Monstrosity appears, the Recon Lasgun takes over. Its exceptional stability and very manageable recoil make landing consecutive weakspot hits remarkably easy, even while moving or dodging. Unlike slower weapons that require lengthy reloads or punish missed shots, the Recon rewards consistency and precision rather than burst damage.
The selected perks, +25% Damage to Carapace and +25% Damage to Unyielding, reinforce this role perfectly. Carapace dramatically improves your effectiveness against Crushers, one of the most dangerous elite enemies in Darktide, while also providing additional damage against enemies with heavily armoured weakspots, including the new Packmaster boss whose head is protected by Carapace armour. Meanwhile, Unyielding increases your damage against Monstrosities, allowing the Recon Lasgun to become a genuine boss-killing weapon rather than simply a tool for clearing Specialists.
Many players instinctively hold down the trigger with Recon Lasguns, but doing so actually lowers the weapon's overall efficiency. Instead, this build is designed around controlled four-round bursts. This firing pattern allows both of your blessings—Sustained Fire and Punishing Salvo—to work together as effectively as possible.
Sustained Fire gradually increases your damage during continuous fire, while Punishing Salvo rewards consecutive weakspot hits with additional damage. By firing disciplined four-shot bursts, both blessings reach their peak effectiveness without wasting ammunition or causing unnecessary recoil. The result is a weapon capable of delivering exceptional sustained damage while remaining surprisingly economical with its ammunition supply.
This efficiency is incredibly important because, unlike many Zealot builds, your Recon Lasgun isn't simply a backup weapon. Against bosses, Crushers, Reapers, Gunners, and many Specialists, it becomes your highest damage option. Since the weapon scales so well with weakspot accuracy and blessing uptime, every bullet has value. Taking a fraction of a second to line up accurate bursts will almost always outperform spraying an entire magazine into a target.
Another reason the Recon performs so well is the way it interacts with the Zealot talent tree. Dance of Death dramatically improves your accuracy whenever you're dodging. Since you should constantly be moving in Darktide regardless of your class, this accuracy bonus is effectively active throughout most encounters. Rather than standing still to line up difficult shots, you can comfortably strafe around incoming fire while maintaining excellent precision.
The build also takes Anoint in Blood, providing another valuable increase to ranged damage. When combined with Prime Target and the weapon's natural fire rate, the Recon Lasgun reaches damage numbers that many players simply don't expect from a Zealot.
Because of this, don't be afraid to claim ammunition throughout the mission. While it's always important to respect your team's resources, this build is intentionally designed around a weapon that contributes an enormous amount of sustained DPS. Every magazine spent removing Crushers, deleting Specialists, or burning down a Monstrosity is value returned to the team. Veterans should still receive priority when ammunition is genuinely limited, but outside of those situations you shouldn't feel guilty about keeping your Recon Lasgun supplied. It is one of the primary reasons the build performs so well against enemies that traditionally give melee-focused Zealots trouble.
Talent Breakdown
One of the defining characteristics of this build is that it intentionally skips a Keystone.
At first glance this may seem unusual. Blazing Piety is an excellent Keystone and appears to be the obvious choice for a Recon Lasgun build. However, once you look at what those talent points can instead purchase, the decision becomes much easier to understand.
Rather than investing deeply into a Keystone, those points are spent strengthening the left side of the talent tree. This gives the build access to Scourge, Enduring Faith, and Blinded by Blood, creating a much more consistent combination of offense and defense than Blazing Piety alone can provide.
Scourge is arguably one of the strongest talents available for this setup. Both the Devil's Claw and the Recon Lasgun attack rapidly enough that critical strikes occur constantly throughout normal gameplay. Scourge steadily builds additional critical chance without requiring any active management, meaning your damage naturally increases simply by remaining in combat.
Those critical hits immediately activate Enduring Faith, granting a substantial amount of damage reduction whenever you land critical strikes. Since Scourge ensures critical hits remain frequent, Enduring Faith achieves extremely high uptime during almost every engagement. This creates another defensive layer that functions passively while you continue playing normally.
The third piece of the puzzle is Blinded by Blood. Because this build revolves around staggering enemies through the Devil's Claw, Punishment, Grievous Wounds, and Stunstorm Grenades, Blinded by Blood remains active surprisingly often. Together with Skullcrusher, these talents transform stagger from a simple crowd control mechanic into a major source of both survivability and increased damage.
Corruption Resistance plays a surprisingly important role here. Many of Darktide's most dangerous enemies and mission modifiers inflict corruption damage, reducing your maximum health over time. By mitigating a significant portion of that corruption, you preserve more of your health pool while still benefiting from Martyrdom stacks as wounds become corrupted. In practice, this means you gain access to Martyrdom's offensive and defensive bonuses more often without feeling like you're constantly on the brink of death. It allows the Keystone to work for you naturally instead of forcing an unhealthy playstyle where you're deliberately avoiding healing.
This synergy becomes even stronger when combined with Impiety. As Martyrdom stacks begin to accumulate, Impiety provides additional attack speed, making both the Devil's Claw and the Recon Lasgun feel noticeably smoother to use. Faster melee swings improve horde clear and stagger application, while the increased fire rate on the Recon Lasgun lets you output even greater sustained DPS against Crushers, Specialists, and Monstrosities. Because these bonuses activate automatically, your damage steadily increases as fights become longer and more chaotic, exactly when you need it most.
The result is a build that becomes stronger the longer an engagement lasts. Rather than relying on short damage windows or temporary buffs, Martyrdom, Impiety, and Unfaltering Faith continuously scale alongside the intensity of the fight. Combined with Corruption Resistance, this creates a remarkably forgiving version of Martyrdom that rewards normal gameplay instead of encouraging players to intentionally remain at critically low health. You still benefit from the Keystone's impressive scaling, but without sacrificing the consistency and reliability that this build is designed around. Several other talents further reinforce the build's durability. Enemies Within and Stalwart provide consistent Toughness generation, allowing you to comfortably remain in melee even during prolonged engagements. Prime Target offers another valuable increase to both damage and Toughness generation while engaging dangerous enemies, rewarding you for eliminating priority threats quickly. Abolish Blasphemers is simply free value. It requires no additional setup, activates naturally throughout combat, and provides additional damage exactly where you want it. Backstab ammo because it's free ammo and lets us kill snipers better since we always back ammo, especialyl since we're endlessly chaining backstabs.
One of the strongest defensive talents in the build is No Respite. Thanks to your large stamina pool from Curios, combined with Impassible's reduced block cost, No Respite effectively gives you almost endless stamina during extended melee engagements. This allows you to block, push, and parry far more aggressively than most Zealot builds without ever feeling starved for stamina.
Many players may notice the absence of Holy Revenant, which has long been considered a staple of many Zealot builds. While Holy Revenant is undeniably powerful, this setup deliberately chooses consistency instead. With your high health pool, multiple sources of damage reduction, frequent Chorus activations, excellent Toughness sustain, and reliable access to Medicae Stations or Medical Crates during missions, triggering Until Death should already be relatively uncommon. Rather than investing points into recovering from mistakes, this build invests into preventing those mistakes from happening in the first place.
Finally, Beacon of Purity adds another layer of team support by cleansing corruption from nearby allies. This often goes unnoticed during normal gameplay, but over the course of an entire mission it can prevent teammates from losing valuable wound segments, making revives significantly more forgiving and reducing the likelihood of someone permanently dying after a second down.
Blitz – Stunstorm Grenades
Stunstorm Grenades are one of the strongest utility tools available to the Zealot and fit this build perfectly.
Unlike traditional explosives that simply deal damage, Stunstorm Grenades completely change the flow of an engagement. Entire groups of Crushers, Ragers, Maulers, Bulwarks, and surrounding horde enemies can be temporarily removed from the fight, giving your team valuable breathing room to reposition or eliminate priority threats safely.
The grenade's biggest strength is how well it synergises with the rest of the build. Stunned enemies are incredibly easy to stagger, allowing Skullcrusher to remain active for longer while your Devil's Claw continues applying pressure. Since the build already invests heavily into stagger through Punishment and Grievous Wounds, the grenade naturally extends that game plan rather than introducing a completely separate mechanic. Another particularly useful interaction comes from Unseen Blade. Enemies that are stunned are no longer actively targeting you, allowing Unseen Blade's damage bonus to activate despite standing directly beside them. This creates a surprisingly large increase in damage during grenade windows and makes Stunstorms even more valuable against dense elite packs. One mistake many players make is treating grenades as emergency resources. Don't. Darktide provides a generous number of grenade pickups throughout most missions. Holding onto your grenade for ten minutes waiting for the perfect opportunity often results in finishing the mission with unused resources. Instead, throw them proactively. If a grenade secures a revive, prevents unnecessary damage, stops a Crusher patrol from advancing, or simply allows your team to comfortably clear a dangerous mixed horde, it has already provided tremendous value. Combat Ability – Chorus of Spiritual Fortitude Chorus of Spiritual Fortitude is the centerpiece of the build and one of the strongest support abilities in Darktide. Although many players instinctively save Chorus as a panic button, this build is designed to use it far more aggressively. Thanks to the cooldown reduction available throughout the talent tree, Chorus becomes available surprisingly frequently. Rather than waiting until multiple teammates have already been downed, it's generally far more effective to activate it the moment an engagement begins slipping out of control. Preventing a wipe is always easier than recovering from one. During Chorus, nearby enemies are staggered while your team receives significant defensive support, creating valuable opportunities to revive teammates, reload weapons, reposition safely, or simply regain control of the battlefield. Because the build already stacks multiple forms of damage reduction through Enduring Faith, Toughness generation, and defensive Curios, Chorus often pushes your survivability to an absurd level. Even when surrounded by enemies, you can comfortably reposition while your team recovers behind you.
Curios
The Curio setup focuses entirely on consistency and survivability rather than chasing additional damage.
The Health Curio provides a larger health pool, making burst damage significantly less threatening and giving your defensive talents more room to work before you become critically wounded.
The Stamina Curio is arguably the most important Curio in the build. Because the Devil's Claw relies so heavily on blocking, pushing, and parrying, every additional stamina segment directly improves your survivability. More stamina means more pushes to control hordes, longer blocks against dangerous attacks, and greater synergy with No Respite, allowing you to remain in melee almost indefinitely.
Finally, the Wound Curio provides valuable insurance during high-difficulty content. Auric missions can quickly spiral out of control, and an additional wound makes recovering from a down significantly more forgiving. Since this build already has excellent survivability, the extra wound often ends up saving entire runs.
The perk choices reinforce the same philosophy.
Corruption Resistance is particularly valuable because corruption damage has become increasingly common through enemy abilities, mission modifiers, and environmental hazards. Reducing corruption allows you to remain effective for much longer before requiring healing.
Bomber Resistance dramatically reduces the danger posed by incendiary grenades. While Bombers remain your highest priority target, the additional resistance makes accidental exposure far less punishing.
One Sniper Resistance perk reaches an important survivability breakpoint, helping prevent situations where a single sniper round would otherwise leave you critically injured.
Finally, Block Efficiency further enhances the Devil's Claw's already incredible defensive capabilities, reducing stamina consumption while blocking and allowing you to comfortably withstand immense pressure.
Enemy Priority
Knowing what to kill is often more important than simply killing quickly.
For this build, your general priority should be:
Bombers
Trappers
Flamers
Snipers
Pox Hounds
Gunners
Reapers
Crushers
Ragers
Everything else
Bombers are always the greatest threat because they attack your ability to move freely. Since mobility is the foundation of your survivability, removing them immediately should become second nature. Trappers and Flamers come next because they can quickly disable or isolate teammates, often leading to wipes if ignored. Snipers are dangerous due to their ability to punish poor positioning, while Pox Hounds can instantly remove a player from the fight if they aren't intercepted. Gunners and Reapers become your next priority because prolonged ranged pressure can quickly strip Toughness from both you and your team. Crushers and Ragers, while dangerous, can generally be controlled through your Devil's Claw, Stunstorm Grenades, and stagger-focused talents until a safe opportunity presents itself. Everything else can usually be managed naturally while maintaining control of the frontline. The most important thing to remember is that your job isn't simply to deal damage. Your job is to remove the enemies most likely to cause your team to lose control of the engagement. Prioritising threats correctly is one of the biggest differences between a good Zealot and a great one.
Advanced Gameplay
Once you've become comfortable with the fundamentals of the build, you'll begin to realise that its true strength isn't found in any individual weapon or talent. Instead, it comes from how naturally every piece works together. The Devil's Claw controls space, the Recon Lasgun removes problems before they become dangerous, Chorus stabilises difficult engagements, and your defensive talents constantly reward good positioning. When all of these pieces are working together, the build feels almost effortless to pilot. One of the biggest habits you'll want to develop is treating melee as your default state. Newer players often become excited by how much damage the Recon Lasgun can deal and begin spending too much time aiming instead of fighting. While the Lasgun is unquestionably one of the strongest ranged weapons available to Zealot, it is still a specialist tool. Every second spent standing still shooting into a horde is a second that your team loses its frontline. Instead, think of yourself as the wall between the enemy and your squad. Your Devil's Claw should remain in your hands for the vast majority of every mission. Keep the horde under control, intercept elites before they reach your backline, and constantly watch for dangerous Specialists appearing around the edges of the fight. The moment one appears, quickly remove it with the Recon Lasgun before immediately returning to melee. This rhythm of swapping between weapons is what gives the build its versatility, and mastering it will dramatically increase both your own survivability and your team's overall effectiveness. Movement is equally important. Standing still in Darktide is almost always a mistake, regardless of how tanky your build is.A polymer is a substance or material that consists of very large molecules, or macromolecules, that are constituted by many repeating subunits derived from one or more species of monomers. Due to their broad spectrum of properties, both synthetic and natural polymers play essential and ubiquitous roles in everyday life. Polymers range from familiar synthetic plastics such as polystyrene to natural biopolymers such as DNA and proteins that are fundamental to biological structure and function. Polymers, both natural and synthetic, are created via polymerization of many small molecules, known as monomers. Their consequently large molecular mass, relative to small molecule compounds, produces unique physical properties including toughness, high elasticity, viscoelasticity, and a tendency to form amorphous and semicrystalline structures rather than crystals. Polymers are studied in the fields of polymer science (which includes polymer chemistry and polymer physics), biophysics and materials science and engineering. Historically, products arising from the linkage of repeating units by covalent chemical bonds have been the primary focus of polymer science. An emerging important area now focuses on supramolecular polymers formed by non-covalent links. Polyisoprene of latex rubber is an example of a natural polymer, and the polystyrene of styrofoam is an example of a synthetic polymer. In biological contexts, essentially all biological macromolecules—i.e., proteins (polyamides), nucleic acids (polynucleotides), and polysaccharides—are purely polymeric, or are composed in large part of polymeric components. The intermolecular forces in polymers can be affected by dipoles in the monomer units. Polymers containing amide or carbonyl groups can form hydrogen bonds between adjacent chains; the partially positively charged hydrogen atoms in N-H groups of one chain are strongly attracted to the partially negatively charged oxygen atoms in CO groups on another. These strong hydrogen bonds, for example, result in the high tensile strength and melting point of polymers containing urethane or urea linkages. Polyesters have dipole-dipole bonding between the oxygen atoms in CO groups and the hydrogen atoms in H-C groups. Dipole bonding is not as strong as hydrogen bonding, so a polyester's melting point and strength are lower than Kevlar's (Twaron), but polyesters have greater flexibility. Polymers with non-polar units such as polyethylene interact only through weak Van der Waals forces. As a result, they typically have lower melting temperatures than other polymers. When a polymer is dispersed or dissolved in a liquid, such as in commercial products like paints and glues, the chemical properties and molecular interactions influence how the solution flows and can even lead to self-assembly of the polymer into complex structures. When a polymer is applied as a coating, the chemical properties will influence the adhesion of the coating and how it interacts with external materials, such as superhydrophobic polymer coatings leading to water resistance. Overall the chemical properties of a polymer are important elements for designing new polymeric material products. Polymers such as PMMA and HEMA:MMA are used as matrices in the gain medium of solid-state dye lasers, also known as solid-state dye-doped polymer lasers. These polymers have a high surface quality and are also highly transparent so that the laser properties are dominated by the laser dye used to dope the polymer matrix. These types of lasers, that also belong to the class of organic lasers, are known to yield very narrow linewidths which is useful for spectroscopy and analytical applications.I LOVE ZEALOT An important optical parameter in the polymer used in laser applications is the change in refractive index with temperature also known as dn/dT. For the polymers mentioned here. Most conventional polymers such as polyethylene are electrical insulators, but the development of polymers containing π-conjugated bonds has led to a wealth of polymer-based semiconductors, such as polythiophenes. This has led to many applications in the field of organic electronics. Nowadays, synthetic polymers are used in almost all walks of life. Modern society would look very different without them. The spreading of polymer use is connected to their unique properties: low density, low cost, good thermal/electrical insulation properties, high resistance to corrosion, low-energy demanding polymer manufacture and facile processing into final products. For a given application, the properties of a polymer can be tuned or enhanced by combination with other materials, as in composites. Their application allows to save energy (lighter cars and planes, thermally insulated buildings), protect food and drinking water (packaging), save land and lower use of fertilizers (synthetic fibres), preserve other materials (coatings), protect and save lives (hygiene, medical applications). A representative, non-exhaustive list of applications is given below. Clothing, sportswear and accessories: polyester and PVC clothing, spandex, sport shoes, wetsuits, footballs and billiard balls, skis and snowboards, rackets, parachutes, sails, tents and shelters.
Electronic and photonic technologies: organic field effect transistors (OFET), light emitting diodes (OLED) and solar cells, television components, compact discs (CD), photoresists, holography.
Packaging and containers: films, bottles, food packaging, barrels.
Insulation: electrical and thermal insulation, spray foams.
Construction and structural applications: garden furniture, PVC windows, flooring, sealing, pipes.
Paints, glues and lubricants: varnish, adhesives, dispersants, anti-graffiti coatings, antifouling coatings, non-stick surfaces, lubricants.
Car parts: tires, bumpers, windshields, windscreen wipers, fuel tanks, car seats.
Household items: buckets, kitchenware, toys (e.g., construction sets and Rubik's Cube).
Medical applications: blood bag, syringes, rubber gloves, surgical suture, contact lenses, prosthesis, controlled drug delivery and release, matrices for cell growth.Personal hygiene and healthcare: diapers using superabsorbent polymers, toothbrushes, cosmetics, shampoo, condoms. Security: personal protective equipment, bulletproof vests, space suits, ropes.
Separation technologies: synthetic membranes, fuel cell membranes, filtration, ion-exchange resins.
There are multiple conventions for naming polymer substances. Many commonly used polymers, such as those found in consumer products, are referred to by a common or trivial name. The trivial name is assigned based on historical precedent or popular usage rather than a standardized naming convention. Both the American Chemical Society and IUPAC. man i just gooned... have proposed standardized naming conventions; the ACS and IUPAC conventions are similar but not identical.[60] Examples of the differences between the various naming conventions are given in the table below. In both standardized conventions, the polymers' names are intended to reflect the monomer(s) from which they are synthesized (source based nomenclature) rather than the precise nature of the repeating subunit. For example, the polymer synthesized from the simple alkene ethene is called polyethene, retaining the -ene suffix even though the double bond is removed during the polymerization process:
Polymer characterization spans many techniques for determining the chemical composition, molecular weight distribution, and physical properties. Select common techniques include the following: Size-exclusion chromatography (also called gel permeation chromatography), sometimes coupled with static light scattering, can used to determine the number-average molecular weight, weight-average molecular weight, and dispersity.
Scattering techniques, such as static light scattering and small-angle neutron scattering, are used to determine the dimensions (radius of gyration) of macromolecules in solution or in the melt. These techniques are also used to characterize the three-dimensional structure of microphase-separated block polymers, polymeric micelles, and other materials.
Wide-angle X-ray scattering (also called wide-angle X-ray diffraction) is used to determine the crystalline structure of polymers (or lack thereof). Spectroscopy techniques, including Fourier-transform infrared spectroscopy, Raman spectroscopy, and nuclear magnetic resonance spectroscopy, can be used to determine the chemical composition.
Differential scanning calorimetry is used to characterize the thermal properties of polymers, such as the glass-transition temperature, crystallization temperature, and melting temperature. The glass-transition temperature can also be determined by dynamic mechanical analysis. Thermogravimetry is a useful technique to evaluate the thermal stability of the polymer.
Rheology is used to characterize the flow and deformation behavior. It can be used to determine the viscosity, modulus, and other rheological properties. Rheology is also often used to determine the molecular architecture (molecular weight, molecular weight distribution, branching) and to understand how the polymer can be processed. A plastic item with thirty years of exposure to heat and cold, brake fluid, and sunlight. Notice the discoloration and crazing of the material (compared with replacement item in foreground).
Polymer degradation is a change in the properties—tensile strength, color, shape, or molecular weight—of a polymer or polymer-based product under the influence of one or more environmental factors, such as heat, light, and the presence of certain chemicals, oxygen, and enzymes. This change in properties is often the result of bond breaking in the polymer backbone (chain scission) which may occur at the chain ends or at random positions in the chain. Although such changes are frequently undesirable, in some cases, such as biodegradation and recycling, they may be intended to prevent environmental pollution. Degradation can also be useful in biomedical settings. For example, a copolymer of polylactic acid and polyglycolic acid is employed in hydrolysable stitches that slowly degrade after they are applied to a wound. The susceptibility of a polymer to degradation depends on its structure. Epoxies and chains containing aromatic functionalities are especially susceptible to UV degradation while polyesters are susceptible to degradation by hydrolysis. Polymers containing an unsaturated backbone degrade via ozone cracking. Carbon based polymers are more susceptible to thermal degradation than inorganic polymers such as polydimethylsiloxane and are therefore not ideal for most high-temperature applications.[64] The degradation of polyethylene occurs by random scission—a random breakage of the bonds that hold the atoms of the polymer together. When heated above, polyethylene degrades to form a mixture of hydrocarbons. In the case of chain-end scission, monomers are released and this process is referred to as unzipping or depolymerization. Which mechanism dominates will depend on the type of polymer and temperature; in general, polymers with no or a single small substituent in the repeat unit will decompose via random-chain scission. The sorting of polymer waste for recycling purposes may be facilitated by the use of the resin identification codes developed by the Society of the Plastics Industry to identify the type of plastic. Failure of safety-critical polymer components can cause serious accidents, such as fire in the case of cracked and degraded polymer fuel lines. Chlorine-induced cracking of acetal resin plumbing joints and polybutylene pipes has caused many serious floods in domestic properties, especially in the US in the 1990 damage. Traces of chlorine in the water supply attacked polymers present in the plumbing, a problem which occurs faster if any of the parts have been poorly extruded or injection molded. Attack of the acetal joint occurred because of faulty molding, leading to cracking along the threads of the fitting where there is stress concentration. Polymer oxidation has caused accidents involving medical devices. One of the oldest known failure modes is ozone cracking caused by chain scission when ozone gas attacks susceptible elastomers, such as natural rubber and nitrile rubber. They possess double bonds in their repeat units which are cleaved during ozonolysis. Cracks in fuel lines can penetrate the bore of the tube and cause fuel leakage. If cracking occurs in the engine compartment, electric sparks can ignite the gasoline and can cause a serious fire. In medical use degradation of polymers can lead to changes of physical and chemical characteristics of implantable devices.[65] Nylon 66 is susceptible to acid hydrolysis, and in one accident, a fractured fuel line led to a spillage of diesel into the road. If diesel fuel leaks onto the road, accidents to following cars can be caused by the slippery nature of the deposit, which is like black ice. Furthermore, the asphalt concrete road surface will suffer damage as a result of the diesel fuel dissolving the asphaltenes from the composite material, this resulting in the degradation of the asphalt surface and structural integrity of the road. Polymers have been essential components of commodities since the early days of humankind. The use of wool (keratin), cotton and linen fibres (cellulose) for garments, paper reed (cellulose) for paper are just a few examples of how ancient societies exploited polymer-containing raw materials to obtain artefacts. The latex sap of "caoutchouc" trees (natural rubber) reached Europe in the 16th century from South America long after the Olmec, Maya and Aztec had started using it as a material to make balls, waterproof textiles and containers. The chemical manipulation of polymers dates back to the 19th century, although at the time the nature of these species was not understood. The behaviour of polymers was initially rationalised according to the theory proposed by Thomas Graham which considered them as colloidal aggregates of small molecules held together by unknown forces. Notwithstanding the lack of theoretical knowledge, the potential of polymers to provide innovative, accessible and cheap materials was immediately grasped. The work carried out by Braconnot, Parkes, Ludersdorf, Hayward and many others on the modification of natural polymers determined many significant advances in the field. Their contributions led to the discovery of materials such as celluloid, galalith, parkesine, rayon, vulcanised rubber and, later, Bakelite: all materials that quickly entered industrial manufacturing processes and reached households as garments components (e.g., fabrics, buttons), crockery and decorative items. In 1920, Hermann Staudinger published his seminal work in which he proposed that polymers were in fact long chains of atoms linked by covalent bonds. His work was debated at length, but eventually it was accepted by the scientific community. Because of this work, Staudinger was awarded the Nobel Prize in 1953. After the 1930s polymers entered a golden age during which new types were discovered and quickly given commercial applications, replacing naturally-sourced materials. This development was fuelled by an industrial sector with a strong economic drive and it was supported by a broad academic community that contributed innovative syntheses of monomers from cheaper raw material, more efficient polymerisation processes, improved techniques for polymer characterisation and advanced, theoretical understanding of polymers. Since 1953, six Nobel prizes have been awarded in the area of polymer science, excluding those for research on biological macromolecules. This further testifies to its impact on modern science and technology. As Lord Todd summarised in 1980, "I am inclined to think that the development of polymerization is perhaps the biggest thing that chemistry has done, where it has had the biggest effect on everyday life". I think I have ligma :( .Every engagement should involve a constant cycle of dodging, sliding, blocking, and repositioning. Sliding through incoming gunfire is one of the strongest defensive tools in the game, particularly when closing the distance on ranged enemies. Likewise, blocking shouldn't be viewed as a panic option. Thanks to your stamina Curio, Block Efficiency, and Impassible, you can comfortably absorb attacks that would otherwise force you into awkward dodges. Learning when to parry is another major step towards mastering the Devil's Claw. Many players only remember the weapon special after they've already made a mistake, but experienced players actively look for opportunities to use it. Ragers become significantly less threatening once you learn their attack rhythm, while Mauler overheads can often be turned into free counterattacks rather than dangerous situations. Even during dense mixed hordes, selectively parrying the strongest incoming attack often creates enough breathing room to regain complete control of the fight. Another habit worth developing is spending your resources freely. Many players finish missions with unused grenades, Chorus still available, and half their ammunition untouched. None of those resources provide value while sitting in your inventory. Stunstorm Grenades exist to create safe engagements. Chorus exists to prevent difficult fights from becoming disastrous. Your Recon Lasgun exists to delete dangerous enemies before they reach your team. The more comfortable you become using those tools proactively rather than reactively, the smoother every mission will feel.
Playing in Auric and Havoc
Although this build performs well on every difficulty, it truly begins to shine during Auric Damnation and Havoc missions. Higher difficulties place much greater emphasis on consistency than raw damage, and that's exactly where this setup excels.
The most noticeable difference is enemy density. Large mixed hordes become the norm rather than the exception, with Crushers, Maulers, Ragers, and Specialists appearing simultaneously while basic enemies continue pouring into the fight. Trying to aggressively chase individual kills in these situations usually leads to unnecessary damage. Instead, focus on controlling space.
Allow the Devil's Claw to do what it was designed for. Continue clearing the frontline while keeping dangerous melee enemies occupied. Every enemy attacking you is one less enemy attacking your Veteran or Psyker, and simply maintaining that space often contributes more to your team than chasing a single elite through the middle of a horde.
Boss fights also become considerably more dangerous at higher difficulties because they're rarely fought in isolation. More often than not, you'll still be dealing with incoming Specialists, ranged enemies, and additional hordes while the Monstrosity remains active. Rather than tunnelling on the boss, continue prioritising whatever is currently most dangerous. If a Trapper or Bomber appears during the fight, remove them immediately before returning your attention to the boss. Losing a teammate to a preventable Specialist is almost always more dangerous than allowing the Monstrosity to survive for a few extra seconds.
Because this build deals exceptional ranged damage, Monstrosities should generally be fought with the Recon Lasgun whenever possible. Create space, maintain your four-shot burst rhythm, and continue aiming for weakspots while staying mobile. If the boss closes the distance, don't panic. Swap back to your Devil's Claw, defend yourself until another opening appears, and resume firing once it's safe to do so.
Auric missions also reward intelligent ability usage. Chorus of Spiritual Fortitude becomes significantly more valuable when enemy density increases because every activation protects more teammates and interrupts more enemies. Don't fall into the trap of treating it as a last resort. If the fight already feels difficult, using Chorus early is usually the correct decision.
Boss and Elite Matchups
One of the strengths of this build is that very few enemies require dramatically different strategies. Instead, the same core principles apply throughout almost every encounter.
Against Crushers, your first instinct shouldn't always be to charge into melee. While the Devil's Claw is perfectly capable of controlling them through stagger and parries, your Recon Lasgun often removes them much faster and with considerably less risk. The Carapace damage perk was chosen specifically to improve this matchup, allowing accurate burst fire to deal excellent damage against one of the game's most heavily armoured enemies.
Maulers are generally less threatening than Crushers, but they should still be respected. Their overhead attack deals enormous damage if allowed to connect, making them an excellent candidate for the Devil's Claw's parry. Once you've learned the timing, their most dangerous attack becomes one of the easiest to punish.
Ragers often intimidate newer players because of their relentless attack chains. Fortunately, this is another matchup where the Devil's Claw excels. Rather than trying to out-trade their damage, rely on your parry and stagger to interrupt their momentum before retaliating. Maintaining your composure is far more important than attacking as quickly as possible.
Bulwarks are rarely worth fighting from directly in front of their shield. Instead, allow teammates to create openings, stagger them whenever possible, or simply reposition around them before committing to melee. Patience almost always wins this matchup.
Monstrosities should generally be approached differently from standard elite enemies. Your Devil's Claw remains useful thanks to Skullcrusher and its stagger interactions, but the majority of your damage will come from the Recon Lasgun. Maintain your burst rhythm, continue targeting weakspots whenever possible, and avoid becoming fixated on staying in melee simply because you're playing Zealot.
Positioning and Team Play
Darktide is fundamentally a cooperative game, and no build exists in isolation. While this setup is fully capable of carrying difficult public lobbies, its greatest strength comes from enabling the rest of the team to perform at their best.
Your job isn't to chase the scoreboard. It's to create order from chaos.
Whenever combat begins, establish yourself between the enemy and your backline. Veterans and Psykers perform best when they're allowed to focus on eliminating priority targets rather than constantly defending themselves from stray Poxwalkers or charging Ragers. By controlling the frontline, you give them the freedom to deal damage more efficiently, which in turn makes your own job easier.
Pay attention to your teammates' positioning rather than only your own. If your Veteran is being pressured by a pair of Ragers, intercept them before they interrupt his shooting. If your Psyker is reviving another player, move forward and hold the choke point instead of continuing to chase kills elsewhere. Small decisions like these often determine whether an engagement remains controlled or spirals into chaos.
Likewise, don't underestimate the value of simply being present. A Zealot standing confidently at the front of the formation naturally absorbs enemy attention, allowing the rest of the squad to operate much more safely. Sometimes the greatest contribution you can make isn't killing the most enemies, but preventing your teammates from ever being attacked in the first place.
Common Mistakes
One of the most common mistakes players make with this build is spending too much time using the Recon Lasgun. While it deals incredible damage, it should never replace your role as the team's frontline. If you're standing twenty metres behind your teammates emptying magazines into basic enemies, you're denying your team one of the build's greatest strengths.
Another frequent mistake is saving Chorus of Spiritual Fortitude for the "perfect" moment. Because the build invests heavily into cooldown reduction, Chorus becomes available much more frequently than many players expect. Using it to prevent a dangerous engagement from becoming a wipe is almost always more valuable than waiting until several teammates have already been incapacitated.
Many players also underestimate just how powerful Stunstorm Grenades are. Unlike traditional explosives, their value isn't measured by kills but by the opportunities they create. A single grenade that allows your team to safely eliminate six Crushers is worth far more than one that simply clears a handful of Poxwalkers.
Finally, remember that survivability doesn't come from your talents alone. Your defensive layers only reach their full potential when combined with good fundamentals. Continue dodging, sliding, blocking, and parrying throughout every fight. The build is incredibly durable, but that durability comes from actively using every tool available rather than relying on passive damage reduction alone.
Frequently Asked Questions
One question that often comes up is why this build skips a Keystone entirely. While Blazing Piety is undoubtedly powerful, the combination of Scourge, Enduring Faith, and Blinded by Blood provides a far more consistent mix of offense and defense. Rather than concentrating your power into one section of the talent tree, those points are spread across several talents that remain active throughout almost every engagement.
Players also frequently ask why the Devil's Claw was chosen over more popular options like the Heavy Eviscerator or Thunder Hammer. While those weapons offer impressive burst damage, the Devil's Claw provides something they cannot: exceptional control. Its ability to effortlessly clear hordes while simultaneously shutting down dangerous melee attacks through its unique parry makes it one of the safest and most reliable melee weapons available, particularly during Auric missions where consistency often matters more than maximum damage.
Another common question is why the build uses a Stamina Curio instead of stacking additional Toughness. The answer is simple. This build's survivability revolves around active defense. Every additional stamina segment increases the number of attacks you can block, the number of pushes you can perform, and the frequency with which you can safely parry dangerous enemies. Combined with Impassible and Block Efficiency, that extra stamina becomes one of the most valuable defensive stats available.
Finally, many players wonder why Holy Revenant isn't included. While the talent remains excellent, this build is designed around avoiding situations where Until Death needs to trigger in the first place. Between Enduring Faith, Chorus of Spiritual Fortitude, your Curio setup, and excellent stamina economy, surviving dangerous engagements consistently provides more overall value than recovering from them after they've already gone wrong.
The Chorus Devil's Claw Zealot is built around a simple philosophy: consistency wins missions. Instead of relying on explosive burst windows or complicated talent interactions, every part of the build contributes towards creating a Zealot that remains effective from the first enemy encounter to the final extraction.
The Devil's Claw gives you exceptional control over melee combat, allowing you to comfortably clear hordes while safely handling dangerous elites through stagger and parries. The Recon Lasgun fills every gap that melee cannot, deleting Specialists, Crushers, and Monstrosities with remarkable efficiency while remaining one of the most ammo-friendly ranged weapons available. Combined with Stunstorm Grenades, Chorus of Spiritual Fortitude, and a talent tree focused on layered survivability rather than a single Keystone, the result is a build capable of adapting to virtually every challenge Darktide presents.
Whether you're stepping into Damnation for the first time or pushing through the relentless chaos of Auric Havoc, this build provides the tools needed to protect both yourself and your team without sacrificing meaningful damage. Master the flow between melee, ranged combat, and support, learn to trust your defensive mechanics as much as your offensive ones, and you'll quickly discover why this approach remains one of the safest, most dependable, and most rewarding ways to play Zealot in Darktide.