
Table of Contents
![Zealot Infodump (Stealth) [Auric]](/storage/sites/darktide/build-editor/cover-images/ax0ssyFTjfczx61TAu4K6c807fxqyjXr9NzTvbOS.jpg)
Class
Weapons


Riposte
+20% Critical Chance for 6s on successful Dodge.
Uncanny Strike
Hitting an enemy's weakspot applies 8 stacks of 2.5% Brittleness. Duration 5 seconds. 16 max stacks.

Hand-Cannon
+60% Rending on Critical Hit.
Surgical
+10% Critical Chance for every 0.3 second while aiming. Stacks 10 times. Discharges all stacks upon firing.
Curios

+17-21% Max Health
+17-21% Max Health
+17-21% Max Health
Talent Tree
Description
No Stealth Build:
⚝ BOUND BY DUTY TALENT CHANGES
I don't play this game anymore or pay attention to the patch details, but I've updated the guide to show the talent selection I would personally use. The key theme of all my advice remains, Defense > Offense in Darktide. Always prioritize defensive talents. Zealot's strength comes from the ability to weasel your way out of impossible situations that are guaranteed death for any other class, even if it takes you 10 minutes of kiting to do it. Nobody gives a shit about your time to kill when the match is already going well, so take the talents that let you survive when things are going wrong.
If there is a single takeaway I could offer from these changes however, it would probably be that Zealot now actually does have the budget to take pretty much every single worthwhile defensive and offensive talent at the same time, whereas before you had to compromise between what you wanted. I'm just taking a guess based on what I see in that talent tree but it looks to me like this is another ridiculous buff to what was already the best class in the game.
Everything you read in this guide still offers exceptional advice that will apply to the core fundamentals of this class no matter what state the game is in. I've made a few changes to my notes below but the rest of the guide doesn't really need any modifications. Obviously things like blessings and breakpoints will change as the game continues to receive updates, so don't rely on this guide for a perfectly accurate take on the game's current meta.
⚝
Inexorable Judgement is definitely better than Blazing Piety, and due to differences in playstyle and talent choices, it is slightly more economical to choose it now when using Shroudfield. I still recommend Blazing Piety for non-Stealth due to budget concerns.
Invocation of Death is a must pick. Stealth spam is broken.
- bye loner aura never come back thx
The Zarona Revolver is still the best ranged weapon in the game outside of Havoc mode, but Zealot has many other fantastic ranged options now that are strong competitors to the Zarona, even though they lack the anti-armor properties. The Agripinaa Braced Autogun, Agripinna/Vraks Infantry Autoguns, and Purgation Flamer are strong competitors to the Zarona on Stealth Zealot. Your melee weapon already destroys armor, your gun doesn't have to too.
- I have a full tier list on Zealot weapons available for viewing in my Full Tank guide, or this pastebin:
https://pastebin.com/nkZMDaNm (Last updated for Grim Protocols)
▞ ▞ ▞▞▞▞▞
Overview
▞ ▞ ▞▞▞▞▞
In the current state of the game, there is one ability in a class of its own, and it is (unsurprisingly) exclusive to Zealot.
That ability is Shroudfield. As it stands now, with the right setup, Shroudfield can make you truly unkillable.
Breaking aggro for 5 seconds every 15-20 seconds on an already very resilient and mobile class is simply broken.
With insane burst damage potential against priority targets, unmatched defensive abilities and clutch potential, as well as the ability to solo almost any objective all by yourself, the simple truth of the matter is that no other build in the game can compete with this setup.
Thus I have decided to write two separate build guides concerning Darktide's highest meta potential. One that embraces Shroudfield (this guide), and one that ignores it. This setup is utterly busted and even an average player with only a few hundred hours should be able to carry any game they join with this loadout. With just a core understanding of the basic flow of combat, recognition of enemy AI patterns, and reasonably good reflexes - you will have all you need to beat even the hardest missions this game has to offer.
▞ ▞ ▞▞▞▞▞▞▞▞▞▞▞▞▞▞▞▞▞
Key Features and Talents
▞ ▞ ▞▞▞▞▞▞▞▞▞▞▞▞▞▞▞▞▞
Blitz: Blades of Faith
Ability: Shroudfield
Aura: Beacon of Purity
Keystone: Inexorable Judgement
Offensive Anoint in Blood | Purge the Unclean | Backstabber | Scourge | Duellist
Talents: Time to Kill | Punishment | Invocation of Death | Riposte
Defensive Second Wind | Enduring Faith | Shield of Contempt | Thy Wrath be Swift | Holy Revenant
Talents: Until Death | Master-Crafted Shroudfield | Invigorating Revelation
This build is highly fine-tuned for the Combat Blade (or Duelling Sword) and Shroudfield, leaving little room for deviation. Several talents should be considered mandatory picks; all right-side talents leading into Blades of Faith, Anoint in Blood, Purge the Unclean, Thy Wrath Be Swift, Until Death, Duellist, Master-Crafted Shroudfield, Invigorating Revelation, and Fury Rising. The Loner aura is hot garbage but unfortunately it is necessary in order to afford the build.
When your defenses are broken, Shroudfield doubles as a defensive ability, allowing you to safely disengage, reposition, and - thanks to Invigorating Revelation - reclaim much of your Toughness before enemies seriously threaten you again.
In a worst-case scenario, with no Toughness and everything on cooldown, Thy Wrath be Swift and Until Death (mandatory talents for all Zealots, no exceptions) provide a last-ditch safety net against being overwhelmed and stunlocked to death.
=========
Q: Why no Holy Revenant? [ Holy Revenant ] Our budget isn't as strict as it used to be. Take it.
A: With this build, every single talent point counts. There is hardly any breathing room at all. Even though it would only require dropping 1 other talent, Holy Revenant is not the right pick for this build. The reason for this is because more often than not, when Until Death triggers, it probably means you are in a truly terrible situation and your team is also probably dead or dying. With Holy Revenant, your instinct tells you to hold your position and keep fighting to regain a small portion of your HP. This is usually the wrong play.
First of all, depending on what is happening, you may not even be able to recover any health at all. Sometimes you will find yourself in such a bad spot that you have no choice but to use the invulnerability to reposition in order to avoid instantly going down when Until Death expires. Even when this isn't the case, and you have regained 25% of your health, your situation is likely even worse than it was before. By staying where you are, unseen enemies have continued to advance and surround you, new specials have arrived or are on the way, you have no new boxes to open to look for resources, and you are no closer to a respawn zone or Medicae Station than you were before. And worst of all, now a single tiny mistake is all it takes to end your run.
When Until Death is triggered, it is a far better idea to simply start running away towards a teammate, Medicae Station, respawn zone, checkpoint, or anywhere that takes you away from huge groups of enemies. You have 5 seconds to escape with full invulnerability, then another 5 during which enemies will completely ignore you. With your insane movement speed, this is an incredible failsafe. You may not even need to activate Shroudfield as soon as Until Death expires, save it for the last moment before risking fatal damage.
Finding a way to full heal yourself or save your team is always the better option. If a teammate is alive and they aren't distracted, swallow your pride and down yourself, let them revive you to reset your health now before things get worse. Even if a boss spawns, you can outrun it. Ingrain this in your mind, and do not fall into the trap of making glorious last stands when the entire map is chasing you, as it often ends with a mission failure.
▞ ▞ ▞▞▞▞▞
Playstyle
▞ ▞ ▞▞▞▞▞
The core playstyle of this build is very typical of any Zealot. You do anything and everything, zipping all around the area of engagement to go wherever you are needed, rushing ahead to take out threats before they reach your team, flanking packs of shooters, and intercepting specials before they can become a problem. What's that? A sudden miscalculation or stroke of bad luck and now you are about to be a smear on the floor?!?!?!
Nah, don't worry about it, just press the F key.
Phew, run on back to your team now, nothing to worry about. Hang out with your buds for about 10 seconds and then off you go, right back to what you were doing, not a care in the world. Don't worry, your team can handle the pack of Crushers you just unleashed upon them with your "Aggro Somebody Else" button.
While you are off saving the Imperium in a random direction half a mile away, one of those Crushers just bonked your Veteran right on his head, down he goes and just as you are thinking to yourself Hmm, I wonder if they need my help? - KABOOM -pop goes the Psyker, a slight mishap on their part that surely nobody could have foreseen.
Well shoot. Now half your team is down, and the Ogryn is fighting for his life, desperately backpedaling against an army of Crushers while trying to find that frag bomb resupply he spotted earlier (sadly, the Veteran needed to restock his smoke grenades when nobody else was looking) So, what do you do in this most perilous scenario?
Oh, I know. Press the F key.
You dash across the room straight towards your team while channeling the inner spirit of Sonic the Hedgehog, probably taking out several guys with a red border around them on the way. No need to manage your Toughness or think about your positioning, enemies will conveniently forget you exist just as you are about to take any actual damage from your reckless charge. Oh, and don't worry, half of your Toughness bar will be back by doing absolutely nothing once your Naruto roleplay has concluded.
So, you make it back to your team in record time, thanks in part to the additional speed boost you are rewarded with by your supremely tactical use of the "Ignore All Consequences for My Actions" button.
With a moist duration of five whole seconds of doing whatever the hell you want, Veteran is back up on his feet - for about half a second. Unfortunately, you revived him at the exact moment the Crusher guarding his body slammed his hammer down on his head again. Whoops! - you think to yourself, as you take a mental note to remember not to do that next time.
But hey, don't worry, everything's fine. Go stab some of those Crushers chasing the Ogryn. (ignore the Psyker, they will just explode again anyway) Ogryn isn't looking too good, but you have this really cool trick: Your melee weapon's Uncanny Strike blessing applies to your throwing knives.
And do you know what that means? You run up to one of those crushy boys (or any enemy actually), then spam some light attacks on their heads until you see a nice little number 5 on the buff icon with the cracked armor plate. Then you line them up and spam those throwing knives right into their stupid faces. 2 Faithful Blades and maybe a quick heavy attack should do the trick for each one, and you can wipe out that entire squad all by yourself in 15 seconds. As long as your S key and Space Bar are working, you should be just fine.
And should something go wrong - maybe you find yourself pushed into a corner, about to be overrun...perhaps destined to be stuck in a net, manhandled by a VERY LARGE MUTANT, or become the plaything of a physics-defying quadruped.
Not to worry. F key.
Oh yeah by the way, that entire squad of 15 gunners and the platoon of Scabs hanging out with them on the other side of the room? The ones who are now ceaselessly firing upon the poor Ogryn cowering behind the garbage dumpster in fear? Well...just use your "Turn Off Enemy Area Denial" button to cross the distance - no need to worry while approaching - all the scary melee guys you don't want to fight right now will be going after the Ogryn instead by the time you uncloak, and don't feel bad, he can handle them just fine now that you're about to shut the laser show down.
Now you'll have plenty of time before other enemies return to get right behind the shooters. Run up to those Scabs and start spamming dodge and left click randomly, watch as they disintegrate, unable to retaliate in any way. (Thanks to Uncanny Strike and bleed build-up, light attacks spammed on weak spots will eliminate groups of non-elite Flak enemies faster than single-target heavy attacks)
One of them getting snarky with you? Opening fire on you from behind while you're busy corralling his friends? Big mistake. Spin around real quick and throw a knife at his face, putting him out of his misery in a literal second, then get back to business. Those throwing knives of yours can one-shot everything except Mutants, Maulers, and Ogryns when scoring a headshot, keep that in mind. Learn to aim above a target's head, not directly at it.
So things are all cleaned up. Vet and Psyker are dead, but you saved the Ogryn, the respawn zone isn't far now. Things look like they are gonna be okay...but suddenly...you hear a crash and ominous music begins - at least it would begin if you hadn't turned off music months ago, you did do that right?
A Chaos Spawn is barreling towards you and your nearly-dead Ogryn pal, behind him is the exact combination of specials and elites that you don't want to come after you while fighting said Chaos Spawn.
What do you do?
Do you know?
Can you guess?
Is it...
The...
F...
<heavy's voice> NO!!!!
At least not yet.
See, with that stabby blade of yours, you are actually REALLY GOOD at boss DPS. Every heavy attack you land on a Monstrosity's weak point is going to take a very respectable chunk out of its health bar. To make things easier, you have insane mobility with the stabby blade out, it's not hard at all for you to get your weak spot hits in and reliably dodge incoming attacks from both the monster and all the other enemies trying to get in your way.
Now, you probably know that landing a hit from stealth is a guaranteed crit and has increased finesse and backstab damage. Very true. So should you always be using this the second it comes off cooldown? Ideally, yes, but realistically, it depends. It is wise to save your stealth camo for when you actually need it to avoid taking damage, or to escape from a very bad situation. Remember that at any moment during a boss fight, something you really don't want to spawn CAN spawn and WILL ruin everything you are trying to do in the blink of an eye.
Whenever you do use Shroudfield, for whatever purpose you use it for, always do your best to get the sneak attack on the boss before the cloak ends so as not to waste the big damage opportunity. There won't be a truly meaningful difference in damage between a headshot and a backstab, so just go for whatever is easier. (FYI: It is also possible to do both at the same time...keep in mind)
Anyway...as nice as all that sounds, this is a Chaos Spawn we are talking about, and as I previously mentioned, everything in existence is currently right next to you and trying to double quadruple murder you at the same time.
Ogryn did his best, but he's long gone. If only he had the "I Can Only Be Killed By Exploding Barrels" button...shame.
Well, you are all on your own now, the Spawn still has half of it's health, and an entire room of taggable enemies is chasing you alongside it. This is it, surely there is no hope...you can already picture it in your mind, the big red letters at the top of your screen; YOU HAVE FAILED THE EMPEROR.
But wait...
What if...
Could it be...
ˢᵘʳᵉˡʸ ⁱᵗˢ ⁿᵒᵗ...ᵗʰᵃᵗ ᵒⁿᵉ ᵏᵉʸ...
...
Do I even need to say it? You know what to do by now. Poof, you are gone, and hightailing it out of there at maximum velocity while all the jokesters you left behind stand around like idiots. And they will keep standing there like idiots for the entire duration of your cloak. By the time they pick up your scent again and start moving, you are in a completely different zone. You got some new guys to deal with now sure, but what do you care? Just juke them, they can't possibly catch you either. Enemies in your way may have slowed you down a bit, and... - uh oh! the horde is catching up! oh noooo!!!!~
nvm stealth is off cooldown again
Frankly, I can probably end my narration here. Nothing more really needs to be said. With the bare minimum amount of critical thinking, and general knowledge of enemy attack patterns and pathing, you will always be able to save yourself and reposition before enemies overtake you. And sooner or later, no matter how many times you have to try again, you WILL get a teammate up. Eventually one of those teammates you get up WILL do something useful. And sooner or later, the rest of your team will be up too. And then you all proceed together to obliterate the army of bad dudes who have been on your tail for the past 5 minutes.
You cannot lose to anything short of truly extraordinary circumstances, or your own mistakes.
ₐₗₛₒ ₈ₐᵣᵣₑₗₛ
Many times I have been in impossible scenarios where there was no hope of ever reviving my team from a respawn zone without going down from the enemies that would catch up. Try to imagine just how many enemies we are talking about here, to describe a scenario where even with stealth, delaying movement for even just a few seconds would likely result in being body blocked and going down.
These are the unbelievable, indescribable, certainly unwinnable situations that with this build, you actually can still win...if you have the skill. Those situations can be won with extremely desperate maneuvers such as soloing entire events or objectives without teammates, or sprinting to the end of a mission while the entire map chases you, with non-stop split-second decision-making determining whether or not you survive.
Not only can it be done, but with the stealth button, it can also be done reliably. I would say that with this absolutely busted build I succeed in these impossible situations far more often than I fail. But it is rare for these situations to happen in the first place, thanks in no small part to this build making you a highly mobile force of destruction that cannot be downed. Your ability to instantly pick up downed teammates with zero risk of failure or self-endangerment also goes a long way towards overall mission success. You basically have a side gig as Mercy from Overwatch.
Anyway, I wonder how many people will actually read all of that? lol
▞ ▞ ▞▞▞▞▞
Weapons
▞ ▞ ▞▞▞▞▞
Melee:
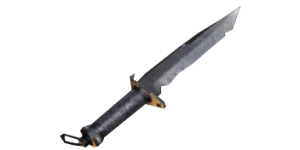
- Catachan Mk III Combat Blade | Uncanny Strike + Riposte or Precognition ..or Flesh Tearer + Mercy Killer | +Crit Chance, +Unyielding [anti-boss/sanic]
or
- Maccabian Duelling Sword | Uncanny Strike + Riposte or Precognition | +Flak, +Unyielding [godhood]
Ranged:
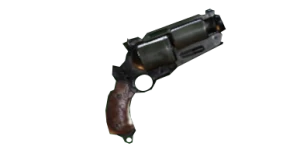
- Zarona Mk IIa Quickdraw Stub Revolver | Hand-Cannon + Surgical | +Crit Chance, +Unyielding [anti-armor]
or
- Agripinnaa Mk VIII Braced Autogun | Inspiring Barrage or Fire Frenzy + Speedload or Deathspitter | +Flak, +Maniacs or +Unyielding [survivability]
or
- Agripinaa Infantry Autogun or Vraks Infantry Autogun | Dumdum + Fire Frenzy or Speedload | +Flak, +Unyielding or +Maniacs [general DPS]
or
- Artemia Mk III Purgation Flamer | Blaze Away + Overpressure or Inspiring Barrage or Penetrating Flame (Havoc) | +Unyielding, +Flak or +Crit Chance or +Carapace (Havoc) [anti-everything]
━━━━━━━━━━━━━━━━━━━━━━━━━━━
➤ Melee Option 1: Combat Blade
━━━━━━━━━━━━━━━━━━━━━━━━━━━
There are many obvious reasons that the Combat Blade is arguably the best melee weapon choice for this build and playstyle. It does everything you want it to do. Unmatched mobility, high single-target/boss damage, fantastic armor penetration, crit/bleed talent synergy, and Uncanny Strike applying to Blades of Faith. Now you are thinking, doesn't the Duelling Sword do all this too, but better? Yes. It does. But it can't speed boost like the knife can. Until the heavy attack speed boost is removed from the game, the Combat Blade is Stealth Zealot's best melee weapon. But only by a VERY slim margin. Being able to outrun every enemy in the game while also being able to drop aggro is just too powerful of a combination. It is basically impossible to lose to anything except Trappers, ledge outs, or poor decision making.
Anyway...The knife's special stagger attack can chain straight into a heavy attack with no windup, abuse this to maximize your heavy attack speed or quickly build bleed stacks to combo into a Mercy Killer weak spot hit. You will be the fastest character in the game, but your horde clear won't be amazing. Getting trapped in a corner surrounded by enemies can be a death sentence if your cloak is on cooldown, so be aware of your positioning at all times.
Perks:
+Flak, +Maniacs, and +Unarmored will not change any breakpoints, nor meaningfully contribute to horde clear.
Your best perks are always +Crit Chance and +Unyielding for Monstrosity DPS.
Blessings:
Riposte and Precognition are interchangeably your best blessings to pair with Uncanny Strike. Riposte is basically a permanent 20% melee Crit Chance increase at all times. Precognition is a 60% finesse damage increase for 2s. Mercy Killer on the other hand, provides huge damage boosts for your bleed build, but it doesn't always have a consistent uptime. Essentially, it's a choice between a higher Crit Chance or getting random damage boosts on a semi-frequent basis.
PSA: I generally view Riposte as having more value than Precognition because crits trigger other buffs too, not just melee damage, and there isn't any meaningful difference between 20% Crit Chance and 60% Finesse Damage in a real Auric match. Smoothbrains will disagree with this because damage number big. Precognition is only better than Riposte in Havoc, where the damage spike with Uncanny Strike actually improves TTK. In Auric, most of that extra damage is wasted and you drop the more important CDR/DR/Piety uptime boost from Riposte as the pointless trade. [Ongoing theme: Defense > Offense]
━━━━━━━━━━━━━━━━━━━━━━━━━━━
➤ Some Info on Mercy Killer
━━━━━━━━━━━━━━━━━━━━━━━━━━━
The true damage increase Mercy Killer provides is wildly inconsistent depending on other buffs and modifiers. From my own testing on a perfect 380 roll, the Tier IV range results in anywhere from a 38% to 58% increase to total damage on a weak spot hit against a bleeding enemy. The full 58% can be observed with Sustained Assault and Uncanny Strike at the full 5 stacks. Buffs from teammates may push damage scaling even higher, but I'm not going to test that. This entire range of potential damage rapidly scales down the worse your weapon's stats are.
Obviously, that is a huge increase in damage, even on the low end. The catch is that the enemy needs bleed stacks, and your only way of applying that by yourself is Scourge. (2 stacks per crit) If you have to pace your hits to dodge incoming attacks, bleed will often expire before you can benefit from the blessing. You of course must also specifically hit the weak point within the time frame, on certain enemies this is not always realistic.
Mercy Killer also will not change most breakpoints. The damage increase does not apply to the attack that inflicted the bleed condition, meaning it still takes at least 2 attacks to kill most enemies.
There are some notable exceptions, assuming bleed is applied on the first attack, no buffs active:
2-shot (from 3)
- Gunners
- Ragers
- Bulwark
3-shot (2 on crit, from 5)
- Reaper
- Mauler
4-shot (3 on crit, from 6)
- Crusher
Really, the best thing Mercy Killer is doing for you is increasing your face tanking DPS against bosses.
Randomly nuking elites every now and then is just a bonus.
=========
Q: Bleed Blessings?
A: The Combat Blade should be optimized to crit and kill Armor/Unyielding as efficiently as possible, everything else doesn't really matter because it will die regardless - with or without bleed. You should always allocate one blessing slot to Uncanny Strike, meaning you can't combo Lacerate or Flesh Tearer with Mercy Killer...UNLESS you are using the Zarona, in which case, Flesh Tearer + Mercy Killer is the ideal combo. (Uncanny Strike and Flesh Tearer ultimately amount to about the same DPS against Monstrosities, so the bleed stacks are better for trash clear and triggering your buffs)
=========
Q: What about Hordes?
A: Attacks from trash enemies are of no threat to you, but the same can not be said of their collision meshes. The number one thing to be aware of during a horde is your positioning. Make sure you always have a way to get out of a cornered area in a pinch, don't stay in one place too long. Spam pushes and push attacks to get things out of your way if you need to reposition fast. Keep an eye out for waist high objects you can vault on, including rails and fences. Even if a horde and 20 maulers are in your way on a narrow strip, you can probably stealth and vault on to the edge rail and walk on it past all of them to escape.
As far as eliminating hordes, just spam light attacks on heads while side dodging down the length of the horde. Move down the line if you predict that trash in front of you is going to die from bleed in the next few seconds. If you really need to get rid of a horde FAST - and you can spare the ammo - blast them with your gun.
=========
Q: How does the Mk VI Combat Blade compare to Mk III?
A: The Mk VI has a lower finesse multiplier than the Mk III and its heavy attacks use a Vanguard-Vanguard-Strikedown pattern instead of just chained Strikedowns. As a result, the Mk VI is objectively inferior to the Mk III in terms of single-target DPS. The horizontal swipe patterns of the Mk VI's heavy attacks are great against man-sized enemies and chaff, but landing weak spot hits on Ogryns and Monstrosities isn't as precise as the Mk III. Both variants perform about the same against hordes of trash enemies, so it really comes down to what kind of attack patterns you prefer. Despite the lower DPS, the Mk VI still has all of the traits that make the Combat Blade meta.
=========
Q: how do sanic heghog??!??
A: Begin sprinting with stamina, then hold heavy attack through the entire charge up animation while continuing to move forward. Wait for the attack portion of the animation to complete, then begin another charged heavy. Repeat this pattern. You can continue to boost without stamina, but its easy to lose it. If you lose the boost, stop in place for a moment to get a tiny bit of stamina, then begin the sequence again.
━━━━━━━━━━━━━━━━━━━━━━━━━━━
➤ Melee Option 2: Duelling Sword
━━━━━━━━━━━━━━━━━━━━━━━━━━━
If you have used this weapon on Psyker, you know how good it is already. But that was on Psyker. Now its on the best class in the game that can make it do twice as much damage as before thanks to critmaxxing.
This weapon honestly should not have been given to Zealot, or at least not with the same blessings. Uncanny Strike and Riposte combined with Zealot's crit talents result in this weapon basically annihilating any enemy it comes in contact with regardless of armor category. Crushers and Maulers will literally die in 3 seconds if you have buffs active.
In addition to the absurd DPS, it has an incredible mobility profile, almost as good as the Combat Blade. Not only can it delete elites in mere seconds, it can also stunlock them indefinitely with the lightning fast special attack stab. Even Crushers will be thrown backwards from it, nothing can touch you, it is absolutely ridiculous how strong this weapon is. If you want to feel invincible and are bored of the knife, the Duelling Sword is your new best friend.
Note: Thrust and Precognition might seem appealing but you will actually kill things faster by just fishing for crits on regular fast heavy attacks. Uncanny Strike outperforms both of these blessings if you simply use your second blessing slot to raise your Crit Chance high enough to ensure every other one of those fast attacks is a crit. Maintaining a fast attack speed and high Crit Chance massively benefits the rest of your kit too, not just your melee weapon. The damage boost Precognition provides does not realistically contribute towards improving kill times in almost any scenario when every enemy is dying in two seconds with or without it. Go fight packs of Crushers or a Plague Ogryn in the meat grinder and time yourself if you don't believe me. There is virtually no difference between +20% Crit Chance and +60% Finesse Damage as the 2nd Blessing supporting Uncanny Strike in regards to the weapon's performance, but raising your Crit Chance is better for the rest of your kit, ESPECIALLY for uptime on Blazing Piety meaning Riposte is the superior blessing. (however, Precognition and Thrust WILL significantly boost your Shroudfield sneak attacks, if that is your primary goal)
Keep in mind that Uncanny Strike and your current Crit Chance % applies to Blades of Faith too!!
Note 2: For some absurd reason this weapon can also kind of speed boost...I really don't know what the hell they were thinking giving this thing to other classes. I personally think this weapon on Zealot is far stronger than the Combat Blade. The way you can dodge dance around everything while still stabbing enemies precisely in their weak points from ridiculously safe distances, and dish out insane amounts of damage against every single enemy type, using this thing really does just feel like cheating.
⋆✧⋆✧⋆✧⋆✧⋆
Headshot Breakpoints: (without Duellist - all unlisted units are 1-shot on non-crit headshots, except Dreg Gunners, which need a crit)
% Unarmored:
Does not change any breakpoints.
% Flak:
1-Shot: Scab Shotgunner, Scab Gunner
2-Shot: Scab Rager
% Maniacs:
1-Shot: Mutant (w/ crit)
2-Shot: Dreg Rager
% Unyielding:
3-Shot: Reaper (has like 1hp left after 3, a crit or any additional dmg will kill it in 2)
4-Shot: Bulwark
% Carapace:
4-Shot: Mauler
5-Shot: Crusher
Based on these results, I would recommend taking +25% Flak and +25% Unyielding as your perks. Duellist will almost always be up while fighting Ragers and Mutants so you don't need +Maniacs to reach those breakpoints. You are better served by +Unyielding for Monstrosity DPS.
=========
Q: What are the differences between the Duelling Sword Marks?
A: The Duelling Sword is unironically the best melee weapon in the game right now, all 3 are ridiculously overpowered, but there are some noticeable differences between each Mark. The most obvious one is that the Mk V trades the Cleave Damage stat for Defences, meaning it has twice the dodge distance of the other two Marks. It does deal less damage on it's light spams due to this though, and instead of forward thrusting pokes for the heavy attack, it uses chained overheads.
The Mk V is best used on Veteran or Pysker to help them stay alive under pressure, it is less desirable on Zealot, as the dodge distance is honestly a bit too much, akin to skating around on ice. The precision offered by the Mk IV and Mk II is ideal, and you will still have all the mobility you need to dance around any situation the game can throw at you regardless.
As for the Mk II, it is very similar to the Mk IV, its key difference is its follow-up heavy attack does not repeat the forward thrust chain, instead it flows into a swiping Vanguard attack that deals significantly less damage against single targets. The up-side of this Mark though is its light attack chains are noticeably faster than the Mk IV, and you can still chain heavy thrust attacks by comboing into the special stagger attack after your first heavy poke, which will reset the heavy attack chain, avoiding the undesirable Vanguard attack.
This leaves us with the default Mark, the Mk IV, which is indisputably the best Mark, for one simple reason: Infinitely chaining your heavy attack thrusts without needing to cancel your animation state allows you to endlessly speed boost forward while projecting the deadly thrust attack hitbox in front of you with its perfect pinpoint accuracy, annihilating anything you come into contact with. If you combine this with chain sliding, good dodge timings, and general situational awareness, you are pretty much invincible. I am not exaggerating. This weapon is BROKEN. You can kind of do this combo on the Mk II and even the Mk V, but it is nowhere near as effective as it is on the Mk IV.
━━━━━━━━━━━━━━━━━━━━━━━━━━━
➤ Ranged Option 1: Zarona Mk IIa Quickdraw Stub Revolver
━━━━━━━━━━━━━━━━━━━━━━━━━━━
With Surgical and Hand-Cannon on a crit-boosting build, it's the strongest ranged weapon in the game, surpassing even the Plasma Gun when taking into consideration its mobility and the fact that it can be equipped by a much stronger class (Zealot). It vastly outperforms any other ranged weapon you could possibly take, and your melee weapon becomes redundant except for Monstrosity DPS and trash clear.
If you have good aim, and take every shot you can take with this weapon, you are basically griefing the match with how effective you are. I've had sub-30 minute Maelstrom games with the Zarona where my kill count on taggable enemies exceeded 300, outperforming my entire team combined by a factor of over 200%.
Perks:
+Crit Chance, +Unyielding
Blessings:
Hand-Cannon
and
Surgical
If you want a detailed breakdown on why this weapon is so monstrously overpowered, I have another exhausting blog post on the subject you can groan at here: https://darktide.gameslantern.com/builds/9b19f0dd-12ce-4b8c-ba77-640a844e86ae/anti-plasma-vet-meta
=========
Q: Agripinaa Revolver?
A: It's really good now! They gave it some cleave, its nowhere near as busted as the Zarona but it is still a good pick. The speedloader alone makes it worth using. Surgical and Crucian Roulette both work well, always keep Hand Cannon.
=========
Q: Do I still want Uncanny Strike on the Combat Blade if I'm using the Zarona?
A: Nope. The knife is now just for stabbing bosses and speed boosting. Take Mercy Killer + Flesh Tearer.
(Monstrosity DPS stays about the same but bleed is far more reliable)
Note: You should never remove Uncanny Strike on the Duelling Sword regardless of your setup. Thrust and Precognition can only win on paper, in a real match, nothing outperforms Uncanny.
=========
Btw here's a secret:
Remember how Blades of Faith inherits the Uncanny Strike blessing?
It actually inherits any blessings of your currently equipped weapon. Try aiming your revolver, wait for Surgical to reach max stacks at 10 (100% crit chance), then throw a knife at a Mauler or Crusher's head from ADS right after you dodge an attack...watch what happens.
━━━━━━━━━━━━━━━━━━━━━━━━━━━
➤ Ranged Option 2: Agripinaa Mk VIII Braced Autogun
━━━━━━━━━━━━━━━━━━━━━━━━━━━
Now that Braced Autoguns have access to Inspiring Barrage, the Autopistol is officially pointless. The Agripinaa Brauto offers superb damage, stagger, and suppression at the cost of mobility. This thing is for mowing down everything in front of you, and taking zero damage while doing it, thanks to Inspiring Barrage generating more Toughness than you could ever lose in the process.
Perks:
+Flak, +Unyielding or +Maniacs
Blessings:
Inspiring Barrage or Fire Frenzy
and
Speedload or Deathspitter
=========
Q: Speedload??
A: Speedload is a solid choice for both damage and survivability. The increased reload speed on kill mostly compensates for the slightly lower killing power without a damage blessing; though each shot is less powerful, your DPS is technically about the same. Additionally, since reloads are faster, you have less downtime between moments where you can stagger or kill enemies, meaning you are also safer as well. Fire Frenzy/Deathspitter are still viable alternatives if you prefer raw burst damage or if you want to be more conservative with your ammo.
===
Q: Between Inspiring Barrage and a damage blessing, which one is the better pick?
A: More damage is always good, but as I've stated many times, I think sacrificing defense for meager gains in offense is a trap in this game. Your goal is to gain as much survivability as possible. Having 10x the average amount of Toughness regained throughout the entire match than you normally would have is a lot better than dealing ~15-20% more damage with your ranged weapon.
The breathing room Inspiring Barrage provides while out in the open is unmatched by any other blessing in the game. It effectively removes non-elite shooters as a threat and can save your life in situations that would normally be guaranteed death. The blessing is in fact so impactful, it should be considered the primary reason for choosing a Braced Autogun in the first place. But if you don't need that crutch, by all means, max out your damage.
━━━━━━━━━━━━━━━━━━━━━━━━━━━
➤ Ranged Option 3: Agripinaa / Vraks Infantry Autoguns
━━━━━━━━━━━━━━━━━━━━━━━━━━━
The Agripinna Mk I and ̶C̶o̶l̶u̶m̶n̶u̶s̶ Vraks Mk V Infantry Autoguns are among the best ranged weapons in the game. They deal godly DPS with power blessings like Dumdum and Fire Frenzy, and with ADS, they are much more accurate than the Braced Autoguns. There is a legitimate argument to be made that the Agripinna IAG is a better pick than it's Braced counterpart. Switching between a Braced Autogun and Infantry Autogun essentially just swaps some of the qualities of your weapon around in an even trade off.
Compared to Braced Autoguns, Infantry Autoguns deal more damage on average, with better accuracy and range. They also give you 3 more dodges (but 10% less distance). However, Braced Autoguns have significantly higher stagger and suppression, and access to Inspiring Barrage, allowing you to play very dangerously with little risk. Taking a Braced Autogun allows you to dish out great DPS while face tanking everything you encounter.
Perks:
+Flak, +Unyielding or +Maniacs
Blessings:
Dumdum
and
Fire Frenzy / Raking Fire / Deathspitter / Speedload
=========
Q: What damage blessings do I want on my Autoguns??
A: I have a full breakdown on the Autoguns and their blessings in the (No Stealth) guide:
▞ ▞ ▞▞▞▞
Flamer?
▞ ▞ ▞▞▞▞
Shroudfield and Blades of Faith negate a large portion of the risk you are usually taking by bringing the Flamer. Your high mobility allows you to safely bait every enemy you can find to come after you and line themselves up for a prolonged bath in fire. This is usually a bad idea, but thanks to Shroudfield, there is no longer any risk involved. If you get into trouble, for any reason, you always have the ability to safely disengage and reposition.
The Flamer's primary caveat is its inability to quickly respond to incoming specials and elite shooters. Without an actual firearm, you are at the mercy of enemies who spawn outside your immediate vicinity. This is especially dangerous with disablers, who you will be forced to respond to with a dodge and follow-up attack, as opposed to the much safer method of simply gunning them down before they even get to you.
Blades of Faith conveniently solves this dilemma. The throwing knives restore your ability to neutralize priority targets from a distance before they can threaten you, which is essential to survival on high difficulties. Trying to do this with just the Flamer is risky. The limited range and mobility, as well as the long draw and reload times, can easily be your downfall. But with Blades of Faith, you are once again able to properly handle every situation, including those that the Flamer would normally struggle with.
And oh, guess what? Now your horde clear problem is fixed.
So...is the Flamer actually a good pick for a meta build? The answer is of course, ̶n̶o̶.̶.̶n̶o̶t̶ ̶r̶e̶a̶l̶l̶y̶ (honestly it depends on how good you are with it)
Despite how well it performs with this build, it is still not really adding anything you couldn't already do better with the rest of your kit or an actual ranged weapon. Without the i-frames and movement tech from Fury of the Faithful, the Flamer is still a risky weapon to use.
///////
PSA 1: Burning Crushers is pretty much a waste of time. Don't waste a blessing slot on Penetrating Flame, Strength blessings outperform it in nearly every scenario. Besides, the Duelling Sword or Combat Blade and Blades of Faith with Uncanny Strike are fully capable of dealing with any armored goons who survive your flammenwerfing. You want Everlasting Flame, Overpressure, or Inspiring Barrage as your second blessing. (Unless you are playing Havoc)
///////
PSA 2: The secondary fire stream will NOT immediately stagger Poxhounds, and the burn on them will not be enough to kill them if they jump on you, so be very careful when they approach.
▞ ▞ ▞▞
Curios
▞ ▞ ▞▞
Though most argue for Toughness curios, I will offer some insight into why I think Health is the better pick.
We are also going to ignore Wounds and Stamina. Never pick Wounds or Stamina unless you are playing a meme build.
=========
Q: Why do you think +Max Health is better than +Max Toughness?
A: When people talk about the amount of value you derive from increased Toughness over the course of an entire match, if you do the math, it adds up to less Health theoretically lost in total, since the amount of Health damage you take is directly tied to the remaining percentage of Toughness you have. More Toughness = Better Defense = Less Health Lost. Data has been compiled to support this notion, and I am not disputing it.
Arguing that this alone validates always choosing Toughness over Health is short sighted. In reality, there are more factors in play than basic math.
First of all, talents already give loads of Toughness and Toughness Regen, and combined with curios stacking Toughness even higher, yes, you can reach ridiculous amounts of Toughness. Lets sweeten the deal up a bit by mentioning that Zealot has a nice on-demand Toughness button, and the Brautos can even be blessed to literally shoot Toughness. With all this Toughness, that can so easily be regenerated, you will never be taking any Health damage, so you don't need the Health in the first place, right? Wrong. This is an erroneous assumption because stacking Toughness actually indirectly has diminishing returns, and I will explain why.
There is a skill threshold in this game where once you reach it, stacking Toughness no longer brings you any value. You will become so good at avoiding damage from your own mistakes that you will reach a point where the overwhelming majority of damage you will take begins to come almost exclusively from sudden burst-damage incidents you had no control over. These incidents almost always immediately zero your Toughness no matter how much you have stacked. A flamer blasting you when you are body blocked, a Poxburster jumping out of a door you are standing next to with absolutely no warning, being grabbed or disabled at the wrong moment in the wrong location, thrown, pinned, or blasted into a horde of enemies (or worse, fire and a horde of enemies), etc.
We are talking about scenarios that you realistically cannot fully prevent from happening no matter how skilled you are. There will always be some degree of randomness at play, and sometimes, the game decides it just doesn't like you. In these scenarios where something terrible happens to you, and your Toughness is instantly gone, this is where we see the value in having more Health.
In most of these situations, there will be a moment where you have no actual ability to respond properly to prevent your Health from being depleted. 115 Toughness and 180 Toughness would have produced the same result, its all gone in a flash, and now everything in the room is targeting your Health. This is where having more Health comes into play. It serves as a buffer for you to last longer in these scenarios before you regain control of the situation and have an opportunity to restore any Toughness at all.
It also does not actually matter what your Max Toughness is, all that matters is that you restore your percent missing as fast as possible to avoid further bleed through. Toughness restoration is based on your percent missing, so the percent restored is always the same regardless of how much Max Toughness you actually have.
- Treat Toughness exclusively as a shield against ranged attacks, and as a 'doesn't count' passive when you take a random hit in melee with a full bar. Don't think of it as a constant source of damage mitigation, the overwhelming majority of potential damage you could be receiving should be dodged or blocked. When the bar gets too low, do something to get it back. It is highly unlikely you are going to get whacked over and over again in melee, the risk to your Health is much more likely to come from ranged enemies, or a disable + AoE/chunk combo that instantly zeroes your Toughness.
Increased Health is a buffer against bad luck. Toughness often is not.
And bad luck is the ONLY thing that should ever be causing an expert player significant damage during a match.
However, you should consider what I wrote and ask yourself if this applies to you - it might not. Toughness may actually be better for your playstyle. If you have trouble with shooters and can't slide dodge everywhere like a crack addict, and still get randomly hit in the back by poxwalkers, then Toughness brings you far more value, since more of your overall damage is coming from chip damage instead of random moments of chaos.
Think for yourself and don't just blindly do what streamers and discord cultists tell you to do. You should be able to determine the difference between good advice, highly opinionated hot takes, and actual nonsense. ⁽ⁿᵒ ᵘⁿᵗⁱˡ ᵈᵉᵃᵗʰ ˡᵐᵃᵒ⁾
=========
Q: I think Toughness is better!!!!!
A: Take Toughness then, it is still good, but you really shouldn't take more than one. Just don't take Wounds or Stamina, those are garbage.
=========
Q: But Stamina lets me-
A: Stamina is never worth it. Psyker and Vet are the only classes that should even consider Stamina curios, and even then it is highly questionable. Is it nice to have? Sure. Do you need it? No, and keeping it on will only make you more reliant on it the longer you use it. Taking Stamina gives you something you don't need in exchange for one of the most important things that you do need. It is a terrible decision, especially on Zealot. If you can't keep yourself alive without extra Stamina, not having enough Stamina is not the problem: https://tinyurl.com/bde7xkfc
=========
Q: I do agree though Wounds are indeed garbage.
A: I knew you had some sense in you.
— — — —
PERKS
— — — —
Perks stack multiplicatively, meaning they offer diminishing returns as you take more of them.
Three 20% perks is not 60%, it is 0.800³ which equals 0.512 and when subtracted from 1.000 ends up as 0.488.
So three 20% Something Resistance perks are actually only providing you with a total of 48.8% resistance. Two provides 36% resistance.
Taking this into consideration, you get much more value out of your perks by not taking a 3rd resistance perk, and instead allocating the slot to something else entirely. The following perks are the ones I consider to be the most valuable and impactful of the lot:
Best in Slot:
x2 - 20% Gunner Resistance (gunners/reaper: +16% resistance from the 2nd; a 3rd only adds +12.2% resistance) [only take 3 in Havoc]
x2 - 20% Sniper Resistance (no matter how much you think you won't get sniped, you will still get sniped) [prevents being chunked]
x2 - 15% Corruption Resistance (reduces damage from Poxbursters, tox gas, and all corruption) [3 adds very little, only take 2]
x1 - 12% Stamina Regeneration (having just one of these is a noticeable improvement) [2 is helpful but unnecessary]
Good Second Picks:
x? - 5% Health
x? - 5% Toughness
x1 - 12% Stamina Regeneration (if you have movement tech down, you really don't need more stamina, if not, sure I guess)
x1 - 20% Gunner Resistance (if you get shredded by Gunners, taking all 3 for the max resistance isn't a bad idea, mandatory in Havoc)
x1 - 20% Sniper Resistance (same as above; if you are a Sniper magnet, take all 3)
x1 - 20% Tox Flamer Resistance (both Flamers, applies to melee, fire, ground flame, tank explosion - NOT tank explosion ground flame)
x1 - 20% Bomber Resistance (both Bombers, applies to melee, grenade explosions, ground flame, and damage from Tox Bomber gas)
Questionable:
x? - 10% Revive Speed (can save missions but its hard to justify reserving the slot for something so situational, 10% is too low)
x? - 15% Sprint Efficiency (some people love this - I think its a total waste, Zealot doesn't need it if you know the movement tech)
x? - 12% Block Efficiency (see above)
Completely Useless Wastes of a Slot:
Experience
Ordo Dockets
Chance of Curio as Mission Reward
Pox Hound Resistance
Mutant Resistance
Grimoire Corruption Resistance
Toughness Regeneration Speed <-- only applies to coherency regen, pointless on Zealot
Combat Ability Regeneration <-- yes, this is useless, waiting is not how you get your ability back lol
![Zealot Infodump (No Stealth) [Auric]](/storage/sites/darktide/build-editor/cover-images/SnpocQGRp51IJATGvERIJeIj8MwyXV4QATMsVdh3.webp)


![Anti-Plasma Vet Meta [Auric]](/storage/sites/darktide/build-editor/cover-images/CEPYTq5nx4AOx5psawBh99THcDkugWqPnP5W5ZSv.webp)
