Table of Contents
Class

Weapons


Headtaker
+5% Strength for 3.5s on Hit. Stacks 5 times.
Slaughterer
+8% Strength for 4.5s on Kill. Stacks 5 times.

Speedload
+10% Reload Speed for 3 seconds after Close Kill. Stacks 5 times.
Deathspitter
+6.5% Strength for 5s on Close Range Kill.
Curios

+13-17% Toughness
+1 Wound(s)
+1-3 Max Stamina
Talent Tree
Stimm Lab
Description
(Edit 20260513) - with the recent reduction in Crushers, I have swapped out +dmg vs Carapace on the Chain Axe with just a flat +10% damage vs. all Elites to smooth that out. Your mileage may vary, Carapace damage is still fine as well. I have also been running this now with a +1 wound curio (due to Janktide/FPS drops/network issues?) and +3 Stam curio for the related overall attack speed increase.
(Edit 20260508) - swapped misppelled Channelled Aggression in and Pulverising Strikes out to deal better with armor, specifically Flak as we have Unyielding/(now +Elite Damage) on the Chain Axe.
Also dropped Voice of Tertium (up top) and took Swift Endurance in the bottom left line. This was just me being dumb as the +toughness on ranged is mid vs. faster attack speed with Stamina.
Assuming your are blocking/dodging, this build is oddly survivable - my best build for taking the least damage on the team.
(This is a Orestes Mk XII Assault Chainaxe focused build spun off of jayalriik's Crucis Mk XI Double-Barrelled Shotgun focused build: https://darktide.gameslantern.com/builds/a08b994f-57de-4493-bf96-cca84ad32aac/doom-slayer-double-barrel-build-beyond-the-hive-updated )
The key here is that the Orestes Mk XII Assault Chainaxe move set lends itself very well to going crazy with Adrenaline Frenzy. Wade into the horde, spam light attacks, rev+heavy for anything tough. Bust out Rampage! when SHTF, and dose yourself with your Equip Cartel Special for the mixed-horde+boss goat rodeos, etc. For crusher packs you can either dump all the above and LET'S GET IN THERE! Or just Raiders of the Lost Ark market scene shooting them... bust out the rocket and delete them.
(If you end up starting with the Orestes Mk IV Assault Chainaxe due to mastery, push attack into heavy for hordes. I ended up having a much better time with the Mk XII, but with practice the Mk IV is excellent as well, just not as unga bunga for hordes).
Overall
- If you have a competent leader/mission driver, then try to float as rear-guard/psyker and vet protector. When it's SHTF time then it's time to scream LET'S GET IN THERE!
- Throw yourself directly into the worst of it. If it's REAL shitty, pop that syringe first and then bust Rampage as close to the thickest knot of traitors to maximize Forge's Bellow stagger + debuff. Immediately start spamming light attacks to amp up both Rampage and Adrenaline stacks, ABD/ABB - always be dodging, always be blocking
- It takes a little experience with the build to know the right time, but mix in heavy-attack headshots when appropriate to finish off Maulers, Flak Ragers, etc. Use full special action revs on Crushers (preferably from their flank or rear) and monstrosities
- Your second Forge's Bellow tells you your rampage is done, but you can still keep Adrenaline going or fire it up again (and if the hordse is still going strong and you didn't pop your cartel special alread you can either do that or slide backward and get that super shotty out and start doing work
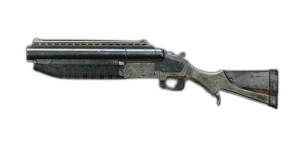
Shotgun (TL;DR - Obliterate hordes of trash. You are in charge of shotgunning any danger-close mutants [double barrel these in the face], trappers, bombers and flamers - in roughly that order of priority)
- Use the shotgun to soften-up/kill distant groups of specials
- Use it to quickly delete or greatly thin out hordes of trash, especially when clearing your psyker/veteran's six
- Only take ammo if everyone else who needs it bypasses/is full (or close to it) - use pickpocket otherwise
- Holding secondary (ADS) puts you in "both barrels" mode - it's amazingly poor at range and amazingly good point blank, use this for close mutants for an instant delete, and it'll headshot about anything else than a Crusher
- It's good at range in regular hip-fire mode, but you will usually still have to fire all 3 in the mag to put down gunners/etc,
- Try aiming for the legs of plasma gunners and flak ragers
- If you find yoursellf using the secondary fire/both barrels mode quite often, swapping speedload for the double barrel speedload might be worth a try
- Get in the habit of cycling weapons and confirming reloads between high intensity engagements
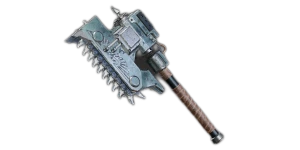
Chain Axe
- As above: spamming light attacks while blocking and dodging is key
- Use heavies judicially, you will stick to the target for a short time but you can selectively remove specific targets more quickly - in a pack of maulers for example, spam lights as you block/dodge work the pack and once they are down to roughly half health, dodge out to the side and heavy-headshot the edgelord mauler. Repeat until they are all dead.
- Only full rev (special action) against tough enemies that are somewhat separated (unless nothing else is focusing you) - if you're low on rockets and there is no other apparent/designated boss killer, chem up/rampage and full-rev monstrosities for really solid damage. Works on captain shields and crushers as well
Rockets
- The most OP offensive blitz in the game right now. Try to hang out with Vets who take Field Improvisation
- How I recommend you use these is based on how many you have left. If you know you'll be able to reload, you can be more liberal in your application of these delete buttons
- 3 Rockets: Apply to any thick situation you don't like. 4+ Crushers. A large mixed horde of ragers/moebian infantry surrounding your squishies while you hear multiple specials announcing their arrival. Any 15 to 20 deep platoon of Elites/Specials. Monstrosities.
- 2 Rockets: Try to use only when making space is going to be important. Team mate is down or disabled and surrounded by maulers. Monstrosity that needs to die quickly (and you don't have two vets with recharging Kraks or whatever).
- 1 Rocket: Save for clutch. Only rip your last rocket when it might decide the game, or you have a guaranteed grenade reload in reach (that some rando isn't going to gank to replenish their inferior blitz right as you send it)