
Table of Contents
Class


Weapons

Agni Mk Ia Shock Maul
Transcendant
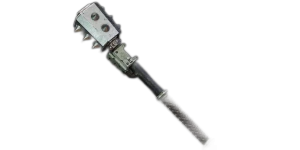

2-5% Melee Critical Hit Chance
10-25% Damage (Carapace Armoured Enemies)

High Voltage
+25% Damage vs Electrocuted enemies.

Skullcrusher
Target receives 4 Stack(s) of +10% Damage if already Staggered. Lasts 5s.

Branx Mk IV Arc Rifle
Transcendant
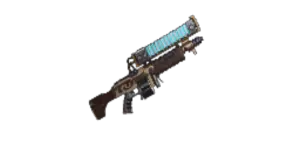
10-25% Damage (Flak Armoured Enemies)
10-25% Damage (Unyielding Enemies)

Enhanced Voltaic Arcs
Arc lightning gains +10 jump angle and +1 jump distance, and can jump 1 additional times.

No Respite
Up to +20% Damage on Hit (Staggered Enemy), scaling with Stagger.
Curios
Blessed Bullet
Transcendant


+13-17% Toughness
+5-20% Damage Resistance (Gunners)
+4-10% Revive Speed (Ally)
+1-4% Combat Ability Regeneration
Blessed Bullet
Transcendant
+13-17% Toughness
+2-5% Toughness
+4-10% Revive Speed (Ally)
+7.5-30% Toughness Regeneration Speed
Blessed Bullet
Transcendant
+1-3 Max Stamina
+2-5% Toughness
+7.5-30% Toughness Regeneration Speed
+1-4% Combat Ability Regeneration
Talent Tree

Patch
Skitarii Class
Old patch
Description
The Optimized Skitarii Build
Reginald and Mr. E got it all wrong—although, with every video they release, they are getting closer to this build. This setup is optimized around bodyshot crit damage while maintaining access to the most powerful and iconic Skitarii tools.
North Nodes: Electric Essentials
- Overcharge Transfer Lattice: While it won’t prevent one-shots, it is incredible at stopping you from being overwhelmed by a high volume of attacks. It completely trivializes Auric difficulty and below. In Havoc, it enables a much faster counterattack with the Arc Rifle.
- Alternative: If you are a top-tier player who never takes damage, feel free to move this point into Voltaic Arcs or Assassination Protocols. However, keep in mind that because we use Flensing Protocols, taking a series of hits will lower your offensive potential anyway.
East Nodes: Ranged Essentials
- These offer easy-to-maintain damage buffs via the Skull, alongside excellent ammo economy for the Arc Rifle.
- Tech Choice: If your team needs more boss damage, opt for Assassination Protocols. Note that it does not meaningfully reduce the Time-to-Kill (TTK) against Ogryns.
South Nodes: Melee Essentials & Crit Capstone
- Your primary role is to unload the Arc Rifle into massive elite packs, meaning you will easily max out your stacks during these engagements.
- Boss Strategy: When the boss music starts, do your best not to lose those stacks. Kite and avoid damage at all costs, because you likely won't be able to regain them for the rest of the fight.
West Nodes: Utility & Skull Essentials
- Core utility nodes to round out the build's baseline efficiency.