
Table of Contents
![[Explained] The actual best Hive Scum build (H40)](/storage/sites/darktide/classes/KavHJUksW8ARPecY2MAmf9P3PeBY9omUuouVjoQu.jpg)
Hive Scum Build - Warhammer 40k: Darktide
[Explained] The actual best Hive Scum build (H40)
Hive Scum Build - Warhammer 40k: Darktide
Class


Weapons

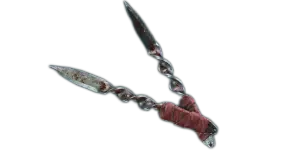


Riposte
+20% Critical Chance for 6s on successful Dodge.

Precognition
+45% Finesse Damage for 2s on successful Dodge.

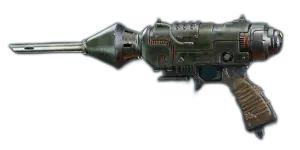

Run 'n' Gun
You can Hipfire with this weapon while Sprinting. 15% Close Damage while Sprinting. Also reduces weapon spread at all times by -30%.

Stripped Down
Gain Ranged Attack Immunity while sprinting with over 50% Stamina.
Curios


+13-17% Toughness
+13-17% Toughness
+1-3 Max Stamina
Talent Tree

Stimm Lab
Description
There are a ton of great variants of this build, but this is the most optimized one. It's the single best melee DPS build in the game and it's flat out overpowered. I'll explain some of the less obvious choices for newer Scum players and I'll share some suggestions for customization.
Hyper Violence + Hyper Critical
Hyper Violence is mandatory, but there's still a ton of confusion about how it interacts with Hyper Critical. The bottom line is that the two nodes are NOT actually as anti-synergistic as many people argue, and the benefits of using both far outweigh the downside. Hyper Critical doesn't reset Hyper Violence stacks. Modded testing reveals that with the game's current enemy density, you won't actually have any problem keeping high damage stacks of Hyper Violence, even while Hyper Critical is "stealing" kills. Additionally, Hyper Violence is a huge force amplifier for Hyper Critical. It compounds with the bonuses from Rampage, Stimm Lab, and Precognition to allow Hyper Critical to cause very consistent one shots against annoying targets like Maulers, Mutants, Ragers, and Vanguards. Testing shows that combining both improves TTK against armor packs and mixed hordes without affecting TTK against ordinary hordes. It's also much more practical in a real game environment where you may not have the opportunity to set up optimal Hyper Violence stacks and just need to remove key targets quickly.
If you really don't want to take Hyper Critical, a few decent options include Channeled Aggression, Virulent Strain, and maybe Channeled Devastation, but truth be told, none of the available choices are nearly as impactful as Hyper Critical.
Boom Bringer vs Chem Grenade
Boom Bringer is preferred because it's the more consistent problem solver. Chem Grenade has the potential to do more overall damage, but it's slower and less consistent in open areas because enemies will pathfind around the toxin if they can. Still, Chem Grenade is a totally viable choice.
Rampage + Stimm Lab + Chemical Dependency Synergy
Rampage is the most broken ability of all time and this build maximizes its value. Boiling Blood and Pulverizing Strikes are mandatory for damage and uptime. You can swap out Forge's Bellow if you want to, but I'd strongly recommend keeping it. The stagger utility is incredibly useful for revives and is very effective against bosses and armor packs. It's almost as good as a Vet shout.
The Stimm + Chemical Dependency setup minimizes Rampage's downtime by keeping the Stimm cooldown under 60 seconds in order to get the +40% Cooldown Regeneration from 4 stacks of Chemical Dependency with Maxed Out Chems. In other words, spam your Stimm the moment the mission starts and always maintain 3-4 stacks.
For the Stimm itself, the Wildfire line is pound for pound the most valuable. Strength is the most valuable damage multiplier in the game and finesse is almost as good as a base damage increase on this build in particular. This is because most of this build's damage comes from crit/weakspot bonuses.
The Stimm cooldown is only at 45 seconds. This makes it easy to keep 4 stacks of Chemical Dependency for an entire map, but if you'd like, you can put a couple points into the other lines. Keep in mind that this will require you to micro your Chemical Dependency stacks a bit more diligently. You'll have less freedom to use it at will and you'll find yourself using it at suboptimal times just to keep high Chemical Dependency stacks. Spur is the best line if you want to spend more points. The defense from Barrage isn't necessary and Kalma is deceptively weak--every extra point in Kalma increases the cooldown of the Stimm, thus reducing the amount of total ability cooldown reduction you actually get from it.
Also, Coated Weaponry and Splash Damage contribute to Sample Collector alongside your Needle Pistol shots, reducing the cooldown of your Stimm and letting you keep more uptime on both its damage bonuses and your Chemical Dependency stacks.
The Invincibility Trio
The combination of Street Tough, Burst of Energy, and Tis But a Scratch make Hive Scum extremely consistent and allow skilled players to play even more aggressively. Street Tough is the star of the show--it protects you from dogs, multihits, and takes situations where you'd have to play defensively (going under 100% toughness in melee) and instead allows you to play offensively (straight up killing all the staggered enemies around you). Also, Nimble is preferred over Alley Rat for melee builds because Alley Rat can make your spacing feel a bit awkward. You'll sometimes dodge an enemy's attack and find yourself too far away to follow up.
Needle Pistol Build
This is the standard Needle Pistol build. Damage is dumped because it doesn't affect the DoT, which is where the damage actually comes from. Reload Speed is chosen because none of the damage boosting perks change the Needle Pistol's breakpoints on Havoc 40. They do increase the DPS of the toxin, but the damage perks are only active when you're actually holding the Needle Pistol itself. You'll often take a few shots and then switch back to the Shivs, in which case the damage bonuses become irrelevant. The most common exceptions to this are when you're using the higher movement speed to kite a boss and when you're using Stripped Down against a gunner pack. Unyielding is useful in both cases for monstrosities and Reapers respectively.
Curios
Gunner Damage Resistance can be taken, but isn't necessary. There's already plenty of ranged defense with Stripped Down, Tis But a Scratch, Burst of Energy, and Hive Scum's innate dodge angle buff. Bomber Damage Resistance is taken because it's the one type of damage that Hive Scum can't avoid taking chip damage from. With a +3 Stamina Curio, the Hive Scum will never run out of stamina and gains an extra +6% attack speed from Swift Endurance.
Common Picks You See on Other Builds and Why You Probably Don't Want Them
-A Tertium Welcome/Punching Above One's Weight/Channeled Devastation/Toxic Mania don't meaningfully improve DPS. A 15% damage boost is quite small in the context of this build, which is getting 80% strength, 80% finesse, and has truly ungodly crit multipliers ranging from 2.5x-5x. None of these talents individually change breakpoints and taking more than one of them comes at the opportunity cost of more useful options.
-Jittery isn't necessary with Hive Scum's innately high stamina recovery speed and a +3 Stamina Curio.
-Ruffian actually provides less DPS than Anarchist for this specific build.
-Battering Momentum isn't necessary with the strength and cleave added from Rampage and Stimm Supply, as strength already increases cleave.