
Table of Contents
Class


Weapons



Momentum
Hitting at least 3 enemies with an attack, restores +15% toughness.

Warp Slice
Guaranteed Activated Critical Strike. 15s Cooldown.

Warp Flurry
-8.5% Charge Time on Chained Secondary Attack. Stacks 3 times.
Rending Shockwave
Target receives up to 8 Stacks of 2.5% Brittleness, scaling with charge time of Secondary Attack. Debuff lasts for 5 seconds and can have a maximum of 16 stacks.
Curios


+13-17% Toughness
+13-17% Toughness
+13-17% Toughness
Talent Tree

Description
Build Use
This is a mid-line support Psyker built around controlling pressure and covering whatever the team is currently lacking. The build does not need to change much based on team composition. The main adjustment is how each part of the kit is used depending on what is causing problems.
Stay close enough to the frontline to help with melee pressure, but far enough back to see the fight developing and react before it gets out of control.
Bubble Shield
Use the bubble to create safe space against ranged pressure.
The best use is usually proactive. Drop it before the team is already getting shredded by gunners, especially when pushing into open areas or fighting somewhere with poor cover.
The bubble does not need to be treated like a permanent fighting position. Once it gives the team enough time to stabilize or move through the area, it has already done its job.
When the bubble is down, play more carefully around hard cover. That is one of the weaker moments for the build.
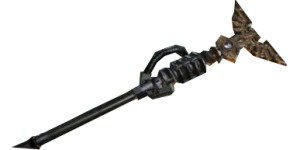
Voidblast Staff
Voidblast is mainly for mixed hordes and elite pressure.
Normal hordes usually do not need it. The greatsword handles those well enough.
Bring out the staff when ragers, maulers, crushers, bulwarks, or several elites start getting mixed into the horde. The goal is not always to kill everything with the staff. A lot of the value comes from keeping dangerous enemies staggered and stopping them from overwhelming the team.
If a pile of ragers reaches the frontline, controlling them is usually more useful than trying to finesse heavy melee chains while backing up.
Warp Flurry keeps the staff cycling faster, while Rending Shockwave helps the team deal with armored targets caught in the blasts.
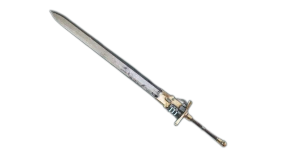
Blaze Force Greatsword
Use the greatsword when the fight is already under control.
It handles normal hordes, isolated enemies, and regular melee pressure without needing to spend time charging the staff.
The important part is knowing when to stop trying to melee everything. If the fight starts turning into a pile of ragers, maulers, crushers, and trash all stacked together, switch to Voidblast and reset the situation.
If the team lacks a real frontline, the greatsword can also be used more aggressively to help hold space.
Brain Rupture
Brain Rupture is there for targets that the rest of the kit does not handle as efficiently.
Use it on Crushers, Bulwarks, distant elites, specialists, or anything else that needs to be removed without having to fight through the rest of the pack.
There is no need to constantly look for Brain Rupture targets. It works best as a tool for specific problems.
Kinetic Flayer also adds passive Brain Rupture damage while using the staff or greatsword.
Warp Siphon
Warp Siphon works naturally in Havoc because of how many elites and specialists are constantly being killed.
There is no need to force maximum Warp Charges at all times. Let the charges build through normal play and take the extra value when they are available.
Essence Harvest also makes gaining Warp Charges part of the toughness sustain.
Toughness Talents
The build has several different ways to recover toughness, so it does not rely on one specific mechanic.
Quietude gives toughness through Peril generation and quelling.
Soulstealer gives toughness from Warp Attack kills.
Mettle gives toughness from critical hits.
Essence Harvest gives toughness when gaining Warp Charges.
This means toughness is usually being recovered regardless of whether the build is using the staff, Brain Rupture, or melee.
Kinetic Deflection
Kinetic Deflection is one of the main defensive tools in the build.
It is useful for buying time when melee pressure gets through, safely getting revives, and repositioning out of bad situations.
It is also very strong against bosses. Since blocking can be pushed into Peril instead of immediately draining stamina, the build can soak a surprising amount of boss pressure. This is especially useful against Daemonhosts, where Kinetic Deflection can let the Psyker hold aggro and block for a long time while the rest of the team focuses damage.
It is also useful against other bosses when someone needs to temporarily hold their attention or survive a bad position.
The main thing to watch is Peril. Kinetic Deflection is best used to buy time and control aggro, not as an excuse to stand still and tank everything forever.
Adjusting to the Team
The main strength of the build is that the loadout stays useful regardless of team composition.
If the team has strong melee damage, focus more on Bubble and Voidblast so they can fight safely.
If the team lacks a frontline, use the greatsword more aggressively and help hold space.
If armor becomes the main problem, use Brain Rupture more and let Rending Shockwave help soften armored groups.
If the team has enough damage but keeps getting overwhelmed, focus almost entirely on controlling the pace of the fight.
The easiest way to think about the build is:
Bubble deals with ranged pressure.
Voidblast deals with mixed-horde pressure.
Brain Rupture deals with priority targets.
Greatsword deals with everything once the fight is under control.
Kinetic Deflection buys time when the team needs someone to hold pressure.