
Table of Contents

Zealot Build - Warhammer 40k: Darktide
Bonkenomics 101
Zealot Build - Warhammer 40k: Darktide
Class

Weapons


Momentum
Hitting at least 3 enemies with an attack, restores +15% toughness.
Thrust
Up to +20% Strength based on the charge time of your heavy attacks. Stacks 3 times.

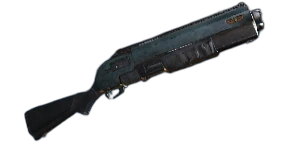
Deathspitter
+6.5% Strength for 3.5s on Close Range Kill.
Full Bore
+20% Strength for 5s when every pellet in a shot hits the same enemy.
Curios

+1 Wound(s)
+13-17% Toughness
+13-17% Toughness
Talent Tree
Description
This build is all about using the hammer to the fullest extent; capable of clearing both hordes and knocking out Specialists and Elites within one or two swings of a fully charged hammer. It takes some getting used to getting behind enemies to give them the BONK, but once you get the hang of it you'll be smashing heretics left and right like it was another day at the office. Remember, killing enemies very quickly is also a form of team support.
Your bread and butter for this build is your heavy attack. Assuming you got the right hammer for the job, it gets bonus power for hitting a lot of enemies and holding the heavy attack button for as long as possible. This will be especially important when fighting Specialists and Elites as all the extra damage stacks up quickly.
WHEN FACING HORDES:
Hold the heavy attack without charging the hammer and start swinging into the heaviest swarms of resistance. You'll be getting toughness back as you hit three or more enemies, and you'll be hit a lot more than that in anything higher than Uprising difficulty. Blazing Piety will also stack and reapply as long as you or your teammates kill at least one enemy. You can use the shotgun or a braced autogun to help with softening up the targets, but don't be afraid to throw yourself in there when the time comes. Be sure to dodge frequently as that applies plenty of bonuses to your next attacks. You can also use the immolation grenade to create a de-facto no-go zone for enemies, as the fire has a respectable time-to-kill, and is useful when shotguns or hammer strikes aren't the best option.
WHEN FACING SPECIALISTS AND ELITES:
When you get into contact with specialists and elites, you're going to do one of two things:
- Charge your hammer, activate Fury of the Faithful, hold the heavy attack for as long as possible, and aim for the weak spots or the back of the enemy, whichever is more readily available.
- Take out your shotgun, aim down the sights and pick them off from range. You'd be surprised at how far the alt-fire shot can reach.
For most encounters (Crushers, Ragers, maybe Mutants, Bulwarks, Maulers, etc.), you'll be using option 1. The guaranteed critical hit plus all the bonuses you've been accumulating will guaranteed that even if they aren't dead as soon as you hit them, then they'll be at low enough health that either you or your teammates can finish the job easily. For enemies like Gunners, Trappers, Pox-hounds, or Bombers and so on - enemies that either try to stay from you or are very dangerous up close - you'll be using your shotgun and aiming roughly for their heads first, and then hammer second. They'll go down in a couple of shots, and the ammo pool will be good enough that it can be used as a long-range specialist killer.
WHEN FACING MONSTROSITIES AND BOSSES:
Don't bother with the grenades or the guns, it's all about the BONK!! Charge up your hammer and heavy attack, activate your ability, and aim directly for the monster's weak spot. With all the bonuses, you will be doing anywhere between 25-33% (and maybe even more) of the monster's health in a single strike; and remember: you have two charges of Fury of The Faithful to work with. Being able to knock off chunks of enemy health like that can not be understated, and will take a fight would normally cause a team wipe into not that much of a fight at all. Just don't be too fanatical and get yourself into more trouble than you can handle.
CAVEATS:
This build doesn't require all 30 points to work effectively, you'll have at least four points left over to use as you see fit. Personally, I used them to get Faith's Fortitude for those extra two wounds. It's nice to have more chances before getting captured; especially on Damnation where getting down is more of a question of "when" and not "if". But this is not necessary, and you can use those points to get other passives as you see fit.
Additionally, you can replace The Voice of Terra with Restoring Faith if you either don't use guns often or notice that you take a health damage frequently. I like using Autoguns and Shotguns in conjunction with my hammer, so I find getting a bit of toughness for each kill to be useful when the danger is too heavy for melee combat.