Table of Contents
Class
Weapons
Curios


Talent Tree
Description
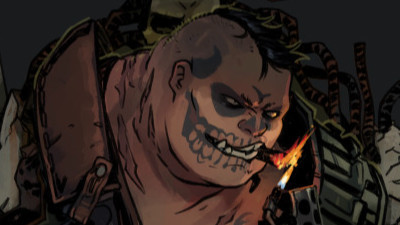
Incendiary Ogryn
So this was a build I put together specifically to fight the Karnak Twins on the secret bell hard mode, maximising DPS to cut them down. That said, I find it versatile enough to work in most auric damnation, and shines in runs with monstrous specials. It shreds boss targets and Monstrosities, without being in the same danger zone that a zealot may have to put themselves in. It is an absolute DPS machine, without needing to be as much of a glass cannon as say, a Psyker would be.
Playstyle
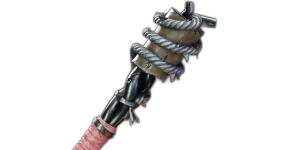
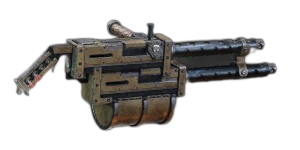
Your ability Point-Blank Barrage should be saved for dealing with Monstrosities or a large group of elites and specials. The Achlys Mk VII Twin-Linked Heavy Stubber has a pretty quick pullout time as is, but being able to circumvent it completely and get straight into firing is fantastic. When combined with Bruiser, you can clear a group of enemies out and recharge half your ability ready for its next use. When fighting the Karnak Twins, this ability should be saved for when their shields are down, so you can apply as much burn and damage as possible. I like to pair this with the "Brunt's Basher" Mk IIIb Bully Club, with Confident Strikes. Most Ogryn weapons will require constant heavy attacks to benefit from toughness regeneration. The Mark III club has a really great light attack moveset. Using light attacks allows greater mobility and more reaction time to deal with trappers. Heavy attacks can still be used when we are getting very low on toughness, but out of all the clubs, the "Brunt's Basher" Mk IIIb Bully Club has possibly the best light attack moveset for dealing with hordes, whilst still doing respectable damage to armoured targets.
Build Path
We have a pretty standard start. Heavyweight increases damage to, and reduces damage from Ogryns. It's a hefty buff to dealing with these large threats for the low, low cost of 1 ability point. Moving over to the left side allows us to pick Smash 'Em! and The Best Defence. Whilst we will be mostly using light attacks, it is good to know that we can rely on heavy hits to replenish a sizeable chunk of our toughness when things start to get a little bit dicey. Both Furious and Lynchpin are not particularly impactful nodes, but are required to pick up the better ones. They are in essence, tax nodes, but do at least provide a small modicum of benefit rather than being completely useless. Spreading out over the top of the tree allows us to pick up both +25 Toughness nodes, which is an absurd amount of defence.
Frag Bomb is the most useful Blitz option for the Karnak twins, as it provides a room clear option when things get too hairy. I've seen many a run ended shortly after one of the gas phases is over, due to being overrun by Maulers or Scab Ragers. This can provide some much-needed breathing room when your whole team is getting overwhelmed. It allows us to path into Soften Them Up, one of the best nodes available to the Ogryn. This increases the damage that we deal ourselves, as well as our teammates, and helps us to ramp our damage up. Make sure to pick up the +10% Toughness Damage Reduction node as we go down. There are 3 of these nodes in the Ogryn tree, and we make sure to pick up all of them to really strengthen our defence.
When it comes to Point-Blank Barrage, there is only one correct way to modify it, and that is by picking up Bullet Bravado into Light 'em up. The burn damage quickly stacks up with a fast-firing weapon such as with the Achlys Mk VII Twin-Linked Heavy Stubber and will absolutely melt everything it touches. It can also be used in a pinch as a defensive tool. Every shot fired replenishes Toughness, and it's possible to face tank a Daemonhost and burn to the ground solo using this tool (not that should be pissing off a Daemonhost in the first place).
Ammo Stash is invaluable. Gunlugger Ogryns have a nasty habit of burning through ammunition, and without something like the Veteran's Survivalist aura, we can run out of ammunition sooner than would be ideal. Extra ammunition not only means that we have more ammo (duh), but also means that ammo pickups will replenish more, allowing our guns to go further. Coward Culling can increase damage to enemies you suppress. Realistically this doesn't come up too often. Not all enemies can be suppressed, so things like Monstrosities will not be hit by it. We take it more for efficiency in pathing, as the middle tree nodes do not benefit us much.
Moving all the way across to the left, we grab Delight in Destruction. This is a pure tax node as we do not have any means of applying bleed to enemies. The only way this will proc is if our allies are running weapons or abilities, so it is incredibly unreliable as a node. However, it is necessary to grab Dominate, which provides some much-needed rending to our build, as well as clear a path for the third and final Toughness Reduction node.
The last of our points we spend down the middle tree. Get Stuck in is... not great. It doesn't proc very often due to our large cooldown timer, nor does it provide a particularly impactful buff when it does proc. Again it is another tax node into grabbing something actually very useful in Bruiser. A 5% Cooldown reduction on elite kills is huge, especially on an ability with an 80-second cooldown, and is vital to get more uses out of our ability. Won't give In, should not (in an ideal world), proc very often. However, it is just more defence to help you get your teammates up when shit hits the fan. Remember in hard mode, respawning allies will be locked in the sin bin, so if you can't save them in time, they will be out for the remainder of the fight. Finally, we end with Arguably Ogryn's most impactful Keystone (even after the nerfs), with Feel No Pain. Whilst there will be some diminishing returns from multiple instances multiplied together, all in all, this effectively means we only take about half our usual toughness damage. Not only will we take less damage, but also means that toughness regeneration talents go further.
(1 - 0.10) × (1 - 0.10) × (1 - 0.10) × (1 - 0.30) = 0.5103. 1 - 0.5103 = 0.4897
Overall damage reduction ≈ 48.97%
Weapons
The "Brunt's Basher" Mk IIIb Bully Club is a versatile weapon, with a great light attack moveset. You can spam Heavy attacks against tougher opponents, or if you want to keep your toughness up, or use light attacks so that you can manoeuvre faster. Mixing heavies and lights in works too, and all the attack types have great cleave whilst still dealing decent damage to armour. Thunderous allows you to more effectively deal with armoured enemies, although Skullcrusher is a viable side-grade. I like to take Confident Strikes so that we can replenish toughness even if we opt to spam light attacks. Our ranged option struggles against carapace, so I like to add extra damage to that and flak to help deal with the hordes we will be facing. It's possible to take Momentum instead of Confident Strikes. It replenishes more toughness, but is reliant on hitting 3 enemies with a swing, meaning it won't proc when you are, for instance, wailing on one of the Karnak twins to get their shield down.
The Achlys Mk VII Twin-Linked Heavy Stubber is the fastest of the three stubbers to equip and also the fastest firing. This comes with the trade-off of having the lowest damage per shot, and also the worst of the three in terms of accuracy. You will want to be fighting enemies at medium range, or firing in short controlled bursts at longer ranges, being aware that many of those shots will be unlikely to hit. However, the reason we pick this weapon is because of its insane fire rate, we can quickly stack up fire stacks. To increase our damage further, we pick up both Blaze Away & Overwhelming Fire. If you plan on using this build only to deal with the Karnak twins, then be aware that they are clad in Flak and Carapace armour. However I like to take this into normal games as well, so swap out the carapace for Unyielding. The weapon naturally does poorly against Carapace and should only be used against these targets if presently under the benefit of Dominate.
Curios
After 1,000+ hours in Darktide, I have a few simple rules when it comes to Curios. Melee classes (Ogryns and Zealot) should take 2x Toughness and 1x Health Curios to give a good mix of defensive stats. Veterans should take 3 Toughness Curios, as they benefit more from Toughness than other classes, owing to their larger toughness pools and skills such as Iron Will. Psykers should run 2x Toughness and 1x Stamina curio to make up for low Base stamina, and to benefit from their faster stamina regeneration. Obviously, there are some caveats to that. A melee centric Veteran might want to run 1x Health Curio and certain knife and stealth builds might want to run a stamina curio. But for the most part, I find this a good rule to stick to, to ensure you have curios that are effective for the vast majority of your builds, especially when starting out when it is difficult to find any curios, much less good ones. Oh and Wound Curios should only ever be used on Zealot Martydom builds. Having Wound Curios actually means that health stims will now heal less on you. I know some people like to take a wound curio 'just in case they go down', but in higher difficulties, there is no guarantee your team can pick you up. It's far better to invest in defensive abilities which prevent downs as much as possible.
For Perks, Always take Extra toughness and gunner resistance. Gunner Resistance is the most useful resistance node as it applies to Scab Gunners, Scab Shotgunners, Dreg Gunners, Dreg Shotgunners and Reapers. This is the largest collection of enemies out of any of the resistance perks. These enemies can absolutely shred you in seconds, and make up a significant portion of the enemies encountered in Auric Maelstroms. The ability is multiplicative, so does have some diminishing returns. 0.80×0.80×0.80=0.512 meaning that we end up with a total gunner resistance of 0.488, just below 50%. I can certainly see the argument to only running two gunner resistance curios (with an overall damage resistance of 36 %) and opting for something else (potentially sniper OR Flamer), but I still value that extra 12.8%.
For the final perk, it depends on your build. If you are using a build which relies heavily on your ability, then run cooldown reduction to more frequently make use of said ability. I find this to be especially powerful on builds which make use of Voice of Command for instance. If your build is not too heavily reliant on your ability, then run for extra health. Again you can tweak this to suit individual playstyle (and the mercy of the RNG-gods as Hadrons bricks yet another piece of equipment), but this is a pretty good rule to aim for.
Strengths
The Incendiary Ogryn build boasts some of the highest DPS in the game, thanks to its combination of rapid-fire and damage-over-time (DoT) mechanics. While optimized for the Karnak Twins on hard mode, this build is versatile enough to perform well in most auric damnation runs and against various monstrous specials. It shines in encounters with boss targets and Monstrosities, providing a significant advantage without the need to take as many risks as other classes like the Zealot. Unlike glass cannon builds such as those for Psykers, the Incendiary Ogryn maintains a solid defensive capability, reducing overall risk while still dealing massive damage.
Weaknesses
The Achlys Mk VII Twin-Linked Heavy Stubber burns through ammunition quickly, requiring careful ammo management and reliance on Ammo Stash perks to sustain firepower. Certain nodes, like Delight in Destruction, rely on allies to apply status effects (like bleed), making these nodes less reliable if team coordination is lacking. Without a Veteran running Survivalist, you may have to be careful with ammunition usage, or risk running out entirely and turning into a lacklustre Bullgryn.
Questions & Answers
Question: Why do the stats, weapons, and abilities in the video not match what's written in this guide?
Answer: I am constantly evolving and refining my builds. As patch notes are released, certain weapons and abilities may change in effectiveness. Additionally, as my skills and knowledge grow, my preferred builds can shift. I aim to provide videos demonstrating the effectiveness of my builds in a Damnation level Auric run as proof of concept. However, these videos may sometimes be outdated. While I strive to keep everything current, Darktide is my hobby, and I may not always have the latest updates in the videos. The information in these guides reflects my most recent thinking and should be considered more accurate than what is shown in the videos.
Video

Azyr Psyker | Smite | Venting Shriek | Empowered Psionics
By Crukih • Updated 1 year ago


Sister of Battle | Immolation Grenade | Chorus of Spiritual Fortitude | Blazing Piety
By Crukih • Updated 6 months ago


Aqshy Psyker | Brain Rupture | Telekine Shield | Warp Siphon
By Crukih • Updated 6 months ago

Ulgu Psyker | Assail | Telekine Shield | Disrupt Destiny
By Crukih • Updated 1 year ago

