Table of Contents

Class


Weapons



Deflector
This weapon Blocks both Melee and Ranged attacks. Additionally, Block Cost is reduced by -30%.

Shred
+4% Bonus Critical Chance on Chained Hit. Stacks 5 times.


Penetrating Flame
Direct hits apply 4 Stacks of 1% Brittleness for 5s. Stacks 20 times

Warp Nexus
Gain between 5% and 20% Critical Chance based on current level of peril.
Curios


+13-17% Toughness
+13-17% Toughness
+17-21% Max Health
Talent Tree

Description
── AT A GLANCE ──
Horde Clear: [5/5]
Crowd Control: [4/5]
Elite Killing: [4/5]
Special Killing: [4/5]
Monster Damage: [3/5]
Survivability: [4/5]
Team Utility: [2/5]
Peril Management: [Moderate]
Skill Floor: {High]
Strengths
- Incredible AOE damage
- Good Stagger
- Very high damage per second
- Often immune to ranged damage
- Decent boss damage
- Incredible mixed horde clear
Weaknesses
- Squishy
- Little team utility
- Can struggle against carapace (Crusher)
- DOT damage can take time to kill
- pubs will ask 'no bubble?'
Aqshy Psyker
Burn them all; the God-Emperor will know His own.
The Aqshy psyker is all about maximising DPS, and it does this by spreading soulblaze to absolutely everything. The Rifthaven Mk II Inferno Force Staff is widely beloved in high havoc for it's ability to soulblaze with theoretical infinite cleave. However the time to build those soulblaze stacks up can take time. DOT damage in darktide works on a logarithmic rather than linear scale, so stacking up quickly is important to deal damage. By pairing this staff with Venting Shriek & Creeping Flames, we acquire another method to quickly add 6 stacks to help reach those higher thresholds more quickly. 6 stacks are applied once peril is above 85%, and shriek applies these in an impressively wide cone, as can be seen below.
Psyker Venting Shriek Radius Test - https://www.youtube.com/watch?v=yHg6tov0vDc
Playstyle
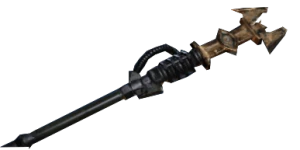
For the majority of the match, you will want to be making ue of your Rifthaven Mk II Inferno Force Staff to apply stacks of soulblaze. The primary attack fires a short spurt of flame. This is a slow and inefficient way of applying stacks as it only applies 1 stack per attack (2 on a critical hit). However it does have good stagger, enough to push back a Dreg Rager, so use it herd enemies away from you. Once you have space, you can channel a secondary charge to hit a concentrated blast and quickly stack up soulblaze stacks. Whenever your peril rises above 85%, look in the firection of the biggest horde you can find and shriek at them to apply 6 stacks. This is enough damage to kill lesser enemies and can take out elites and special if Kinetic Flayer procs, which in turn spreads more soulblaze through Perilous Combustion & Wildfire.
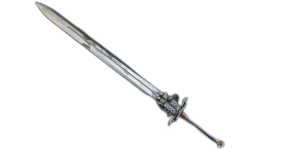
The one negative about the Rifthaven Mk II Inferno Force Staff is that it is actually quite poor at generating peril. Ordinarily this is great as it makes it hard to accidentaly self-destructing. However there are times when we want our peril to be high so that we can quickly vent soulblaze stacks. This is where the Covenant Mk VIII Blaze Force Greatsword comes into play. Three charged attacks can raise peril to 100% and unlike it's single handed cousin, does not require hitting a target to do so. When entering a new area, use the Covenant Mk VIII Blaze Force Greatsword to quickly generate peril and Venting Shriek at any new horde of enemies you come across, to knock them back and set them on fire. Following up with the Rifthaven Mk II Inferno Force Staff means that reaching those higher soulblaze stacks occurs much faster, reducing the time to kill. The actual projectile attack itself does minimal damage without charging, but it can help contribute some additional AOE damage. Mainly however, it is used as a tool to manipulate our peril.
Build Path
Weapons
The Covenant Mk VIII Blaze Force Greatsword is favoured over its counterpart the Covenant Mk VI Blaze Force Greatsword due to it's greater single target Heavy damage. The meain threat that we cannot deal quickly is Crusher. Whilst arguably the Maccabian Mk IV Duelling Sword is better for dealing with these threats defensively, due to their parry mechanic, the greatsword provides two additional benefits. The first is Deflector. Whilst we are often safe whilst flaming enemies thanks to Empathic Evasion, there will be times when there are no enemies close, and a horde of gunners with poor trigger discipline. Deflector can protect us in bad spots and when paired with Kinetic Deflection, can quickly build up peril to empower a Venting Shriek. The second benefit is it's special attack. Whilst we will be rarely using it to attack often, its special charge will often not be charged. an uncharged warp slice does minimal damage, but can still proc Kinetic Flayer and is a good way to quickly generate peril in a pinch for Venting Shriek.
The Rifthaven Mk II Inferno Force Staff is our primary weapon throughout the mission. To get the best use out of it, make use of funnel points and chokepoints. Flames deal damage based on the base armour type of the enemy, so I like to pick up extra flak damage since it's the most common armour type you'll encounter. More importantly, though, is how the flame staff works with critical hits. The majority of the damage comes from the burn stat, and soulblaze stacks increase damage exponentially, so even a modest increase of 5% leads to a massive damage increase across all damage types. The burn stat technically caps damage over time at 75% with 14 stacks. If you want to min max your weapon, you can push for this, but I kept the dump stat at 60% for simplicity's sake (and because of rounding errors, I'm not fully certain if it maxes out at 75% or 76%, and I don't want to spread misinformation). For blessings, Warp Nexus is a natural choice for increasing critical chance and Penetrating Flame helps us better deal with armoured threats such the Crusher and Scab Mauler
Curios
- 2 x toughness curio
- 1 x health curio
- 3x ability cooldown
- 3x revive speed
- 2x gunner resistance
- 1x toughness perk
Whilst you can make adjustments based on individual builds, I find this to be a pretty good mix of stats for most psyker builds, and is a good starting point to aim for, as I know how tedious it can be to find those +17 toughness and +21 health curios. Block efficiency and stamina regeneration can also be useful depending on what you are looking for, and you can adjust your loadout to what you need. In general, if you are looking for more toughness or health, it is more efficient to pick up toughness perks and a health curio, as a curio gives you +21% health compared to +17% toughness, whereas both versions of the perk only give +5% health.
Whilst the psykers innate health is low, and at high Havoc we will still get 1-shot by crushers and maulers, I have found the extra health useful in mitigating the myriad forms of corruption present. Cooldown reduction lets use our abilities more frequently. Abilities are some of the most powerful tools any budding varlet has, and should be prioritised in the majority of cases. Whilst everyone should be working hard to avoid dying, there will inevitability be times when we need to make a quick pick-up. Kinetic Deflection makes this possible, provided there are no heavy hitters in the mix, and extra revive speed can help make the difference to losing a teamate or not.
Gunner Resistance is the most useful resistance node as it applies to Dreg Gunner, Dreg Shotgunner, Scab Gunner, Scab Plasma Gunner, Scab Shotgunner, and Reaper. Please note, this reduction does not apply to basic gunner type enemies, and these previously unassuming enemies will become some of the biggest threats in high havoc. This is the largest collection of enemies out of any of the resistance perks. These enemies can absolutely shred you in seconds, and it's not uncommon to see teammates seemingly insta-die when faced with a firing squad of them, especially with toughness grace period being removed. The ability is multiplicative, so it does have some diminishing returns. 0.80×0.80×0.80=0.512
3x Gunner resistance = 48.8% damage reduction
2x Gunner resistance = 36% damage reduction
It's up to you whether you choose to take all 3, or use that last slot as a flex pick. I personally like to pick up some extra toughness, but block efficiency is also good because of its synergy with Kinetic Deflection. Since Kinetic Deflection converts a blocked attack's Stamina cost into Peril at a fixed rate, anything that lowers the underlying Stamina cost of a block also lowers the Peril you take on for absorbing it.
Peril gained = Blocked attack's Stamina cost × 0.25
Extra block efficiency therefore compounds twice over: you're spending less Stamina per block in the rare cases you do dip into it, and you're generating less Peril from every block that Kinetic Deflection converts.
Questions & Answers
Question: How can I ask you a question?
Answer: Of course, provided you are kind and respectful, I have unforunately been banned from discord due to their terrible AI automated detection system. If you wish to contact me, the best way is through Discord's competitor Stoat in the link below. I do apologise as it is inconvenient and a less commonly used app. Please be aware, Darktide and Youtube are both my hobbies. Whilst I will attempt to get back to you as soon as possible, it may take some time before I can respond.
Server: stt.gg/a0bSbDFW
Question: Why do the stats, weapons, and abilities in the video not match what's written in this guide?
Answer: I am constantly evolving and refining my builds. As patch notes are released, certain weapons and abilities may change in effectiveness. Additionally, as my skills and knowledge grow, my preferred builds can shift. I aim to provide videos demonstrating the effectiveness of my builds as proof of concept. However, these videos may sometimes be outdated. While I strive to keep everything current, Darktide is my hobby, and I may not always have the latest updates in the videos. The information in these guides reflects my most recent thinking and should be considered more accurate than what is shown in the videos.
Video


Other builds by Crukih