Table of Contents
Ogryn Build - Warhammer 40k: Darktide
Ogryn Bonepicker
Ogryn Build - Warhammer 40k: Darktide
Class
Weapons
Curios


Talent Tree
Description
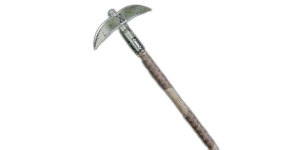
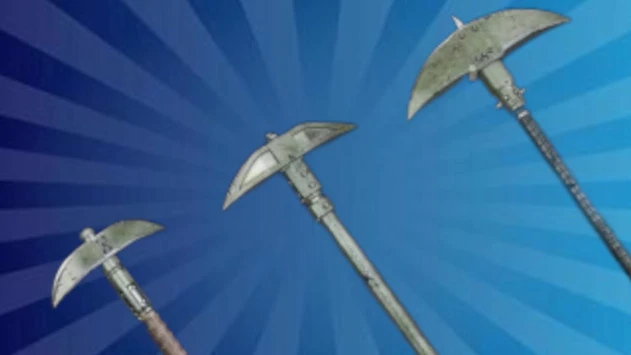
The biggest drawback on the pickaxes is that despite their huge size, their range isn't any longer than Ogryn's other options and is considerably shorter than the Shovel V's special attack. This, combined with their slowness, makes it difficult to close the distance on enemies and hit them before your team does. Karsolas can build them fast, but the other two can struggle to build up stacks.
The Karsolas (Light) and Borovian (Medium) picks have a "Pull" special that yoinks enemies, stumbles them towards you (depending on their weight), and applies a debuff that makes them take 10% more damage for ~6 seconds. It does not stumble or move Muties or Monstrosities. To make use of the "Pull" special while on the move, you want to Pull while sliding, then slide again and charge the strikedown heavy while sliding. This lets you enter combat at basically full speed with a powerful strikedown heavy.
Note: the talents used are for that particular karsolas build. Vary them based on your preferred blessings and weapon. Crunch in particular shouldn't be used on any other build besides Karsolas Thrust.
Karsolas (Light)
The light pickaxe has the simplest horde-clear moveset, but that doesn't mean it is a lightweight against armor. The weapon special is a powerful stagger that pulls the enemy slightly closer. After using the weapon special, the next attack (light or heavy) becomes a powerful strikedown. The next light after that combo is also a strikedown.
Two best ways to build it:
1) Heavy-focused: Thrust and Slaughterer or Slow and Steady or Headtaker
- Slow and Steady usually doesn't do anything. Most heavy hits will refill your toughness even without this blessing and in especially bad situations you often don't have the luxury of fully charging up.
2) Light-focused: Slaughterer and Headtaker
Dump stat: Defenses (need 50% or more still)
You can't hit more than 2 maulers with one attack, and only 1 mauler if you hit the head. When up against multiple maulers, Light-attack build uses pulls and strikedowns, whereas Heavy-attack build uses chained heavies aimed at the torso and occasional Yoinks/Pushes to interrupt.
Heavy Combos
- Heavy Chain - Actually good now that Heavy 2 no longer has an awkward windup. Bread and butter.
- Heavy + Light - less dps but against trash enemies the first heavy will usually kill most stuff and a light is plenty to clean up. Try to make sure your heavy is Heavy 1 (from right side) because Heavy 2 has a slightly longer windup.
- Special + Heavy + Light: go-to combo against Bulwarks and anything with a lot of HP. Great against ragers and other medium elites when you lack buffs. Great to kill a mutant (use the special before they get to you). The special won't pull them, sadly. On Heavy build this will kill a crusher with 1 stack of Heavy Hitter, or Crunch, or Headtaker over S&S. On Light build it will kill a crusher with nearly maxed buffs.
- Push Attack + Heavy + Light: follow-up combo for anything that you've already hit with the special combo but isn't dead yet. The push attack deals more damage than the special so it's useful when they already have the debuff. It's also a useful combo when you have a mixed horde and need to push everything before taking out a priority target.
- Against Bulwarks, you don't have enough time for the push attack combo after the special combo. Your combo is Special + Heavy + Light + Light. After that they'll attack, wait until they start the attack to pull them again.
Light Combos
- Light 1,2,3 + tap block: use in hordes. Avoids the strikedown of Light 4. You can just do a full light chain if there's a beefier target you want to take out, to maintain confident strike, or if you're just lazy it's not a big difference.
- Special + Light + Light: use against medium elites when you have Heavy Hitter up.
- Push Attack + Light + Light: Use to push trash while taking out a priority elite.
Note that you can use pushes without doing a push attack by holding block for just a moment after pushing. It can be helpful to push before charging a heavy in cases where you don't want to push attack.
Blessings
S Tier
- Thrust - Thrust charges at the same rate on all weapons that use it, but the point in the attack where thrust starts charging varies between weapons. On Karsolas, it starts charging almost right away, way earlier on the Karsolas than on the heavier picks. You'll generally get 1-2 stacks just doing normal heavies without consciously overcharging them. Thrust starts charging a little slower when doing the strikedown after a push attack or pull, compared to the regular heavies. Thrust pairs great with Slaughterer or Headtaker; you end up with a heavy-attack focused build that can kill crushers in a Special-Heavy-Light combo when fully buffed. Slow and Steady is usable, but the heavy attack toughness talents are usually enough. I'd recommend Confident Strike instead if you want more toughness restoration, or even putting a point in Too Stubborn to Die.
- Slaughterer: gives a good Strength boost, often overkill but it helps you kill elites much faster when it's up. Strength increases damage, cleave, and stagger.
A tier (great)
- Headtaker - Headtaker generates Strength in more situations, even if it's less max than Slaughterer. Better against bosses and when starting a fight against armor.
- Confident Strike - up to 8% toughness on subsequent hits on any target after attacking. Resets if your combo resets from blocking or not attacking for a couple seconds. Strong defensive option. Confident Strike will NOT trigger from your first attack after blocking, which means it never triggers from Push Attacks or from your first attack after block cancelling. It does trigger from the weapon special, but your first attack after a weapon special will not trigger Confident Strike. Good for light attack builds.
B tier (good)
- Wrath - +200% max cleave is nice, but Strength takes care of your cleave needs just fine.
- Slow and Steady - stacks like Thrust while charging heavy attacks, but restores 8% toughness per stack, up to 24%. Don't use without Thrust. Don't use on other pickaxe marks because it's too grutting slow.
C tier (usable)
- All Or Nothing "up to 40% power as stamina depletes" in actuality it gives 1 stack of 8% power for every 20% stamina you're missing, with 5 stacks only at 0%. You'll use up a lot of stamina just sprinting around, and you can throw in push attacks to use some up in combat. Highly recommended if you like push attacks or blocking a lot, but the Karsolas push attack isn't used as often as other picks. Note that you'll rarely ever have the full 40% even when purposely keeping it low as having any stamina at all lowers it to 32%. Make sure to take off any curios with +Stamina regen.
- Torment: 24% power after using weapon special. Anytime you need more power it's often an enemy that is worth staggering first anyway. Makes it much easier to hit the breakpoint for the short crusher kill combo. Only issue is the duration is way too short
- Thunderous - 10% brittleness (max 40) per hit is decent in theory, especially on a light attack build. But it doesn't help this weapon as much in practice because it has very high modifiers against armor already and if someone else is already applying brittleness yours becomes less valuable.
Borovian (Medium)
Plays similarly to the Karsolas. It's noticeably slower (both in attack speed and move speed) with a little more damage, especially against big targets. it's a powerful weapon, but your slow speed also leaves you vulnerable to waves of specialists. It works decently in this build, but the Karsolas (Light) pickaxe works better for it.
If you get a few buffs, can one-shot muties with Heavy 2. Use special as they approach for a faster strikedown.
Dump stats: Cleave Targets, Defenses
Blessings
Same as Karsolas; All or Nothing goes up to A tier because the push attack is really good and can be used in combos. It also makes one-shotting muties easy. Thrust down from S tier to A tier, it is still good but the charge time starts much later than on Karsolas.
I recommend Slaughterer and either Thrust or All or Nothing.
Combos
Multi target A: Light 1 + Push Attack: simplest combo. It handles packs of ragers and hordes with ease thanks to its speed and stagger. The push attack damage is lower than normal attacks, but with a bit of power it will kill plenty. Great synergy with All or Nothing. If using Confident Strike, you should instead Push Attack + Light 1+2
Multi target B: Light 1 + Tap Block - use to kill horde faster when you don't need to be defensive. If you have
headtaker & slaughterer, this is your nosh and butter. Zero synergy with Confident Strike.
Multi target C: Push Attack + Heavy 1 (+ Light 3): use against hordes, and especially small groups of medium Elites or when you need to conserve stamina compared to the light attack version. Great synergy with Thrust. The light attack combos into the push attack very quickly, but can be skipped if you need to block early.
Multi target D: Heavy 1 + Light + Light + Light. Use with confident strike.
Versatile A: Light Combo. Use when there's 3 or fewer enemies or you need to utilize Confident Strike. Mix in Heavy 2 as needed.
Versatile B: Special + Light + Light - for 1-2 medium elites.
Single Target A: Special + Heavy (+ Light) - for big stuff
Single Target B: Special + Heavy + Light + Light + Heavy - longer combo for bosses and Reapers.
The Borovian is a great choice for Gunlugger builds. See here: https://darktide.gameslantern.com/builds/9c63953b-802e-4106-8e97-1b9c9d1cb03b/gunlugger-pickaxe
Branx (Heavy)
Lights are strikedowns, and so is Heavy 1. But lights chained after the second heavy become wide attacks. Your main hordeclear combo is Push Attack + Heavy 2 + Light then repeat Heavy 2 + Light.
The special attack is a push, rather than a pull, but it applies the exact same Pull debuff as the other picks. It has a bit of an uncomfortable delay if you try to use it after a heavy attack so it is best used after a light attack.
Recommended blessings: Thrust and either Slaughterer, Headtaker, or Wrath, in that order of recommendation. I don't recommend using Slow and Steady as most of the extra toughness regen will be overkill with talent regen. Confident Strike is actually better than Slow and Steady for survivability because it lets you regenerate toughness on the lights or specials attacks in between heavies which helps your survival more than increasing heavy hit restoration. Just keep in mind pushing or blocking resets it.
Combos
Heavy 2 + Light main horeclear combo for this weapon. It gets noticeably faster once heavy hitter reaches 5 stacks.
Push Attack + Heavy 2 + Light most common way to open the combo.
Heavy 2 + Light + Special + Heavy 2 alternate combo that applies Pull debuff.
Heavy 1 + Light + Heavy 1 single target combo when you don't have 5 stacks of heavy hitter yet
Heavy 1 + Light + Light + Heavy 1 single target combo when you have 5 stacks of heavy hitter already.
Ranged Weapons
Pickaxes are fairly slow, so your ranged weapon should be something you can equip quickly to deal with specialists. If not running rocks, it also needs to be able to deal with Gunners. Here's a breakdown in order of my recommendations for this build.
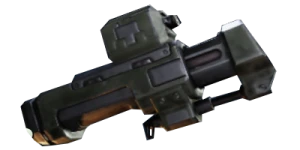
Kickback can really tear through groups and has great ammo efficiency. Knocks down enemies chasing your teammates, as well as shooters so you can move up for the kill. I recommend any combo of Blaze Away, Inspiring Barrage, Run and Gun, and Expansive, though others like Surgical can be good too.
- Blaze Away offers a great damage bonus while spamming, but heavy hitter stacks will be lost while you're shooting. Which is fine, because they don't actually increase ranged damage anyway. If you run it, Inspiring Barrage can keep you topped up in case something hits you while you're distracted. Note that in both cases the buff actually applies to the shot that increases the buff, so you're always getting an at least 8% power increase when using this blessing.
- Expansive offers a nice, but brief buff to your melee attacks. It can be nice to whip it out and shoot a pack of armor to knock them down, then charge up a heavy to finish the first one off. It's just a pain to use a quickswap ability with the Kickback because of its slow draw speed. Punishing Fire is tempting to run with it, but is bad for several reasons. First, it's only a 15% ranged buff so even 2 shots of blaze away will be better. Second, it's a pain to juggle both blessings on the kickback because of the reload and the long draw speed.
- Run and Gun is nice just for having the tighter spread for killing specialists more easily. Though keep in mind that you can't reload while sprinting. Also, due to minimum pellet mechanics, tighter spread doesn't affect dps against a single target at long distances, and actually lowers DPS long distance against hordes due to fewer enemies being hit at all.
- Minimum Pellet Count: as long as at least 1 pellet hits an enemy, it will deal extra damage as if 10-12 had hit, depending on the enemy's armor type.
- Kickback currently fires 32 pellets
- Flak and Unyielding always take damage from 10+ pellets, as long as 1 hits
- Other damage types always take damage from 12+ pellets, as long as 1 hits
- Hitting more pellets on an enemy than the minimum pellet count does normal damage
- Minimum Pellet Count: as long as at least 1 pellet hits an enemy, it will deal extra damage as if 10-12 had hit, depending on the enemy's armor type.
- Surgical offers guaranteed crits, but the weapon doesn't do much more crit damage so it's mainly useful against Crushers or to meet the breakpoint for a mutie 1-shot.
Grenade Gauntlet is basically just a reloadable rock whose special attack can be used as emergency crowd control against big groups of scab ragers and maulers (the special counts as a heavy attack for maintaining heavy hitter). The reload is long but I think of it as 4 rocks you get every single fight, then I have rocks when I need to reload. It's also good at clearing specialists behind a horde (jump and shoot, they're taller than the horde), poxbursters, and snipers up to 40 meters away. Two shots will kill a Reaper, and 1 will open up a Bulwark or knock down a Crusher to help a teammate.
- Flak and Maniac for perks so you can 1-shot all light elites and specialists with a headshot
- You need 1 stack of Pinpointing Target blessing in order to 1-shot flamers. That blessing also helps you take down Reapers in 2 shots.
- Second blessing I like both Gloryhunter (35% TN on elite kill) for helping against gunners and shotgunners, or you can use Explosive Offensive to get a 15% power boost when chaining multiple special attacks.
Ripper V is quite reliable, much better range than the kickback, especially firing unbraced shots in controlled bursts. You can also slap on Can Opener to help debuff armor and bosses. Good choice if you want to run Unyielding instead of Carapace on your pickaxe.
Stubbers are fun. Achlys (light) is the only one that can be pulled out quickly, whereas Gorgonum has better stats but horrible draw speed.
Rumbler with Blaze Away and Blast Zone, 4 shots is equivalent to a frag bomb.


