Table of Contents

Class

Weapons


Thrust
Up to +20% Strength based on the charge time of your heavy attacks. Stacks 3 times.
Confident Strike
+8% toughness on Chained Hit.


Gloryhunter
+35% Toughness on Elite Kill.
Pinpointing target
+8% Strength every 0.4 seconds while aiming, stacking 5 times. Discharges all stacks upon firing.
Curios

+17-21% Max Health
+17-21% Max Health
+17-21% Max Health
Talent Tree
Description
"Them 'eretic Crushers think they so strong, so tough, but they ain't. I'm strongest. I've got me Emprah', I've got me little'uns, and I've got me pick! AND IM GONNA TURN THEM PUNY CRUSHER 'EADS TO MUSH!!!"
~ Strog, Ogryn Warrior, Moebian 9th
Overview
It's all about being the biggest and the toughest, and nobody is bigger and tougher than an Ogryn. This build seeks to truly be a generalist on the battlefield, equipping the Ogryn to have extremely high survivability, while also having an answer to every threat. It focuses on the newly released pickaxes to turn the Ogryn into the loyalist equivalent of a Crusher, able to strike down any elite you see in one hit. It seeks to be as optimal as possible, only giving you as much damage as you need, meeting as many breakpoints as possible. What you can't demolish with your melee, you'll be able to quickly turn to mist with your Ranged, combining the high damage and crowed control of the pickaxes, with some of the best Specialist shutdowns the Ogryn has in the Ranged department. In cases where you can't focus down high priority targets, you have a myriad of crowd control options, from charging, to pulling, to shooting, and then some. Below I've covered all three pickaxes, as well as the 3 Ranged weapons I believe compliment the build to the fullest. If you're looking for a build that is a Jack of All Trades, the Ogryn Crusher is for you. I've spent weeks gathering as much information and numbers through countless testing to present below. Good luck, and remember: Blessed is the mind too small for doubt, and the Ogryn is blessed indeed.
Going into the Talents tree, the build starts out with general toughness perks at the top of the list, as well as Heavyweight and Furious which are perks for free damage. After that, the build can go into any grenade, but it opts for Frag Bomb, as the main pickaxe for the build benefits greatly from Soften Them Up, and Frag Bomb is a much better utility pick over Bombs Away! Feel free to pick whichever you like in your playstyle. The extra Toughness node helps the Ogryn be just the slightest bit tankier on top of the toughness damage reduction taken after. If you are opting for Big Friendly Rock (possibly because you're using the Branx which I detail below) then just mirror the tree with slam and the same toughness option. Next the tree has two choices of Indomitable and Loyal Protector. Loyal Protector can be fun, but Indomitable provides much greater utility by providing a relocation tool, a large stun over its duration, and toughness regeneration with Stomping Boots. Overall while I strongly recommend Indomitable, Loyal Protector can be built into as well if you prefer. After that there are two main picks that follow. The first is Batter, which due to how well it works with Delight in Destruction further down, should be on almost EVEY Ogryn build that is not a Gunlugger. Its free passive damage that provides free damage reduction. Next to it we have Crunch! which is required heavily for most variants of this build. I detail below how some of the weapons can get by without Crunch! but they are very weapon stat dependent and may be hard to get online. This perk however, combined with Thrust IV on a pickaxe, will provide one shot breakpoints on every single enemy (though the only ones that really need it are Ogryn enemies.) After that the build goes straight down into Bonebreaker to save on points, and then splits between the middle and right tree. Delight in Destruction is a must pick with Batter to add on more survivability, and then we take Too Stubborn to die for more survivability and to get No Stopping Me which will allow you to Take risky plays such as targeting a Crusher inside a mixed horde, while guaranteeing the kill even if you're smack a bit. Due to the high damage and slow attack speed of the pickaxe, the build pivots down into Feel No Pain rather than Heavy Hitter. As detailed below, the pickaxes meet all the major Breakpoints without any stacks of Heavy Hitter (Except the Karsolas) so instead the build focuses into more survivability. Bruiser is another best in class pick for high ability uptime, so it builds down into it from Get Stuck In. After that, both No Pushover and Wont Give In are both equally meh. Pick whichever you like as the main goal is just to get down into Feel No Pain. With Feel No Pain, all you really need is the standard keystone. However, taking Strongest! can be nice to help keep your stacks high. Pained Outburst is a niche pick to get hounds off of you if you're last alive, and Toughest! only applies to passive toughness regeneration which is much weaker than active sources that the Ogryn has plenty access to. If you would like to take Strongest, I recommend removing the toughness damage reduction node on the left side. While the build can be tinkered around with, I have found that this is one of the best Ogryn builds I have used on Auric Maelstrom. You wont be the highest damage on the team, but you will be able to take the most punishment, on top of having an answer to every enemy on the field, letting you fill any role your team might not have.
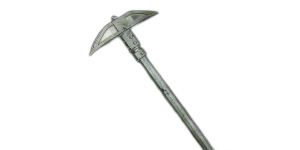
Melee Weapons
This build focuses on making the most out of the new pickaxes added to the game. Other weapons make work with this build, but this guide will only be going into the 3 pickaxe variants.
Borovian Pick Axe
Perks:
- +25% Damage Carapace
- +25% Damage Unyielding
Blessings:
- Thrust IV
- Confident Strike IV or Slow and Steady IV
[Ideal Combos]
Single Target Combos:
- Special Attack -> Heavy Attack
- Light Attack -> Heavy Attack -> Light Attack
Horde Combos:
- Heavy Attack -> Light Attack
- Shove Attack -> Heavy Attack -> Light Attack (Can then be Chained into combo 1 or repeated as normal)
- Heavy Attack -> Light Attack -> Light Attack -> Shove Attack (Good for triggering Confident Strike)
note: After any Heavy Attack (Strikedown or Sweep) one light Attack will lead into the Sweep Heavy, two light attacks will lead into the Strikedown Heavy. Shove Attack will always lead into Sweep Heavy.
The Borovian Pick has a couple of advantages compared to its heavier brother the Branx. The first and most obvious is the weapon's special attack, It pulls targets in and stuns them (minus Mutants and Bosses), as well as grants a natural debuff of around 10%, leading into a Heavy Strikedown. With Thrust IV, +25% Carapace, Soften Them Up, and Heavyweight (and a good Stat roll,) this combo can One Tap* Crushers at 3 stacks of Thrust without Crunch! Though due to the pull doing slight damage it's technically not a true one tap. With Crunch! it will do a true One Tap on its strikedown alone.
The second advantage is its easier access to horde Combos, and better use of Confident Strike. In a pinch, it's starting light will be good for single target, and it's starting Heavy will be good for crowds, whereas the Branx starting light AND heavy are both strikedowns. Its access to a horde combo with chaining lights helps confident strike activate faster when in need.
At the end of the day it's personal preference, but the build is entirely built around the Borovian, whereas the Branx will need slight adjustments.
[Ideal Stats]
Now unfortunately, for the Borovian there are 3 build differences entirely dependent on the stats of your weapon, and a god roll can really change the build. Your main focus stats are Penetration, Damage, and First Target. For most variants you will want to use the listed build up above, as this was designed for ease of access.
If you manage 77% in ALL THREE stats, you can hit the breakpoints to One Tap* Crushers and Reapers without Crunch! You will however need to replace it with the +5% Heavy Melee Damage node at the bottom of the tree, and be at 3 stacks of Thrust. Crushers will also have to bleed to death from Batter.
If you somehow are lucky enough (or the itemization rework makes it easier) to get 79% in ALL THREE OF THOSE STATS you can One Tap* Crushers and Reapers without the +5% damage boost. In this case, I like to grab one of the toughness damage reduction nodes at the bottom, but you can sacrifice the Strongest! node for the other toughness damage reduction node. Getting 3 stats at almost the highest possible level AND getting the perks and blessings you need is near impossible with the current economy, but if you're lucky, it can push the build over the edge.
[Ideal Breakpoint Combos]
This will cover any important breakpoints for elites and specials that should be consistent across all builds of the Borovian with the listed ideal stats. The only change is that if using the variant without Crunch! Bulwarks will fall out of one shot* range. For most single targets you will want to open with a pull to both stun and setup an easy follow-up, but in mixed hordes that all goes out the window unless you find openings, in which case just stick to horde combos.
Bulwark, Reaper, Crusher, and Mauler: Pull + Full charged Strikedown Heavy to the head
Both Ragers: Pull + Heavy with 2 stacks of Thrust IV
Pox Hound, Dreg Flamer, Scab Flamer, Sniper: Pull + Light Attack to the head, or uncharged opening heavy.
Tox Bomber AND Scab Bomber: Opening Light Attack to the head.
Mutant: Heavy Strikedown with 3 stacks of Thrust IV, or Pull + Uncharged Heavy Attack.
Both Shotgunners: Pull + Heavy/two Light Attacks, or Opening Heavy at 2 stacks of Thrust IV to the head
Scab Gunner: Opening Heavy with 3 stacks of Thrust IV, or Pull + Heavy/two Light Attacks
Dreg Gunner: Pull + Uncharged Heavy, or Opening Heavy with 3 stacks of Thrust IV + Light Attack
Branx Pick Axe
Perks:
- +25% Damage Carapace
- +25% Damage Unyielding
Blessings:
- Thrust IV
- Slow and Steady IV or Confident Strike IV
[Ideal Combos]
Single Target Combos:
- Heavy Attack -> Light Attack
- Light Attack (Repeat)
Horde Combos:
- Shove Attack -> Heavy Attack -> Light Attack (can cycle between Heavy and Light once started)
- *Special Attack -> Heavy Attack -> Light Attack (can cycle between Heavy and Light once started)
*Special Attack can be good for extra range, but otherwise is mediocre.
The Branx has an awkward Shove with the head of the pickaxe that chains into its Sweep Heavy. This is a major downside as the pull the other two pickaxes gets provides a valuable stun. It doesn't benefit as well from Soften Them Up without guard canceling to regain access to its Heavy Strikedown. However, it also doesn't need Soften Them Up as it meets or beats all major breakpoints, reliably killing every non-boss with a fully charged strikedown Heavy. Its notable drawback is lack of opening horde attack without a setup through a shove or special attack. However, it can kill smaller elites and disablers with much more ease. You can opt to take Big Friendly Rock with the Branx, as Soften Them Up is not required as the Branx special attack is much less useful than the pull its two smaller brothers get. This can give a reliable disabler killer if you're opting to use the Rumbler or Kickback. Due to its slow attack speed and lack of light attack horde combos, the Branx sees much more benefit in Slow and Steady for toughness regen over Confident Strike, but both are still decent options.
[Ideal Stats]
Much like with its smaller brother, the Branx has some weird breakpoints that are even worse. It either requires Thrust IV and Crunch! to meet its breakpoints on Ogryn enemies, OR it requires 80% in Damage, 79% in First Target and Penetration, PLUS +5% Heavy Melee Damage Boost node (which requires a bit of reworking on the build) just to have a Crusher bleed to death from one hit. However, with a decent roll, and Crunch! you can one shot Bulwarks to the head. Another option is to replace Unyielding with +10% damage to elites. This also removes the need to take Crunch and the +5% damage node, but Reapers will need a follow up light attack to handle, and Bulwarks will take much longer to kill.
[Ideal Breakpoint Combos]
The Branx is all about brute strength. there's no pull stuns, no slight setups, nothing. You swing and kill whatever you want in almost one hit, even if its a slow hit.
Bulwark: Full Charge Heavy + Light
Reaper, Crusher, and Mauler: Full Charge Heavy to the head.
Dreg Rager: Heavy at 3 stack of Thrust IV to the head.
Scab Rager: Heavy at 1 stack of Thrust IV to the head.
Pox Hound, Trapper, Both Shotgunners, Both Gunners, Mutant*: Heavy to the head. (Mutant is easier to kill with full charge heavy due to its movement)
Dreg Flamer, Scab Flamer, Sniper, Scab Bomber, Tox Bomber: Light to the head.
Karsolas Pickaxe
I want to quickly get this out of the way: I DO NOT recommend this pickaxe with the above build. It works far better with heavy hitter to make up for its lower damage compared to the other two, and has a much stronger focus on crowd control, even replacing the First Target stat with a Crowd Control stat. It is a great weapon, but it simply doesn't do what all this build sets out to do. Nevertheless, I will include a breakdown of the weapon to use with the above build. Mileage may vary.
Perks:
- +25% Damage Carapace
- +25% Damage Unyielding or 25% Damage Maniac
Blessings:
- Thrust IV
- Confident Strike IV
[Ideal Combos]
Single Target Combos:
- Pull + Heavy Attack + Light Attack
- Shove Attack + Heavy Attack + Light Attack
Horde Combos:
- Heavy Attack (Repeat)
- Light Attack + Light Attack + Light Attack + Block Cancel
- Light Attack + Light Attack + Light Attack + Heavy Attack + Light Attack (Can either Block Cancel or combo into Heavy Attack + Light Attack on repeat)
- Heavy Attack + Light Attack (Attacks at a slight angle)
- Light Attack + Heavy Attack (Attacks fully horizontal)
[Ideal Stats]
As stated, the Karsolas Pickaxe does not have a Single Target modifier, and instead has a Crowd Control modifier. This makes it really good at dealing with crowds and mixed hordes. With good rolls and a proper build, the only thing stopping this weapon's horde clear is carapace and Bulwarks. In a build with Heavy Hitter, it benefits from blessings like Headtaker and more. Not to mention it benefits the best out of Confident Strike with its several chaining light hordes. However, for the build listed above, it sadly misses the mark a bit. For starters it not only hard requires Crunch! just to do one taps* with its pull, but it also needs at least 73-74% in both Damage and Penetration just to make Crushers bleed to death. This can be alleviated by taking Torment instead of Confident Strike, but then you're sacrificing a great source of toughness recovery that the pickaxe provides. If you're dead-set on a Feel No Pain build with the Karsolas, I recommend at least 75% on Damage and Penetration. You'll also need to make choices on perks. Taking maniac turns Ragers from requiring a pull and a fully charged Crunch! heavy to kill, down to a pull and just two charges of Thrust IV. Overall, this weapon sacrifices a lot of elite clear for its better horde control.
[Ideal Breakpoint Combos]
These will be listed for running Carapace and Unyielding. The Maniac version changes the breakpoint on Dreg Ragers to a pull and 2 stacks of Thrust IV Heavy.
Bulwark: Pull + Full Charge Heavy + Uncharged Heavy
Reaper, Crusher, Mauler, Dreg Rager: Pull + Full charged Strikedown Heavy to the head
Scab Rager: Pull + Heavy at 2 stacks of Thrust IV
Dreg Gunner: Pull + Heavy at 1 stack of Thrust IV (Damage and Pen at 77% will kill with full charge opening Heavy)
Mutant: Strikedown Heavy at 3 stacks of Thrust IV (Can be achieved by using the pull on the air and timing the heavy to come out when the Mutant arrives)
Dreg Shotgunner and Trapper: Opening Heavy at 3 stacks of Thrust IV
Scab Gunner: Opening Heavy at 2 stacks of Thrust IV
Scab Shotgunner: Opening Heavy at 1 stack of Thrust IV
Pox Hound, Sniper, Both Flamers, and Both Bombers: Uncharged Opening Heavy
Ranged Weapons
There are personally only 3 ranged weapons I prefer to run, the Grenadier Gauntlet, the Kickback, and the Rumbler. The Ripper Guns and Heavy Stubbers are not bad weapons, but I find the Ripper Guns lack the utility this build needs, and the Heavy Stubbers lack the ready speed and Time To Kill (TTK) for quickly taking out disablers and specialists. Both have their merits on other builds, and if you enjoy those weapons I suggest looking at other guides that utilize them to learn more.
Blastoom Mk III Grenadier Gauntlet
Perks:
- +25% Damage Maniacs
- +10% Damage Specialists or + 25% Damage Flak
Blessings:
- Pinpointing Target IV
- Gloryhunter IV
The Grenadier Gauntlet (GG) is best for being able to deal with single targets at any range. It has an easier arc to understand than the Rumbler, and when mastered can kill targets at any range due to lack of damage falloff. It has a higher magazine size and ammo capacity compared to its other explosive counterpart, but slower reload and damage across a wide area. It is a projectile weapon, so some skill will be needed in leading shots on moving targets, but when mastered, there will not be a single Specialist or Disabler on the field that you cannot deal with. It also can be fired at your feet to quickly stun enemies around you.
[Specialist vs. Flak]
Two of the most popular perks to take on the GG is damage against Specialists and damage against Flak, with different builds swearing by one of the other. After extreme testing its not hard to see why as each weapon provides slightly different utility. I went ahead and ran the numbers and have the following information at each version's ideal stat levels. While the GG can take down nearly any disabler and Elite with ease, it will not hit a one shot breakpoint on Ogryn enemies, as well as the two Ragers, two Flamers, Mauler, Mutant, and Pox Hound. This is where Pinpointing Target comes in to help make up the difference, but breakpoints change depending on the stats and what perk is being used. Keep in mind it takes 0.4 seconds to get one stack of Pinpointing Target, which means 1 stack should almost be a guarantee each time you aim the weapon. The short answer is if you want easier access at taking down flamers, and the ability to one shot hounds, take Specialist. If you want easier access at taking down gunners, and the ability to one shot Scab Ragers, take Flak.
[Ideal Stats (Specialist)]
My personal pick. The ideal main stat focus for the Specialist variant is an eyewatering 79% in Blast Damage. Keep in mind that Melee Damage and Blast Radius can be your dump stats here as the GG is built more for taking out single targets and stunning groups rather than killing hordes. I prefer this version as being able to quickly take out Flammers can be a difference between someone going down or getting cut off from the rest of the team. Here are the main breakpoint differences for Specialist.
1 Stack of Pinpointing Target IV(0.4s): Kills both Flammers, Tox Bomber, Scab Gunner
3 Stacks of Pinpointing Target IV(1.2s): Kills Dreg Gunner
5 Stacks of Pinpointing Target IV(2.0s): Kills Pox Hound
[Ideal Stats (Flak)]
The second pick for those who just really hate Gunners. This one has a sligtly less egregious breakpoint as it needs 76% damage (specifically to hit breakpoints on Tox Bombers) and at least 60% Penetration. Same rules for dump stats as above applies. This will allow you to quickly take out Gunners that stun and lock you in place.
1 Stack of Pinpointing Target IV(0.4s): Kills both Gunners, and Tox Bomber
3 Stacks of Pinpointing Target IV(1.2s): Kills both Flammers
5 Stacks of Pinpointing Target IV(2.0s): Kills Scab Ragers
Keep in mind this is for direct hits to target to achieve one shot breakpoints.
Lorenz Mk V Kickback
Perks:
- +25% Maniac Damage
- +25% Flak Damage or +10% Reload Speed
Blessings:
- Surgical IV
- Blaze Away IV or Punishing Fire IV
The Kickback is a beast, and one of the best generalist weapons the Ogryn can have. It does high damage, decimates hordes, stuns anything you point the gun at (except Mutants) and has a great weapon special for easily getting stacks of Heavy Hitter, making it practically the go to gun on a Heavy Hitter build. Even its ammo economy is the highest out of any Ogryn weapon. However, the one thing it lacks is range... and maybe a less than ideal reload. This is made up for by its stun, but it can still be frustrating to see a sniper taking aim at you from across the map and knowing you don't have a reliable way to take it out. However, usually a good shot or two will be enough to stagger out of range disablers and specialists, allowing you to run over for the kill. Overall, if you can't get a good role on a GG, then a solid Kickback is a great choice. It has better horde clear and a lower skill ceiling, but can be more frustrating due to its need to reload after every shot, which can sometimes allow multiple disablers to gang up on you. But even with its lower damage to armor, it can still safely stun enemies to keep them off your team.
[Ideal Stats]
Reload Speed, Damage, and Stopping Power are good stats to try and focus on. Because of the nature of the Kickback introducing pellet counts and all the math involved in that, breakpoints are a bit harder to calculate. Darktide has a mechanic called "Minimum Pellet Count" which essentially means even if you hit an enemy with only one pellet, it will default up to the minimum value the weapon has. This is what allows the Kickback to still only take a few shots to kill something soft like a sniper from a huge distance. However, IF every pellet hits the same target, the Kickback can do some disgusting damage. But that's a big IF. In a mission, you're almost never going to reliably hit every pellet on one target, unless that Target happens to be an Ogryn, which your pick will handle better, along with the Kickback having awful Carapace damage. Most builds run Surgical to help with its range, but then it becomes a toss up depending on what you want out of the weapon. Blaze Away pairs well with its high ammo economy if you want to use Ranged fire more on hordes, even if it contradicts Surgical. Punishing Fire can beef up its damage a bit more to handle elites when dealing with mixed hordes. Pierce can let you just use the weapon as a second Melee for hordes just in case you can't reload the gun quick enough. Overall if it isnt covered in armor and isn't a million miles away, the Kickback should handle it. Even the targets it can't kill it will stun so you can introduce it to the bloody side of your pickaxe.
Lorenz Mk VI Rumbler
Perks:
- +25% Unyielding or +25% Maniac
- +10% Reload Speed
Blessings:
- Adhesive Charge IV
- Shattering Impact IV or Pierce IV
The Rumbler can be a hard weapon to use as it has a rather high skill floor. However, that skill floor also provides a much higher skill ceiling. It suffers from the same speed problems that the Rumbler has, along with the explosive payload taking time to detonate. However, it makes up for this with a higher stun and better range. Where the Rumbler differentiates itself from the GG is that it has a much better AOE explosion. While not the best at dealing high damage across that AOE, it will stun whatever gets caught in the blast. However, if you're looking for a gun you can pull out to immediately stun or kill a disabler, this is not the gun for you. This is due to how the actual grenade interacts with enemies. The projectile will collide with enemies or a surface, dealing a decent amount of damage if the former, before bouncing around and detonating roughly a second later, or about 2 seconds after the weapon fires if it does not connect with any enemies. These are rough estimates as it can sometimes feel like the explosive charge detonates whenever it wants to. This can be tough because the bounce can be unpredictable and could be the difference between killing the flamer in front of you, and just stunning it. However its benefit over the GG is that it will stun and/or kill your target as well as a LOT of the enemies around it. The only other issue with this weapon on this build, is that the Rumbler benefits heavily from the Big Boom passive perk, which the build cannot afford to take.
[Ideal Stats]
Your best stats are going to be Blast Damage, followed by Penetration, and then Ammo. Blast Radius is nice to have, but the Rumbler CHEWS through ammo faster than a flamer wielding Zealot that has their mouse buttons taped down. As for perks, the Rumbler has a LOT of awful perks. Its recommended to take Adhesive Charge followed by Shattering impact to deal boss damage and provide utility against Ogryn enemies, or replace shattering with Pierce to have another easy source of bleed. With Unyielding and a high enough Damage stat, the Rumbler can 1 shot Reapers with a direct hit, though try to aim for the head as the impact can deal precision damage. You can also take Maniac to more consistently deal with disablers like flamers and the like. Unlike the GG, this weapon will also give you an outline of its arc when ADS which can be very useful for hitting far off snipers and the like. A pro tip, you can shoot the charges at ceiling or other surfaces to try and bounce the grenade into hordes or other targets to get the most bang for your boom. Overall, the weapon's extremely high skill ceiling can lead to some rather clutch plays when proficient with the weapon, but it can be a real slog with its low ammo count and high skill floor.
Curios
Toughness vs. Health
If you're running an Ogryn, you can immediately throw out any stamina or wound Curios you find. You already have the highest stamina out of any class, AND get an extra wound. On end game difficulties, NO class needs more than 3 wounds. You're actively trading off more survivability for more chances to be revived, which already isn't a guarantee on higher difficulties. So this leaves us with Toughness vs. Health. Both have equal merit and what you want changes depending on what issues you're struggling with.
Benefits of Toughness:
Toughness is great against Ranged threats, as to Ranged fire (minus snipers) it acts like a shield that will take 100% of the damage. With Ogryn's larger hit box, and lack of precision Ranged damage options, a pack of gunners can be a huge issue if you don't yet have the skills down for dodge-sliding and avoiding Ranged fire. Plus, Toughness is a regenerative resource, meaning more Toughness, more you regenerate with different blessings and abilities.
Benefits of Health:
Health is great against ALL threats, but is not regenerative. Ogryn has the highest base health out of every class in the game, meaning he gets the most benefit out of Health Curios. It also gains better usefulness against Melee enemies due to Melee attack bleedthrough. Think of your toughness bar like a percentage gauge. When it's full, it will block 100% of Melee Damage. The damage the Melee Attack would do is then subtracted from your toughness bar. If that damage takes you down to 80% of your toughness, Melee bleedthrough can take effect. The next Attack will be blocked by your toughness and take the damage, but 20% of that Melee Damage will bleedthrough to hit your health. At 50% toughness, 50% of that damage will bleedthrough to your health, so on and so forth. Plus, Crushers, Maulers, and Snipers will always bleedthrough 100% of their damage to your health no matter what percentage of toughness remains.
BOTH are important. You can't build toughness and neglect health, and you can't pump health and avoid toughness. Toughness helps prevent mistakes, health helps when you make mistakes. If you have dodging and positioning down 100% then I'd recommend 3 health Curios with a toughness node on each. If you're struggling with gunners or can't keep your toughness at 100% through Ogryn's great toughness regen, replace one or two with a toughness Curios as you see fit.
Perks
Must Have (All 3 Curio)
- +5% Toughness
Having a little extra toughness always helps, especially if all 3 Curios are for health.
Important (2 Curio)
- +20% DR (Gunners)
Having extra damage resistance to gunners is always nice. However, only take 2. Due to diminishing returns, taking a 3rd Gunner DR provides near unnoticeable benefits.
Good (1-2 Curio)
- +20% Sniper DR
- +15% Corruption Resistance
- +30% Toughness Regeneration Speed
- +10% Revive Speed*
Sniper DR is always good for moments where you can't dodge a sniper or are caught unaware. Due to Ogryn's high health, he can easily get by with 1. Corruption Resistance is nice to have for modifiers where tons of hounds, bombers, and other Corruption applying enemies are present. Toughness Regen Speed helps when out of combat to get your toughness back up, but In combat you should rely more on active toughness generative sources.
*Revive Speed is a sleeper Pick as Ogryn can Revive without getting stunned when taking damage.
Situational (1 Curios Max)
- All Other Damage Reduction (Minus Hound)
- Block Efficiency
- Sprint Efficiency
- Stamina Regeneration
- Combat Ability Regeneration
These are all picks that aren't bad, but shouldn't take priority over Perks higher up on this list. Ogryn doesn't need Block Efficiency or Stamina Regeneration due to his absurd stamina, and sprint efficiency is a weird Pick unless you're bad at running into fights and draining stamina before hand, which is just a bad habit. Combat ability Regeneration isn't that impactful as most uptime on your ability comes from Bruiser. If you're struggling with a damage type, grabbing a DR for it is fine.
Useless (Don't Use)
- All Mission Reward Related
- Experience
- Hound DR
The best case argument you can make for mission rewards is that you're Curio hunting, which means it will get replaced when you get a good Curio, or you're low on dockets. They serve no point on a build at end game level. Experience is useless when you hit max level as well. Hounds already do MINISCULE damage and are more deadly due to disabling you in bad spots than any damage of their own. You do not need it.
This list is equal parts data and game knowledge, and equal parts preference. Plenty of people run end game content with full toughness curio and three toughness regen Perks. Feel free to seek advice from other players and try things out to find what works for you. This is also for Ogryn, what works on one class may be bad for another or have diminishing returns.
![Doom Slayer (Double Barrel Build) [Beyond the Hive Updated]](/storage/sites/darktide/build-editor/cover-images/0wNaEJPrNbjw95LQ01eP47V0wv6dIvdLxNd2x1Mb.webp)