Table of Contents
Class
Weapons
Curios


Talent Tree
Description
An apparently off-meta high warp resist Inferno build.
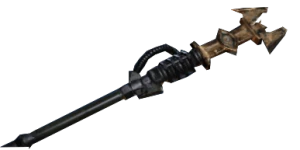
The Inferno Force Staff has the slowest peril gain of all the staves. Running between 80-100 peril is optimal for buffs, and you also want to be over 85 peril when you Venting Shriek to apply the max 6 Soulblaze stacks with Creeping Flame. In an ideal world you would have no warp resistance between 0-85 peril, but then magically have full warp resistance between 85-100. This would allow you to quickly get up to the optimal peril range, but then stay there forever while maintaining maximum buffs. This ideal is obviously impossible, but this build attempts to get close.
The slow peril gain of Inferno creates an issue for builds, which is most commonly solved by running a low warp resistance staff and avoiding Empyric Resolve. The advantage to this meta approach is obvious. However, the downside is that you need to quell frequently, which is actually far more detrimental than it might seem at first. The Blaze Away blessing can be maintained at the max 5 stacks between casts so long as you chain min charged secondary attacks (or spam primary), and gives a huge constant 40% power bonus to all damage. This 40% power bonus is far more impactful than the 20% damage (Warp Rider) and 20% crit chance (Warp Nexus) bonuses at 80+ peril, and so it becomes a priority to maintain max stack Blaze Away to maximize your damage. Ideally you will have both high peril and max Blaze Away buffs active as often as possible. Needing to frequently interrupt your attacks with quelling, which is necessary when edging with a low warp resistance build, means you end up losing significant uptime on max stack Blaze Away.
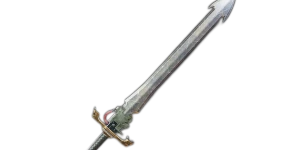
This build instead solves the peril gain issue with a very low warp resistance Deimos force sword. Sub 15 warp resistance on a Deimos is a much faster way to get to high peril, even with Empyric Resolve, so you actually have an easier time getting up to optimal peril range than the low warp resist builds. It requires a quick weapon swap between each special activation, but that is fairly easy once you get the rhythm. With my 14 Warp Resist Deimos I get 21.5 peril per special activation. This means I can get from 0 peril to 85 peril in a few seconds with four quick specials. Or after shrieking, from 50 peril back up to 71 peril with just one charge. Once you are at high peril, you can switch to your Inferno Staff to get the benefit of having high warp resist allowing you to chain uninterrupted attacks for 100% uptime on max Blaze Away stacks. Generally you will approach a fresh fight by charging up a full secondary while sliding towards your victims, and then following that up with sliding min charged secondaries to maintain max Blaze Away, top up dot stacks, and remain highly mobile in the middle of the fight. Because you can are constantly chaining you will spend more time attacking than the low warp resist builds, which also means more crits to proc crit based buffs, as well just applying more dots and direct damage. Taken all together this puts you a solid step above the low warp resist builds in terms of offense. This build will obviously have much lower toughness regeneration than low warp resist builds, but if you are comfortable with relying on move tech to avoid damage and want to maximize your damage, then this is the build for you.
The perfect Deimos roll would be 0 warp resistance, and 80s in Damage, Finesse, First Target, and Mobility. It is fine to have Mobility below 80, but the other three you want to be very near max to hit the Mutant one hit break point.
The perfect Inferno roll is 80 Damage, 64 Warp Resistance, 80 Quell Speed, 76 Burn, 80 Cloud Radius. 76 Burn is identical to 80, so that is 4 free points. I carefully tested various rolls dropping Quell Speed instead of Warp Resistance. I found that if you do need to quell from 100 peril, with 80 quell speed and 64 Warp resistance you can quell for a single tick down to about 88 peril and have room to fully charge a secondary and comfortably release it below 100 peril, meaning you can follow that up with another full or part charge, after which Venting Shriek really should be off cooldown.
Potential talent swaps are:
- Warp Expenditure for Mettle (Mettle is currently bugged with Inferno staff and will only trigger on the first dmg tick of the secondary channel. Once this is fixed Mettle will be the preferable pick.)
- Kinetic Resonance for Soulstealer/Essence Harvest/Inner Tranquility/Warp Battery/5% move speed. (Trading superior Elite/Special sniping for better toughness or even more warp resistance or damage & cooldown reduction or mobility).
- Seer's Presence for Kinetic Presence (if another Psyker already has Seer's Presence).
- Seer's Presense & 5% TDR & Empathic Evasion for Kinetic Presence & -5 Peril & Soulstealer/Essence Harvest/Warp Battery (if running Melee only with another Psyker that already has Seer's Presence).
- Wildfire for something above. Imo, starting most targets at 4 dot stacks, and applying first stack to ensure your buffs are actually applied, are very strong. But if you disagree then feel free to trade it for something.


