
Table of Contents
Psyker Build - Warhammer 40k: Darktide
Novice's Havoc 40 build: All-rounder
Psyker Build - Warhammer 40k: Darktide
Class

Weapons


Deflector
This weapon Blocks both Melee and Ranged attacks. Additionally, Block Cost is reduced by -30%.
Uncanny Strike
Hitting an enemy's weakspot applies 8 stacks of 2.5% Brittleness. Duration 5 seconds. 16 max stacks.

Blaze Away
+8% Strength for every 10% of magazine spent during continuous fire. Stacks 5 times.
Penetrating Flame
Direct hits apply 4 Stacks of 1% Brittleness for 5s. Stacks 20 times
Curios

+17-21% Max Health
+17-21% Max Health
+17-21% Max Health
Talent Tree
Description
UPDATE: Havoc 40 completed on Skitarii update. Build is still viable, be sure to keep track of warp siphon stacks for bubble CDR.
Playstyle:
This build is made to be an all rounder for your team; someone who can melt hordes and pick off distant enemies, but also someone who protects the team and helps mitigate their mistakes/mispositioning.
This build will leverage positioning, protecting the team via Telekine Dome , debuffing enemies with Penetrating Flame, and leveraging critical chance for your critical talent nodes.
Talents:
Node breakdown / rational:
- Soulstealer : Toughness back per enemy killed
- Mettle : Toughness regen / increase movement speed
- Perilous Combustion : This lets you exeed 16 stacks of Soulblaze up to 31. This will be important for modifiers like rotten armor and garden.
- Perfect Timing : More damage when you crit
- Brain Rupture : Good for picking off things far away that your vet or otherwise might not be able to get easily. This node helps you be flexible in close and far range combat
Kinetic Flayer (Controversial): I mostly take this in order to proc Perilous Combustion when things get hectic. The extra damage / insta kills it gives are nice too. Others may not agree with taking this. - Souldrinker : Another way to regen toughness, and it increases your crit rate to 22.5%
- Wildfire(Controversial): This node is not for damage necessarily, but it aids in gaining more stacks of Warp Siphon using In Fire Reborn to have more uptime on Telekine Shield . An added benefit is that wildfire can travel further within a crowd and proc Kinetic Flayer, which either one shots something and/or aids in spreading Perilous Combustion. Also synergizes with Souldrinker to have more toughness regen + crit chance.
- Seer's Presence : Cooldown for everyone on your team so they can use their abilities more.
- Psykinetic's Aura : More cooldown for when Elites or Specialists die (either you or teammate in coherency)
- Empathic Evasion : Helps avoid chip damage for stray bullets
- Just a Dream (Controversial): With further testing, helps psyker become more tanky (ability to take more chip damage, sniper shots, random poxbursters are increased). This requires more peril management, but this node has helped me survive more situations than possible before. Empyric Resolve also helps with peril management and the ability to take more damage here. TLDR: Mistakes happen in Havoc, this node helps you get away with taking way more damage than you should.
- Telekine Shield Telekine Dome Sanctuary : The core of my gameplay. This helps mitigate damage and bad/awkward positioning from other players. This alone will help you win more games because you're more likely to live longer together as a team. Placement for this ability is also a skill on this own (do you push, hold, or fall back) which is also variable depending on the type of people you play with.
- Kinetic Deflection (Controversial):
1. In my group, I am the anchor and usually the last or one of the last to go down. Kinetic Deflection let's me take an obscene amount of melee hits to revive downed teammates (while reviving, I am in a blocking state so all their hits convert to peril. I run Empyric Resolve so I also take less peril per hit + Telekine Shield to block range while reviving). This is a team game, and I want to have as many people up and running as possible.
2. This in combination with Deflector will help you reposition when there are a lot of ranged enemies to better place your bubble in an area that it won't get shredded apart instantly. - Warp Rider : More damage for how high your peril is. Easy to maintain 70-90% with this build.
- Solidity : Increased quell speed to better manage peril.
- Empyric Resolve (Controversial):
- This works in conjunction with Kinetic Deflection Deflector in order to help with ally revives (blocking state when reviving) and repositioning from gunners.
- This synergizes with Just a dream so you take less peril when you accidentally take damage.
- I have skill issue and this helps me manage my peril better (i find it easier to sit at 70-90% when using Empyric Resolve)
- Warp Siphon Warp Battery In Fire Reborn: Helps with cooldown for Telekine Dome , as well as providers more damage.
Weapons
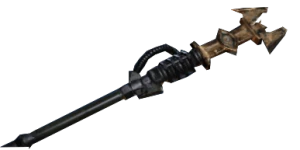
Deimos MK IV Blaze Force Sword:
I enjoy this weapon for it's ability to knock down crushers (heavy 2), it's moveset is fine, and it gives me access to Deflector and Uncanny Strike.
The Deflector blessing is great for helping you reposition, especially when you're faced with a lot of range. You can hold your block and either bide time for your shield, reposition yourself to safety, or both. Uncanny Strike also increases soulblaze damage, which you can proc via push attacks on the Demios to stay safe, or just regular melee.
Inferno Staff/Talent tree discussion: 5% crit chance is nice to maintain a 22.5% crit rate, flak covers other immediate threats, and Uncanny Strike helps with carapice. Penetrating Flame or Warp Nexus are both good depending on preference, but Blaze Away is a must for the damage it provides.
Curios
I usually run all Health Curios with Combat ability regeneration, Ally revive speed, and Block efficiency. I understand that this is not a popular opinion as most darktide players agree on toughness for curios, but health as worked for me with no issues.
I run health curios instead of toughness for high havoc because I'm leveraging Just a Dream and Empryic Resolve to cover my deficiencies as a darktide player
Experimentation is always encourged.