Table of Contents

Hive Scum Build - Warhammer 40k: Darktide
All Gun No Brakes - Vulturado Scum
Hive Scum Build - Warhammer 40k: Darktide
Class

Weapons


Can Opener
Hitting an enemy while in secondary mode gives them 4 stacks of 2.5% Brittleness. Debuff lasts for 5 seconds and can have a maximum of 16 stacks.
Superiority
+12.5% Strength for 7 s on Elite and Specialist Kill. Stacks 3 times, deteriorating one at a time.

Blaze Away
+8% Strength for every 10% of magazine spent during continuous fire. Stacks 5 times.
Pinning Fire
+5% Strength for every Enemy you Stagger. Stacks 5 times.
Curios

+13-17% Toughness
+13-17% Toughness
+17-21% Max Health
Talent Tree
Stimm Lab
Description
A very straightforward Hive Scum Desperado build.
BASIC PLAY STYLE & ADVICE
This build is designed to keep you shooting everything, as fast as possible with as much Desperado up time as possible. And it's important that you be shooting everything in sight, because that's also how you survive using Vulture's Dodge. Stay mobile, slide and dodge often to make sure you're always in a good position. That's also why your Stimm is cooldown reduction only, instead of adding the top right tree that gives brittleness.
The basic loop is use Desperado when there are enough targets to kill that you'll get value out of it, and to keep you shooting through hordes until the elites that refill your ammo show up. Pop your cooldown stimm as soon as possible after Desperado goes on cooldown AND you have some enemies to kill to maximize the cooldown reduction. Sample Collector is there so you can make sure you always have your cooldown reduction stimm ready after you've used Desperado. The end goal is as much Desperado uptime as possible, and a never-ending hail of bullets. Note that desperado fills your magazine without a reload animation. You can get some burst damage by emptying your magazine and then triggering Desperado to keep shooting.
Try to avoid taking ammunition from your squad mates unless it's getting left behind anyway or everyone else is full, or flat out doesn't use it. If you're low on ammo, kill a specialist or elite. You'll typically be hunting and prioritizing them over all other targets to keep yourself shooting, and that's a crucial element of the build.
Reloading is among your most vulnerable moments. Without the Speedload blessing, reloading is a little slower, so try to be mindful of when you're going to run dry on your current mags, and maneuver accordingly. Your other major threats are AoE and Specials. Area of effect dangers like gas clouds, pools of fire, and gas bombs will chew through your defense fast, and some inhibit your mobility. Getting immobilized is very dangerous. If you are trapped or get pounced, you are likely to be put in dying state or outright killed VERY quickly. Stay alert, stay mobile, and kill those threats immediately. As a bonus, Pickpocket will reward you with more ammo for doing so.
One other note about defense. When you're in trouble, the normal instinct is to try to block or run. With this build, if you have bullets in your magazine, be shooting. It'll save you from situations that would otherwise drop you.
WEAPONS
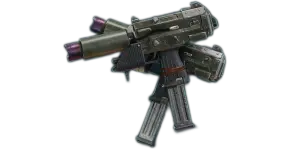
Dual Auto Pistols
The Dual Auto Pistols are your main weapon, and what you'll likely be using more than 90% of the time. They will burn down everything but Crushers very quickly, and even then, you can chip away at crushers while Desperado is active if you don't have a better target. For Maulers and Plasma gunners, shoot for the chest, and armored ragers, aim for the legs. Everything else you can try for weakspot hits, or let recoil walk shots from center mass up into weakspot. Everything dies fast, regardless. If you know a monster is coming, you can use Desperado to burn magazines into its weakspot, but keep in mind that if you're not killing other targets, that the time on the Desperado buff will expire very quickly.
Flak helps you kill lots of important elites.
Unyielding lets you hose down Bulwarks and do very good Monster damage. Crushers are typically dealt with using other tools.
Blaze Away is a straight damage increase, because you will be holding down the trigger and hosing down targets very often.
Why Pinning Fire instead of Speedload? Because you kill every staggerable target faster, helps horde clear on scabs and dregs, so it's a wash in terms of maximizing Desperado value, and dead things can't kill you or your squad mates. This build does work with speedload if you just can't hang though. Note that Pinning Fire stacks on the *same target*, like a Mauler. Different stages of stagger each create a new stack of the buff.
***Do your squad a favor and be mindful of barrels and bursters. It doesn't take many rounds from the Dual Auto Pistols to pop one, and since you're shooting so often, it's very easy to accidently blow them up in your squadmates' faces. Don't be that scum.***
MK VI Crowbar
I've found success running the crowbar exclusively as a method of applying Can Opener to deal with small numbers of Crushers, rather than waste boom bringer rockets on them. The first thing you'll do on a map is use the special so the pokey bit of the crowbar is facing front, and leave it there. When confronted by a small number of crushers, first make sure your mag is full. Get in, do a light attack, then dodge cancel out of it immediately (so the crowbar doesn't 'catch'), then do it again, back out, and hose down the crusher with your dual autos. Two hits is enough stacks of can-opener brittleness to allow you to kill the crusher with reasonable speed, though you can apply more. We dodge cancel the second built-in crowbar hit so you can apply debuff stacks quickly and get back to shooting; you are at your most vulnerable while your melee weapons are out. The crusher you're banging away at may not even be alive by the time you're ready to shoot, because the Brittleness applied by Can Opener makes the target much easier to deal with for your whole squad.
For large groups of 4+ and especially Crusher/Bulwark conga lines, just use a Boom Bringer rocket.
Shivs Mk I (note: if you go Shivs, you don't need Swift Endurance, and can move that talent point elsewhere)
I originally ran this build with Shivs. Your shivs are there as back up and to help with Crushers, really. For Crushers, use the Shiv Special to throw poison knives at 'em to soften them up, and then finish them off with heavy weakspot hits. Remember that you only get shivs back on elite and specialist kills though. You may want to whip them out to kill a target of opportunity for that reason. Killing the Crusher you tossed knives at is ideal, but don't get killed trying to preserve your shiv shots.
Blitz - Boom Bringer
This is how you deal with massed groups of crushers and bulwarks. Be a little patient, mind your positioning, and try to target your rocket for maximum coverage. Also keep in mind that you are vulnerable while that rocket is on your shoulder, so don't put yourself in a position to take hits. Boom Bringer rockets can also save distant squadmates who are getting overwhelmed, make breathing room to pick up downed squad mates, and clear out sticky situations in tight quarters; but again, mind that vulnerability. If you try to get a rocket off while you're in a press surrounded by ragers and poxwalkers, incidental hits are probably going to knock you down long before you manage to launch. All the Scum blitzes are great, so you can try others if you wish, especially Chem Nade, but this build struggles with massed carapace armor the most, and the boom bringer is the best answer you have for it.