
Table of Contents

Class


Weapons

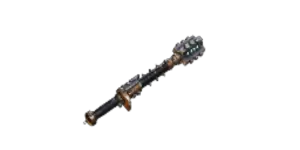


Enhanced Voltaic Arcs
Arc lightning gains +12 jump angle and +2 jump distance, and can jump 2 additional times.

Execution
+20% Damage Bonus vs Staggered enemies.

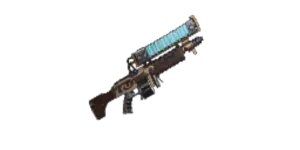
Enhanced Voltaic Arcs
Arc lightning gains +10 jump angle and +1 jump distance, and can jump 1 additional times.

Cavalcade
+5% Critical Chance for every 10% of magazine spent during continuous fire. Stacks 5 times.
Curios


+13-17% Toughness
+13-17% Toughness
+13-17% Toughness
Talent Tree

Description
This build is straightforward, easy to pilot, and strong. TL;DR warning for below! Most of this build plays itself, so the below information is only if you're interested in my reasoning for this skill tree.
How it works / Skill Tree:
This build is an all-rounder with a focus on crowd control, deleting waves of specialists, and basically just dealing a truckload of damage to anything. We leverage the very powerful arc rifle to chain electricity all around the map, and our tree buffs that damage while debuffing enemies and recharging our ability.
Flensing protocols is incredibly strong, and this build wants to squeeze as much juice out of that as possible. You will have solid uptime with this even if you do get hit quite a bit. We ensure this by taking Honed Dissector to increase maximum stacks, and Enhanced Capacitance Protocols so that if your stacks are low or you're getting shredded, Voltaic Emitter will rebuild all your stacks. Because Voltaic Emitter in this build is a 'get off me' button, we only take the Toughness regain node on it. In high-intensity Auric Mael, and definitely in Havoc, you'll be spamming it, so we don't get that much value out of Voltaic Arcs or Voltaic Motivator. If you are a very skilled player who rarely takes damage at all, you could consider removing Voltaic Overcharge, and taking another node of your choice. I would recommend Assassination Protocols, as it really helps you delete bosses in a pinch. If you find the toughness regain isn't useful but want your Emitter to do more, take Voltaic Motivator instead. Its attack speed buff is very nice.
The nodes we take in the top part of the tree maximise our damage output and debuffs against enemies by electrocuting them. They are very self explanatory.
Some players do not like Ablative Wards. I find it extremely helpful, but I also just hate corruption damage, especially when playing Havoc. This node can be removed at your discretion and placed elsewhere - either for more damage output with Assassination Protocols or Galvanic Marking Array, or a safety node such as Progressive Plating Matrix if you want a bit more toughness DR.
To deal damage (and a lot of it,) we are focusing on Critical Hits and Arcs. Your weapons and skill tree will quite frankly do a lot of the work for you, this build and playstyle is not complicated. Shoot things that are far, especially disablers, area deniers, and Elites. Melee any trash that get close. If your team is playing well, you should be completely comfortable with standard enemy waves.
System Shock is a priority node, and IMO you should always take this on an Arc build - virtually all your damage will electrocute, so you'll apply major brittleness to almost every enemy you fight. This is invaluable over the course of a game.
Blitz:
For our Blitz we're going with the first node of the Servo-Skull. This is mostly just for the quality of life (Data-Interrogators.) The passive DPS it adds is good, but nothing game changing. For this build you do not require Grenade Boxes, which ally Ogryns and Hive Scum will be grateful for.
If your team doesn't include anyone who needs Grenades, I would recommend taking the Arc Grenades and the sub-node Overcharged Arc Grenades. These are ridiculously powerful, capable of wiping an entire wave of elites or specialists while shredding any nearby chaff. However, they aren't that useful against bosses (in my experience at least), you don't get many of them, and they are completely wasted if you punt them into chaff or just whiff. I really like these grenades, and think they're slept on. There is quite a set in stone belief among many Havoc players that only Hive Scum or Ogryns should take nades. It's usually not worth the salty argument that this can provoke when a game goes badly, so I tend to take the Servo Skull in Havoc. Teams are often grateful for not having to mess with Data Interrogators, so it's a win-win.
Quick note on the Medicae Servo-Skull - it's good, but it's unfortunately tied to Grenade Boxes, making it a drain on team resources that are better spent as Chem Nades, Boom Bringers, Ogryn nukes, or your own Arc Nades. Killing more things quicker is almost always better than safety tools such as this. Resources are better spent keeping the team out of trouble, than saving it from trouble, as a general rule of thumb. If you really want the revive skull, consider sacrificing Ablative Wards or Ammunition Restoration Pod. I would not recommend this. Quite apart from anything else, if you are going to be eating grenade boxes for the Medicae skull, you could just throw an Arc Grenade onto a downed teammate instead. Everything near them will die instantly apart from bosses, allowing a free manual revive unless the situation is so dire that reviving them wouldn't save the team anyway. Noospheric Command and the Purgator Servo-Skull are not good enough to justify a skill point in my opinion. Avoid these in high difficulties.
Aura:
We're going for Foe-Render Creed partially because we're already pathing to Flensing Protocols, but also because our other option (Resurgence) sacrifices 3 Curio perks and some DPS for its benefit. If you love Resurgence, it will fit this build fine. I find that the added survivability doesn't save your life in really bad situations anyway, so I'd rather have the Cleave and Rending. If you find you are struggling with being squishy, Resurgence might help, as it's unconditional toughness regen to keep you on your feet. It synergises with Auto-Repair Doctrines too which is nice.
I have not played with Ammunition Deposit much. It might be good for keeping your Arc Rifle fed, so I wouldn't write it off. It would require re-pathing through Assassination Protocols, but that's a great node, so feel free to do this if you love shooting stuff.
Weaponry:
Your bread and butter is the Arc Rifle, which will have plenty of ammo and rarely need to be reloaded thanks to Ammo-Cell Augury, Ammunition Restoration Pod, and Gunsmith. Dump Reload Speed on this one, because its reload is already slow AF. The extra speed from this stat does very little, and you're using Gunsmith to passively reload. Mobility is also a fine dump stat. For Blessings, we take Enhanced Voltaic Arcs to maximise its screen clear and boost the amount of things it will crit, electrocute and kill. Cavalcade boosts the weapon's crit chance, and means that the longer you're needing to shoot, the more you're hitting crits, creating a feedback loop. Dumdum is another great option, and if you prefer the straightforward DPS boost, go for it. If you want to just hold left click, you could take Charmed Reload, which is fun but doesn't boost your DPS as much as Dumdum or Cavalcade. I am not a fan of the rest of its blessings. If you really value one of the other ones, you'll probably still be fine. The base gun is very powerful already, we're just looking to min-max it.
Try not to blast your Arc Rifle at everything - it's tempting, but using it on pure chaff like poxwalkers is a waste. In Havoc you can have ammo problems if you aren't disciplined. The Arc Rifle is for elites, specialists, bosses, disablers at range, and for assisting a teammate dealing with those threats. If you pick your targets well, you shouldn't struggle for ammo much, if at all. You also won't need to reload the Arc Rifle often (if ever), which is a nice bonus. NB: When safe to do so, remember to ADS with the Arc Rifle. Shooting from ADS extends the maximum Arc chain of every shot.
The Arc Maul is used to clear horde or get rid of things in your vicinity. Very self explanatory and easy to use. Heavy -> Heavy -> Light is good for single target. Light spam is fine for most small threats. Push -> light is a nice horde clear starter. Learn its combos in the training room if you like, but it's pretty forgiving. Dump stat is Mobility. Blessings wise, Enhanced Voltaic Arcs is a no-brainer unless you don't like Arcs for some reason. I always take this. Execution is great. Most of your melee attacks will stagger human-sized enemies, meaning its +20% damage bonus has high uptime. Perks are up to you. +Flak, +Carapace, +Maniac, and +Crit Chance are all good for different reasons, it's down to personal preference.
I take Crit chance on both the Maul and the Rifle, to profit off the fact that Skitarii Arcs can crit, and to trigger Power Redistribution Uplink and Flux Conduit Build-Up. If you don't value this, change the 5% Crit Chance to +25% vs Flak for the Maul, and +25% vs Carapace for the Arc Rifle. I have tried these options and they work great.
Curios:
In terms of Curios, we want 3x 17% toughness, 3x 5% Toughness perks, 3x 4% Ability Cooldown (For Skitarii this equates to Capacitance Generation), and at least one 12% Revive Speed perk. More revive speed is always good, games can be won or lost on rescues and revives. I like to take 1x 15% Corruption Resistance, as this slows the corruption tick of Ablative Wards. This is entirely optional, though. I also like to take 1x Gunner Resist, to give breathing room for those '5 gunners and 3 reapers lock onto you' moments. These last two Curio perks are flexible, though. Want Stamina Regen? Go for it. More revive speed? Great. If you find yourself being deleted by Gunners often, consider taking 2x Gunner Resistance. I would not recommend 3x due to diminishing returns, but I have played with experienced players who swear by this. Tailor these last couple of choices to suit your strengths and/or shore up things you struggle with.
Stimms:
Blue stimms are great, Skitarii are slow AF. Use one to catch up with the team or reposition when you're in a bad spot. Yellow stimms - you get buffed big time by gaining and spending charges, so keep casting, kill a lot, and get hopped up on yellows whenever you can.
If nobody else wants it, a red stimm will nudge you into boss / monstrosity deleting territory. Pop red, hold down left click with arc rifle, and even huge health bars empty very fast.
Final Notes / Team Composition / Flex Nodes:
This build best slots into a team with players able to delete bosses fast. Krak Veteran, Thunder Hammer Zealot, Toxin Hive Scum, etc.
The build's role in the team is similar to a Flame Staff Psyker, in that you often top score damage, but need to apply that damage well to enable team members. It has surprisingly good potential at long range. With good target priority, you'll find that you can dictate the pace of engagements, and there aren't many situations you will struggle to handle. Don't underestimate your damage and CC potential.
Bosses, Captains, Monstrosities, and the Twins can be an issue for this build. You are completely capable of killing them, but if forced to do that on your own, the team will suddenly miss the absurd crowd control and specialist clear this build excels at. Try to position yourself amongst the team, so you can help take down bosses, but float between that, CC, and Specialist sniping.
Also useful to have in your team is a frontliner / tank, such as an Ogryn, Arbiter, non-stealth Zealot, or Melee Psyker. Someone who is great at melee, drawing aggro and staying alive. You can fill this role in a pinch, but you're better suited to a 'control' style.
If you take Ablative Wards and at least one +15% Corruption Resist perk on your curios, you are almost immune to Corruption damage. I can't stress enough how helpful this is on some modifiers, like the one where there's pox gas everywhere, or the green goo nightmare blunt rotation.
Regarding Flensing Protocols, if you are cracked out of your mind, you could replace Enhanced Capacitance Protocols. If you rarely take damage, you'll still have superb uptime on Flensing, and Skitarii's tree has many excellent nodes to choose from. My recommended replacement nodes are (roughly in order): Assassination Protocol, Channelled Motive Force, or Progressive Plating Matrix. Personally I find shooters, flame or tox gas chip away at Flensing stacks often enough that ECP is worth it.
Final note, this build excels at not draining the team's resources. Lean into that as you play. Be the guy who takes ammo last unless you're dangerously low. Be the player who gets their skull on the data interrogator straight away. If someone's getting swarmed by ragers or maulers, open up with the Arc Rifle to kill most of them and debuff the rest. If there's a gun-line chipping away your mates, consider it your job to get rid of it. If your frontliner is getting overwhelmed by trash, fire up your Arc Maul and get stuck in. You're a versatile beast. I've managed to clear 1.5m dmg with this build while not going down once at H36. I'm not even all that skilled! This Skitarii is a problem solver, easy to pilot, with few weaknesses.
Have fun!
P.S. if your Skitarii isn't max height, you're a coward. =)