Table of Contents

Class


Weapons



Cranial Grounding
Reduces Heat buildup by -6% and increases weakspot damage by +4% for 3s on chained weakspot hits. Stacks 5 times.

Overload
Upon reaching the Lockout state, you cause an Explosion around you and immediately reduce Heat by +25%.


Blaze Away
+8% Strength for every shot fired during continuous fire. Stacks 5 times.

Volatile
4%Charge Speed on low Overheat. Stacks up to 5 times.
Curios


+13-17% Toughness
+13-17% Toughness
+13-17% Toughness
Talent Tree

Description
The BEE build
Because while the Skitarii can't float like a butterfly, he still can sting pretty well. However like actual bees, they usually die soon after their barb penetrates.
Everyone say thank you Ablative Wards when merely swatted away rather than squashed outright after playing with this build!
Also called The Bee, because I wanted to utilized as many "B" tier weapons and talents while still being competent. At this, I do think I succeeded.
The constant electricity going *buzz* *buzz* helps.
So let's talk how this build works, and then we'll get into the details.
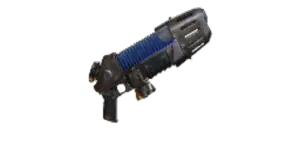
M35 Magnacore Mk III Plasma Gun is our horde clear weapon, any mixed hordes come your way, this weapon will solve it in 2 fully charged shots. The issue is getting space made for those 3 seconds to get shots downrange. Utilize Voltaic Emitter to stun and prime the group with brittleness and Powerdrive Power Overload to boost your damage. We get 3 shots for a full bar of heat, so use them wisely. Run unyielding to handle Reapers/Bulwarks. Monstrosities can be primary fired when fine on ammo, but boss killing ourself is not the goal, we buff team and debuff boss to ensure monstrosities die.
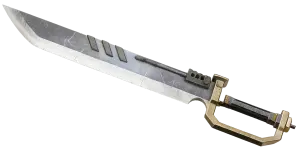
Aridin Mk I Power Falchion (either mark) is the all arounder. Powered up its a discount relic blade, great damage into all targets, 70% carapace damage on heavy AND LIGHT ATTACKS so only need 3 sources of System Shock to be dealing unmitigated damage. Not that it needs it, solid B tier weapon.
Sadly I did have to use the "S++" tier blitz, we have to have a way to both manage specials and manipulate our capacitance below always using max Voltaic Emitter . 5 grenades is enough to basically use one on any non-weakened boss trigger. Just managing the hordes for your team removes so much time to kill for bosses where they have no distractions. I think most people know how to use Noospheric Command now, but it saves so much ammo by handling specialists instead of chasing them with melee or burning our precious non-cleave plasma ammo. Save at least 1 charge of Voltaic Emitter before using it, if at all possible. Too much power of this build is reliant on having Voltaic Emitter ready, and a single dead sniper is rarely worth it. Remember, with Ablative Wards, we always get at least one down state. Spam Noospheric Command then, not prior. Voltaic Emitter will save you more than a silly skull ever could. Saving others, however, our silly skull can certainly do that! No room for revive curios, so save a Medicae Servo-Skull.
Voltaic Emitter is our shooter solution and panic button. Taking Voltaic Arcs allow it to proc 20% brittleness right away for a decent uplift of damage, With Powerdrive and Critical Power Overload, it also has the potential to add another System Shock stack. There still are some issues with guaranteeing weapons malfunctioning, so its best to run straight through soaking up hits to go beyond the gunner line, or get on the high ground to get more reliable shooter denial before popping a double charge. You'll get some toughness back and with all enemies stunned for 2 seconds, time to get killing to recover the rest.
DETAILS:
Resurgence is the lowest B tier of any aura, but its a near constant trickle of toughness to the whole team. With 3x toughness regen curios the delay penalty is halved so it kicks in in under a second of last damage taken or when solo and moving back into coherency. (Bonus fact, insta gibbing enemies via explosions I believe has the faster death animations, so those pesky half charred corpses are gone pretty quick compared to other ragdolls.) Because enemy death animations can take up more time than our regen delay to kick in, this means it removes the delay entirely when the last melee slot does bother to clear. You get the full "normal" 100% coherency regen as opposed to auras half. Ammunition Deposit is so bad, I'm sorry, it doesn't even grant any positive rounding errors when it comes to the plasma ammo pickups. The plasma's ammo reserve is half our entire ammo... any buff to our reserves miss out on the ammo in a full rifle. So middling Resurgence it is!
Aridin Mk I Power Falchion takes the damage as the dump stat because when charged up, the Power Output stat becomes our damage. Mobility sucks on the Skitarii and having any help with that is worth. We have enough damage juice in our build for it to still handle Poxwalker hordes un-empowered as a last resort. Anything more than that and its time to use our M35 Magnacore Mk III Plasma Gun or a Purgator Servo-Skull. Overload stagger gives us a moment of reprieve to swap and land a charged shot without having to use our ability. Also the reason why Plasma uses Volatile as its blessing. Safety is our consideration when it comes to survival; there is enough damage already focused on later in this build guide. Cranial Grounding buys us more time in the empowered state, and the marginal weakspot improvement does carry over into the un-empowered mode. I take Mk I over the other because of the empowered H1 will stagger Ragers mid combo. Mk IIb H2 will also, and with more power. It can cleave a mauler on H2 with just Shockline Breach Protocol active. Mk I cannot. Try them both and take your pick. Note: activating the sword counts as blocking so feel free to do it in the middle of combat. (Be extra silly and swap in Counterattack to get a perfect block every time you do activate your blade in combat.) Mk I main single target attack pattern is H1, H2, then into your choice of L3, Push attack, or block cancel; all lead back into H1.
M35 Magnacore Mk III Plasma Gun has some unique quirks right now (read: possibly bugged; just Fatshark things). The damage is split into two parts: for the charged shots, which you should be primarily using, its roughly 60% damage of the total direct impact hit. HOWEVER, the 40% explosive part is not considered a ranged attack, so even on the initial target, it cannot crit, cannot gain weakspot damage, and gains no damage scaling from +ranged damage talents. Only global damage modifiers will. The crit scaling on the weapon is bad enough that losing out isn't much. The fact that kills granted by the explosion not being considered ranged is very bad. Threat Detection Imperative, Superior Defence Engrams, Hybrid Combat Covenant, Galvanic Marking Array, only gain stacks if the initial damage, not the explosive part, of the shot hitting one single enemy will kill. If you need to gain rapid stacks, shoot trash enemies in a horde, not into the tankier foes, to ensure the ranged component is the killing blow. The Mk III has no cleave, yet has Bulwark shield & terrain penetration ¯\_(ツ)_/¯. Jump shotting past the single front enemy will be a bigger payoff to maximize the explosion radius. No explosion occurs if you miss, take a clear shot rather than risking whiffing. The more bunch up a group is the better, let them cluster into a choke before loosing hell. Substantial loss of damage particularly against carapace when at ranges over 20 meters. The gun itself, and by being out of range of our debuff engine. We're fine shooting in melee ranges as long as we made space properly. Possibly even in a better position as the blast radius can clear enemies trying to flank us. Attack speed also does not increase charge time, so Voltaic Motivator is unnecessary; Celerity Stimms do. Your friends in this build are blues over red. With 60 thermal and Volatile, it is possible to spam minimum charged shot up to 5 times making use of Blaze Away, how exactly useful this is for any breakpoints is yet to be tested.
To maintain decent ranged kill talent uptime, especially on Galvanic Marking Array, we must take the servo skull. When stacks are low, try to snipe low health elites with a well timed Noospheric Command, if and only if, you have capacitance to spare. You could spend 4 Noosph charges to get back all your Galvanic Marking Array, but it's still only a 20% damage boost, don't worry to much about it. I will reiterate, having a safety Voltaic Emitter charge is how this build survives.
Without capping Static Capacitor Drain , early Ability Cooldown will suffer. Stay in coherency and you will get steady stacks. Use resources liberally to gain them as quickly as possible. Waste Stimms, ammo, and grenades to ensure a safety margin over using Voltaic Emitter and buy time to reach 24 stacks.
This is a 30/70 ranged/melee build. Being able to reliably get shots off is a must. Overcharge Transfer Lattice is a small AoE stun to all enemies and will prevent multi hits which is how you die. It also adds a System Shock stack allowing you to effectively parry and riposte them for more damage. Veteran players know that its always the unseen poxwalker behind you that screws you over when shooting at priority targets and this get you free from them every 15 seconds. Shockline Breach Protocol gives a moderate cleave bonus allowing us to cleave through a 10 hit-mass mauler on empowered heavy attack, when staggered or Sequenced Charge is active. Target Prioritization Psalms is a tax node. Sing Psalms to the Machine God that there are only 2 in this build! Sequenced Charge pays dividends with its uptime once you are fully energized with the capacitance regen going. Using Noospheric Command to go briefly under a full charge then getting it back is an easy way to smooth out the highs and lows of this build when not utilizing Voltaic Emitter regularly. Data Sensor Protocol is another safety node, for the rest of your team this time too. The weird interaction with Data Sensor Protocol and Ablative Wards combined with Invigorating Overload compliment each other very well meaning no stamina or stamina regen curios necessary. The weird interaction is that every tick of corruption gain grants the stamina regen from DSP and also there is no buff icon for the stamina portion of Data Sensor Protocol . Not the toughness part despite corruption supposedly only affecting health, which does have a buff icon. As long as other teammates aren't the ones taking toughness damage, we can readily rely on gaining a burst of 45% stamina every 20 seconds. 20 seconds to take a corruption point, and the average of 20 seconds for Power Overload to gain 30 stacks.
As you should see by now, we have no crit in this build, and yet... Electro-Strike Conduit. Not much to say about this. 7.5% chance to add a System Shock stack. Normally a top tier talent in any other build, but we just pay the tax node path to get the BESTEST B TIER talent in the tree. Ablative Wards. This allows protection from one shots and thus losing all your Static Capacitor Drain stacks we've been building so much towards. Stand in the goo, buy your team time by letting yourself get chaos spawn grabbed; no harm, no foul. Spam Noospheric Command when you inevitability do go down. Last of the blue talents to mention, Ammunition-Restoration Pod . Its free ammo, that's it — feeds your hungry Plasma gun. The Mk III is very very gungry.
In Havoc, the average time to get a Power Overload instance is about 18-20 seconds. 8 minutes until you get all 24. If you time your ability, to not waste over stacking through the use of Powerdrive , you can get it faster. This is mastery level Skitarii tech, Powerdrive is mainly here to be able to get a cycle of Power Overload when things stopped dying because its just a wall of armour or maintaining debuffs of Critical Power Overload on-towards a boss. Using Voltaic Emitter with Power Overload is a 45+% toughness instant panic button cast.
Cons of this build:
- Needs early help to get online with Static Capacitor Drain .
- Loss of all Static Capacitor Drain stacks on death.
- Loss of grenades on death.
- Can easily be an ammo hog.
- Heavily spamming Noospheric Command can leave you out to dry.
- Needs ability spam for major toughness regen.
- Balancing capacitance needed for using exactly how many stacks of Voltaic Emitter needed for the encounter.
- Low Ability regen, especially early, if things stop dying.
- Low uptime of Sequenced charge if not gaining charges quickly.
- Potential low uptime of on ranged kill talents.
- No aura/curio benefit if out of coherency, or if team is dead.
- No real solo potential, due to lower uptime of Power Overload .
- Finicky shooter weapon malfunctions
- Poor toughness over time regen, especially without Resurgence boosts (haha!)
- Needs close range engagements to maximize debuff radius.
- Struggles immensely with scattered basic shooters.
- Lowish solo monstrosity performance, especially if not debuffed by Critical Power Overload .
Pros:
- Extremely good mixed horde clear.
- Extremely good mixed horde control.
- Extremely good AoE debuff on enemies, thanks to mass brittleness, Power Overload damage boost, Critical Power Overload damage multiplier, and Artificer Servo-Skull damage multiplier.
- Specialist sniper with Noospheric Command .
- Mass shooter suppression at 2+ Voltaic Emitter charges
- Decent toughness team support. Power Overload 20%, Data Sensor Protocol 25%, and Resurgence tiny dribbles.
- Good passive ability regen, better when actively killing, but not the fastest.
- MEDICAE SKULLS!!! So maybe actually good clutch potential?
- Good boss damage when double debuffed. Shoot them after targeted by the servo skull.
Alternative build adjustments:
Change auras, frees up your coherency curio slots. Swap a stamina curio in for the toughness if you really need it.
Be more of a teamplayer and take Power Overflow instead of Data Sensor Protocol turning your Power Overload into a potential 25%(!!!) toughness regen. Hey it's half the strength of Vet's shout, half the average cooldown time. Without the gold part, not that that part matters right? ¯\_(ツ)_/¯ And actually save face by bringing more than Resurgence aura when they ask you how much toughness you are actually giving your team.
Moebian Conductor instead of Binary Ballistics Protocol , Retribution Conduit instead of Overcharge Transfer Lattice if you want all the damage.
Lastly, Ablative Wards can be removed, and therefore Electro-Strike Conduit , but nothing feels worse than having to restart stack building after a death. Would not recommend. God Gamers only. Change for Moebian Conductor and Galvanized Coating at your own peril (or whatever the Skitarii equivalent is)
Other builds by ijipop