Table of Contents
Class

Weapons


Tenderiser
After hitting an enemy with your Weapon Special attack, your next melee attack will have +30% increased Power.
Slaughterer
+8% Strength for 4.5s on Kill. Stacks 5 times.

Can Opener
Hitting an enemy with the special attack gives them 16 stacks of 2.5% Brittleness. Debuff lasts for 5 seconds and can have a maximum of 16 stacks.
Blaze Away
+8% Strength for every 8% of magazine spent during continuous fire. Stacks 5 times.
Curios

+13-17% Toughness
+13-17% Toughness
+13-17% Toughness
Talent Tree
Description
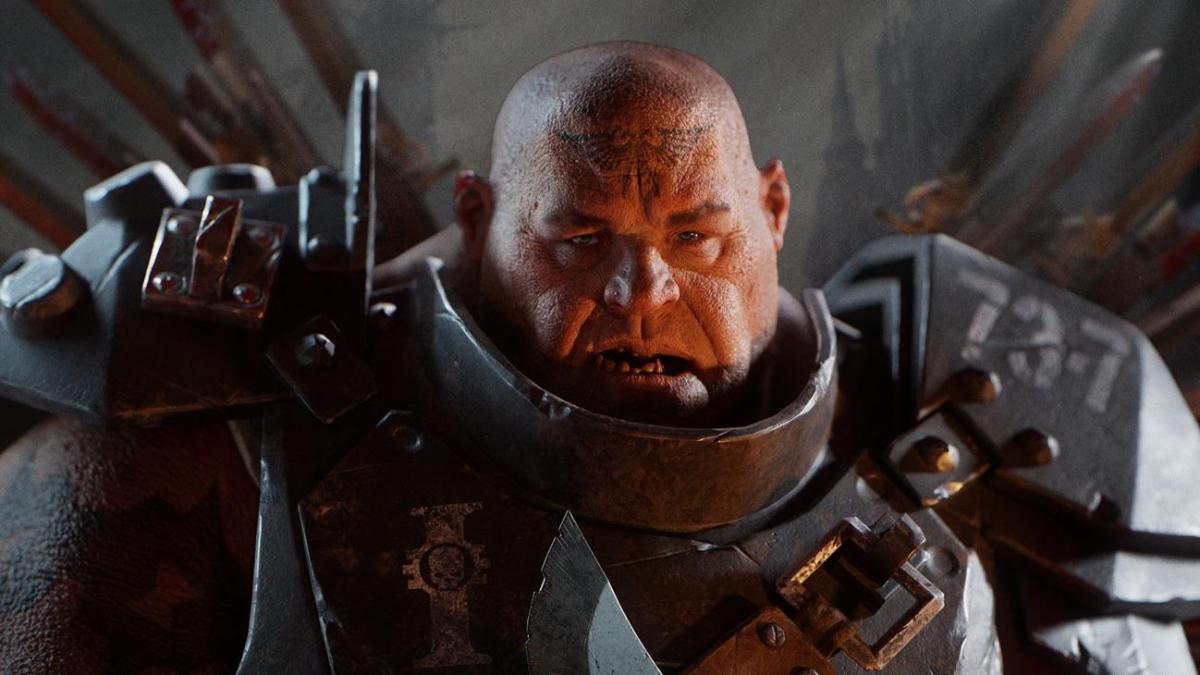
Welcome to the Ogryn Build for Darktide. This is a very melee focused Ogryn build.
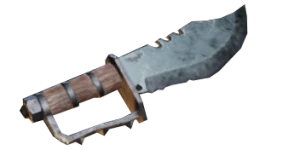
Mobility 80 Knife Build — Stab Fast, Die Never
Mobility 80 knife go zoom zoom, now me sneaky-stabby, yes yes!
Zoom in, slice 'n dice all the spiky men — never die, always stab.
Ripper makes big red mess — good times! With Don't Feel a Thing, me basically immortal with Don't Feel a Thing . Like tank, but fast. Fast tank. Stank?
Why Rambo Knife? Why Not!
Picked up the Rambo knife for a change. Cleave damage? Haha who needs that? Still shreds hordes like hay in a wind tunnel. H2 > L3 loop go brrrrrr.
Turns out: Ogryn fast. Who knew? Me now speedyboy!
Bonus: Rambo Knife is special — L1 > L2 gives criti... critty... smart bonus hits! Big number time with Lucky Streak Massacre!
Who ninja now?! Just Getting Started! makes stabby even faster. Blade goes snikt snikt snikt, enemies go aaargh.
Perk Time — Maximum Bonk, Maximum Survive
- Smash 'Em! = extra oomph.
- The Best Defence = all melee now, all good.
- Tenderiser = punch with feeling.
- Slaughterer = kill more, stab more, win more.
- No Hurting Friends! ! = very polite, very efficient.
- Confident Strike = swing, regen, never die. Boom.
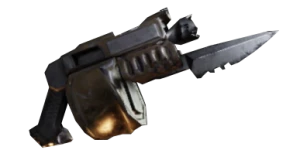
Ripper 6 with Can Opener = Problem Solver Supreme
Anything heavy? Shoot-y? Ripper go BRRRAAAA, then go home.
Now with bonus big number crits — smart Ogryn do pew pew too!
Knife Combos – The Ogryn Arts
- General crowd control: stab stabbity stab stab spam.
- Big boy setup: punch > stab stab for extra pain.
- Single target blender: H1 > L1 > L2 — loop it like a cooking show.
- Horde sweep: H2 > L3 loop. Push attack to enter flow state.
- PANIK?! Heavy attack spam for crowd clear, stagger, and that sweet blue bar. Or just light spam until the panic stops.
Overview – The Biggest, Toughest Team Player
The Ogryn Skullbreaker is all about being the biggest, meanest shield for your team – and having a ton of fun doing it. With the Patch 1.7.6 updates, our favorite abhuman got a talent tree rework that opened up new build options and buffed some core defenses. Ogryns are naturally tankier than any other class (300 base health and now 75 base Toughness after the rework), so you’ll be front-and-center in every fight. Your job: soak up damage, smash hordes aside, and protect your puny teammates (who, let’s be honest, would be lost without you).
Patch 1.7.6 Highlights: The Ogryn’s talent tree was revamped to allow more build variety. Notably, Thick Skin passive got a buff (20% → 25% damage reduction to both Toughness and Health), and a new dodge-based passive “Outta My Way!” was added to make your hulking dodges actually shove aside smaller enemies. Plus, your team aura now buffs all melee attacks (not just heavies), and you have more choices in talents and grenade types. In short, Big Boy got even better.
(Don’t worry if this sounds like a lot – we’ll break it down step by step, just like an Ogryn breaking a heretic’s ribs.) 😄
Core Abilities & Passives
Let’s review what makes the Skullbreaker tick, including some changes from the latest patches:
- Bull Rush (Class Ability – aka “Indomitable”): The Ogryn’s signature charge. You ferociously charge forward, knocking down and staggering enemies in your path. This is your “oh crap!” button to bowl through hordes or escape danger. As of recent updates, you count as dodging while charging, so you won’t get netted by Trappers mid-rush (and even those flying Pox Hounds can’t tackle you out of it). Use Bull Rush to initiate fights, interrupt dangerous foes, or to plow a path to a downed teammate. It’s both a gap-closer and a panic-button – versatile like a multi-tool, if that tool was a 300kg battering ram.
- Loyal Protector (Alternative Ability / Former Passive): Originally a passive that made you a revival machine (you couldn’t be interrupted while reviving allies – hence the “res-bot” nickname). In the new system, Loyal Protector is available as a selectable ability (instead of Bull Rush) for a more defensive playstyle. When activated, the Ogryn plants his feet and taunts enemies in a 12-meter radius, forcing them to focus on you. This makes it safer for your team to reposition or get revives in. Important: If you take Loyal Protector, you can still revive allies without being staggered (that original effect remains, making you the ultimate clutch reviver). The taunt now repeats 3 and 6 seconds in to catch any latecomers, ensuring new enemies also get drawn to you. With the “No Pain!” talent, Loyal Protector will grant you Toughness back for each enemy taunted (10% upfront + additional per second per enemy), so you become extra tanky while everyone’s shooting at you. In short: Bull Rush is for mobility and crowd control, Loyal Protector is for playing big-bodyguard. Choose what suits your style – nobody’s stopping an Ogryn from doing what he wants, anyway!
- Intimidating Presence (Team Aura Passive): You inspire your allies to hit harder. Ogryns give a +10% damage boost to all melee attacks for teammates in coherency range. (Originally this aura only buffed heavy attacks, but patches kindly made it apply to all melee swings now – because who wants to be picky about how you smash the heretics?) This aura makes you the ultimate front-line buddy: stick close so your friends enjoy the damage buff while you soak up the aggro.
- Thick Skin (Passive): Your innate toughness. You take 25% less damage to both your Toughness and your Health. This is always on, making you noticeably harder to bring down than other classes. Combined with your huge health pool, Ogryns can face-tank hits that would splatter a Veteran or Zealot. (Pro tip: still take cover from mass gunfire – 25% of “a lot” can still be ouch!)
- Excessive Force (Passive): Adds +25% melee stagger to all your attacks. Every swing of your club or cleaver hits like a truck, stumbling and knocking around enemies more easily. This makes your heavy attacks and even light strikes consistently interrupt foes, which is great for controlling hordes and stunning elites before they can hit back. In gameplay terms, you’re the crowd-control king.
- Loyal Protector (Passive Effect): (If you didn’t select it as your active ability, don’t worry – the no-interrupt revive effect is baseline for Ogryn now.) Being damaged while reviving or assisting allies will not interrupt you. This means Ogryns excel as combat medics – you can confidently revive teammates in the middle of a firefight. Pair this with your damage resistance (Thick Skin) and new Toughness talents, and you’ll often pull off clutch rescues while shrugging off incoming fire.
- Outta My Way! (New Passive): Added in the rework, this hilarious passive makes your bulk work in your favor when dodging. Any time you dodge, nearby small enemies (basic human-sized poxwalkers, dregs, etc.) get shoved aside and staggered. Ever been annoyed by a swarm that body-blocks your Ogryn? Not anymore – you literally dodge straight through the chaff, leaving a trail of staggered little heretics behind. This also helps avoid those annoying dog pounces or just reposition in a horde. (Who needs fancy footwork when you can just bulldoze through? 😎)
- Grenade (Blitz) – Big Box of Hurt (and Friends): The Skullbreaker’s “grenade” has some options now! Traditionally, you hurl a box of grenades that burst apart and pepper an area – great for staggering and softening up a crowd. As of Patch 1.7, you actually have three grenade choices in the talent tree:
- Big Friendly Rock – Pull out a literal rock and yeet it at a target. This thing hits like, well, a rock fired from an Ogryn, often one-shotting common Specials (yes, a well-aimed rock will flat-out drop a charging Mutant, Hound, Bomber, etc.). You get multiple charges (the devs increased base charges from 2 to 3), and it’s quick to throw. Great for sniping priority threats or finishing off a wounded Crusher from a safe distance.
- Frag Bomb – A classic single big grenade. Think of it as a concentrated “boom” for when things get dire. It deals massive burst damage in an area – perfect for deleting a group of elites or chunking a boss’s health. You only get one charge, so treat it like a panic button or a boss nuke. (Also popular for “ledgeing” bosses – knocking them off the map – when combined with Bull Rush’s momentum.)
- “Bombs Away!” – Why throw one grenade when you can throw ALL the grenades? This option lets you lob the entire box in an arc, spreading multiple grenades over an area like a giant shotgun blast of explosions. It’s fantastic for crowd control – it will stun and stagger packs of enemies, giving you breathing room. It can even be thrown at the feet of a downed ally to clear and stun nearby enemies while you revive. With the right talents (Fire Away and Bigger Box of Hurt), this turns into a mini-artillery strike that can wipe out clustered hordes.
All grenade types have their uses, so pick what fits your playstyle. And remember, with 3 charges available, don’t be stingy – an unused grenade is just wasted damage. When in doubt, make it explode! 💥
Talent Tree – Best Skills for a Big Brutish Ogryn
Patch 1.7.6 gave Ogryns a brand-new talent tree, replacing the old linear “level 5-30” perks. Now you earn talent points up to level 30 and can invest them in a three-branch tree (left = melee Skullbreaker, center = defensive/support Bodyguard, right = ranged Gun Lugger). You can mix and match, but below are some top talent picks that synergize for general viability across difficulties. These will maximize your survivability and damage, letting you shine as a nigh-unstoppable wall that still hits like a freight train:
- Steady Grip: A must-have survival node near the start of the tree. It dramatically improves your Toughness sustain when things get rough. (Picture this: you’re trudging through a gas cloud or taking fire from distant gunners – Steady Grip keeps your Toughness regenerating and stable so you can push through.) Ogryn survivability is all about Toughness, and Steady Grip ensures you don’t lose your composure (or your shield bar) under pressure. Always take it – it’s basically free extra tankiness.
- Smash ’Em! – Your core Toughness-recovery talent. This gives you a chunk of Toughness back on every melee hit you land (with higher return on heavy attacks). In the old days it was “Smash ’Em Good” for 15% on single-target heavies; now it’s been improved to also grant Toughness on light hits. The bottom line: hit things, get shields back. This keeps you going in protracted brawls. Whether you’re cleaving a lone Elite or swiping through a horde, your shield bar will refuel with each thwack. (Melee Ogryn or ranged Ogryn, doesn’t matter – if you ever plan to swing a weapon, grab this! It’s basically free survivability.)
- The Best Defense: The second key Toughness talent, complementing Smash ’Em. Best Defense triggers more on hitting multiple enemies (great for horde-cleaving situations) and likewise restores your blue bar to keep you in the fight. Post-patch, it gives 15% on heavy multi-hits and a bit on any melee hit (so even light attacks vs groups help you). If you’re going toe-to-toe with mobs of poxwalkers, this ensures you gain Toughness for cleaving through crowds. (Ranged-focused Ogryns might skip this, but then you’d better carry a Cleaver with the Confident Strike blessing to compensate, as one guide quips.) For most builds, take it – you can’t kill stuff if you’re dead, and this helps you not die.
- Heavyweight: An old favorite, now a single-node powerhouse. +30% damage and +30% damage resistance vs big targets (Bulwarks, Crushers, Reapers, Plague Ogryns – basically anything ogre-sized or a Chaos Spawn that makes the others cry). This used to be +50% in the old system, but 30% is still huge – and you get both offense and defense in one talent. This makes you significantly tougher and deadlier when trading blows with the baddest enemies on the map. If a Crusher or Reaper is rushing the team, you want Heavyweight in your back pocket. That’s a grab!
- Soften Them Up: A damage amplification node that makes targets you stagger take more damage. As an Ogryn, you stagger things constantly (remember Excessive Force’s +stagger?). This talent ensures that after you bop an enemy, your whole team’s follow-up hits hurt extra. It’s especially good against high-health elites and bosses – slam them to apply the debuff and let your team melt them faster. This is high value for any melee Ogryn, and even for hybrid builds. (In-game description was corrected to clarify it’s for melee stagger specifically.) Since you’ll be staggering enemies just by doing your job, you might as well make everyone’s damage higher – take this node.
- Payback Time: A flat damage buff whenever you get hurt (or dodged an attack) – basically 15% more damage for a few seconds after you take a hit, now also triggering on a successful dodge. Given you’re a big target, you will get hit. Payback Time ensures that every smack you endure just makes you hit back harder. It’s great for both melee and ranged Ogryns (works with your guns too) and has a high uptime in the thick of battle. This talent used to be 20% but 15% with more consistent triggers is still fantastic. Always take it if you can – it basically rewards you for doing what Ogryns do (getting stuck in and maybe catching a bullet or two). Who needs fancy tactics? If they shoot you, you just get angrier!
- Stomping Boots: This talent is the new version of the old “Non-Stop Violence.” If you plan to use Bull Rush (Indomitable) as your ability, Stomping Boots is mandatory. It replenishes a chunk of Toughness for each enemy you hit with Bull Rush, turning your charge into a huge survivability boost (an emergency shield refill on demand). In higher difficulties especially, this is a lifesaver: you can charge through a horde and watch your Toughness bar zoom back to full, even as you plow into danger. (Charging headlong into the enemy is fun; doing it and coming out with full shields is glorious.) So if you’re the charging type, invest a point in Stomping Boots and use your ultimate aggressively to stay alive and smashing.
- No Pain! (Loyal Protector mod talent): If you choose Loyal Protector as your ability, grab this talent to become absurdly tanky during your taunt. No Pain! makes your Loyal Protector shout immediately grant +10% Toughness and then continuously regenerate additional Toughness for 3 seconds per enemy affected (up to another 10%). And since Loyal Protector’s taunt now pulses multiple times, this effect actually triggers up to three times! In practice, you can be surrounded by a horde, pop Loyal Protector, and watch your Toughness refill even while everything is shooting or clawing at you. It basically guarantees you won’t go down while protecting your team. If you’re going for the full tank/bodyguard style, this talent is invaluable for keeping you standing when you’ve got the whole room’s attention.
- Bruiser / Towering Presence: These are more “nice-to-have” than core, but worth a mention. Towering Presence increases your coherency radius by +50%, which means your team can stray farther and still get your aura (and other coherency perks like Toughness regen). It’s a quality-of-life pick that pairs well with any aura effects. Bruiser gives you and nearby allies some flat Toughness damage reduction when close – also handy for team support. These aren’t critical like the ones above, but if you have spare points and want to lean into a supportive Ogryn role, they can be useful. (Note: Towering Presence was great in the old system for sharing your heavy-attack aura, but now that aura affects all melee, it’s still decent if you have room.)
- Can’t Hit Me…Again!: A quirky but potent defensive node deep in the tree. It reduces consecutive ranged damage you take, rewarding you for dodging or not getting hit repeatedly. Niche for highest difficulties (Auric+) where gunner crossfires are lethal – it makes follow-up shots hurt less if you keep getting pinged. If you’re finding ranged enemies ruin your day, consider it. (NRGaa calls this “super potent in High Intensity,” so on standard difficulties it’s less needed.)
- Other Notables: Furious (boosts light attack power) and Batter (adds bleed on non-heavy attacks) were added to buff “light attack Ogryn” builds – but these are less universally useful unless you’re specifically going for a light-attack spam style. Slam is a fun one that now gives Stamina back on stagger hits – good since you stagger often; it helps you push more and block more. Heavy Hitter (Keystone) got reworked to stack damage on ANY melee hits (heavies give 2 stacks) – if you reach the end of the left tree this can make you a monster, granting stacking damage and even Toughness damage reduction per stack with the right sub-talent. Meanwhile, Feel No Pain (Keystone) on the middle branch now provides team-wide all Toughness regen (not just coherency-based), which can make your squad extremely durable if you go full support. There’s a lot to explore, but the earlier picks are the bread-and-butter that no Ogryn should skip for general play.
Talent Build Example: For a balanced “general difficulty” build, you might do something like: take Steady Grip, Smash ’Em!, Best Defense, Heavyweight, Payback Time, Soften Them Up, and either Bull Rush+Stomping Boots or Loyal Protector+No Pain! depending on preference. This gives you durability, damage vs all targets, and a strong ultimate synergy. You can then sprinkle remaining points into personal taste (maybe Strongman for more melee damage/stagger power, or Valuable Distraction to boost team damage on taunted enemies, etc.). By level 30 you have enough points to cover all essentials and a few “fun” extras – experiment and see what makes the big guy even more enjoyable for you!
Playstyle Tips – How to (Skull)Break Everything
Playing an Ogryn is a unique mix of tankiness, team support, and surprisingly high damage when played right. Here are some tips to maximize your impact and survive any difficulty:
- Be Aggressive, But Not Reckless: As an Ogryn, you excel in melee. Use your bulk and damage reduction to stand toe-to-toe with hordes and elites – that’s where you shine. Your cleaving attacks stagger crowds easily, often stopping weaker enemies from even attacking. However, ranged enemies (snipers, gunners) are a real threat – your Toughness is relatively low (75 base vs 100+ for others) and can get shredded by concentrated fire. So, close distance fast: use cover, dodge zig-zag (your large dodge now even bowls over trash mobs!), and Bull Rush to gap-close into gunner squads. Once you’re in melee, you’re in your element – and those shooters will be on their backs or running scared.
- Use Bull Rush / Indomitable Wisely: If you have the charge, don’t hold it for too long. It recharges reasonably fast, and it can save your life or your team. Great times to Bull Rush:
- To Save a Teammate: If a teammate is down or grabbed, charge through to knock away enemies and create space. You can even bull rush a Trapper or Mutant to instantly free a caught ally – or at least stop the mutant’s charge.
- Panic Button: Low on health and swarmed? Bull Rush out of the mob – you’ll knock most of them down, giving you breathing room. With Non-Stop Violence/Stomping Boots, you’ll also heal Toughness per target hit, likely refilling your shield to survive the escape.
- Initiation: See a cluster of elites that need disrupting? Bull Rush in to scatter them. The stagger buys your team time to focus-fire them while they’re knocked over. Just be careful not to overextend alone; you’re tanky, not immortal!
- Loyal Protector Taunts – Team Lifesaver: If you opted for Loyal Protector ability, your role leans more toward protective tank. Don’t be shy about using it when your team is in a bad spot – it forces all nearby enemies to target you and temporarily stop shooting your allies. This is perfect if, say, your Veteran is one shot away from death – you shout, and suddenly all the shooters switch to you, giving the Vet time to recover. During your taunt, start reviving downed players – you cannot be interrupted thanks to the passive effect, and you’re taking reduced damage (with Thick Skin + possibly Hard As Nails if you specced it, etc.). Also, remember it taunts new enemies that enter, so you’ve got a good 6 seconds of drawing aggro. After it ends, you’ll likely have high Toughness (thanks to No Pain! giving you extra Toughness per enemy taunted), so you can safely fall back or start smashing again. You basically become the unbreakable focus of every enemy’s hate – exactly what you want when your allies are in trouble.
- Rescue Duty – Ogryn “Res-bot”: Your massive damage reduction and the Loyal Protector revive immunity make you the best candidate to pick up downed allies. Communicate with your team – if someone falls, often the Ogryn should charge in, knock enemies away, and start the revive while others cover you. Even without Loyal Protector active, you won’t get staggered by hits while reviving, and talents like Hard as Nails (which reduces damage taken by 25% for each downed ally) make you ridiculously hard to kill in those moments. As one guide puts it, this combo makes enemies have “a hard time completely killing you” when you’re picking someone up. So be proud of your secondary role as the team’s savior – it wins games.
- Stay in Coherency: You provide great buffs (melee damage aura, and possibly other talents like Feel No Pain’s Toughness regen or Bullfighter if you took it). Likewise, you benefit from allies’ coherency perks (like Toughness regen pulses). With Towering Presence your aura is big, but try to keep buddies nearby. An Ogryn alone is a big target; an Ogryn with friends is a big target that hits back while the friends shoot everything around him. Work as a team – that’s what the Emperor wants, probably.
- Use Cover and Slide/Dodge vs Ranged: This isn’t unique to Ogryn, but it’s extra important because of your size. You’re literally a walking meatshield, which means enemies will spot and shoot you first. Use your Ogryn shield (if equipped) or just terrain to break line of sight as you approach shooters. Your dodge is shorter than other classes, but with Outta My Way! you can dodge to interrupt enemy shooters by bumping into them, or dodge through fodder blocking you. If pinned by gunfire, don’t hesitate to lie prone (slide) behind cover – you’re big, but you can crouch. And if things get really hot, wait for your team or ranged weapon to thin them out. Remember, an Ogryn’s death is a big loss – you’re the linchpin of the frontline. So play smart on approach, then unleash hell up close.
- Melee Combat Tips: Your melee attacks have sweeping cleave – make sure to aim those cleavers and clubs to hit multiple targets when possible (more hits = more stagger + more Toughness back with your talents). Heavy attacks often have high stagger; use them to smash elites down or to control a choke point. Light attacks can be quicker for horde clear. Learn your weapon’s combo patterns (some weapons like the shovel or club have great light–heavy alternating combos). And don’t forget your weapon special moves: e.g. the Cleaver’s special is a punch that can stun, the Shovel and Bully Club have targetable heavy slams, etc. These can be clutch for disrupting an enemy preparing a big hit.
- Thump the Big Guys: As the biggest reject, it falls to you to handle heavy enemies. With talents like Heavyweight and your sheer strength, you’re best suited to duel Crushers, Bulwarks, and mutants. Circle strafe around Crushers/Bulwarks to hit their backs, use your melee stagger to your advantage (many big foes can be staggered mid-attack by a heavy swing or a kick). If you see a Chaos Ogryn (the Plague Ogryn boss) or a Daemonhost – you can actually withstand their hits better than others. Tank the boss (blocking when needed) so your teammates can pour in damage. Knowing when to go defensive (block/push) vs offensive is key: you have high health, not infinite health. Time your blocks and pushes for when a big enemy tries to smack you, then punish with a heavy attack to the face. Nothing is more satisfying than an Ogryn Skullbreaker literally out-brawling a Chaos Spawn one-on-one. 💪
Weapons & Synergy – Choose the Right Tools for the Job
The Skullbreaker isn’t picky – he can wield massive melee weapons and brutal heavy guns that other classes can only dream of. Patch updates have shuffled the weapon balance a bit, so let’s highlight the best options and how they synergize with your playstyle:
Top Melee Weapons for Ogryn
- Cleavers (Mk III, IV, VI “Bull Butcher/Krourk”): The cleaver is a fan-favorite and still a top choice for general play. It’s essentially a giant chopping blade that excels at horde clearing with wide sweeps, and does surprisingly well against armored targets if you use the right one. The Krourk Mk IV Cleaver stands out as the best of the bunch – it has a great combo of fast swings and strong damage, including against armor. In fact, it’s considered S-tier among Ogryn weapons. Light attack spam with the Mk IV can even chew through armored enemies, unlike the other cleavers. If you mod it with the Confident Strike blessing (restores Toughness on chained hits) you’re “almost invincible” in melee, since each swing heals you. Pair that with Momentum (toughness on hitting multiple enemies) and you’ll be a regenerating meat-grinder in every mob. The other cleavers (Mk III, Mk VI) are a bit weaker – slower or less armor penetration – so stick with the trusty Mk IV if you can. Cleaver gameplay is straightforward: spam light attacks for hordes, and use an occasional heavy for a single tough enemy. The cleaver’s fast hits plus your stagger bonuses mean even a charging rager might get stagger-locked by your relentless chopping. It’s a beautiful thing.
- “Brunt’s Basher” Bully Club (Mk IIIb): The Bully Clubs are basically giant two-handed maces. The Mk IIIb Basher is considered another top-tier (S-tier) melee for Ogryn. Its claim to fame is very fast and powerful light-attack spam – you can swing it almost as fast as a human swings a sword, and it hurts. In a horde, you can literally mash light attack and watch dozens of heretics get knocked around and pulped. With Confident Strike on it, you again achieve near-invincibility through constant Toughness restoration. Unlike the cleaver, the club’s heavy attack is an overhead smash that deals huge single-target damage, so mix in heavies for elites. Combo tip: one recommended pattern is Light → Heavy → Light → Heavy to keep up a rhythm of wide sweeps and heavy hits. The Bully Club also has a special attack (a jab) that can set up a heavy follow-up. Overall, if you like the idea of home-run smashing enemies into the ground, the Bully Club will deliver. It’s a bit slower vs groups than the cleaver, but hits harder per swing. (Plus, it’s literally a slab of metal marked “Brunt’s Basher” – what’s not to love?)
- Latrine Shovel: Don’t laugh – the shovel is actually great! Ogryn shovels have a mix of quick swings and heavy thrusts. Notably the Brute-Brainer Mk III and Mk V shovels are strong: they can one-shot many elites with a charged heavy strike (Mk V’s charged heavy is especially powerful). The shovel’s light attacks are wide sweeps good for clearing trash, and the heavy attacks are overheads or thrusts that hit very hard. Some shovel variants have a unique special attack (the “folding shovel” bayonet stab) that hits even harder. According to one post-rework guide, the Mk III shovel is an A-tier weapon with a good mix of speed and elite DPS, and the Mk V shovel can literally one-shot multiple elites in one swing if you charge it up. If you fancy the entrenching tool playstyle, it’s totally viable. Use light attacks for hordes, and heavy thrusts or the special stab for big targets. (And enjoy the mental image of an Ogryn furiously whacking heretics with a shovel – because in the grim darkness of the far future, even the shovel is deadly.)
- Ogryn Power Maul & Slab Shield: This combo deserves a shout-out for style and utility. The maul itself hits decently, but the real gem is the Slab Shield special. You can raise your shield to become nearly invulnerable from the front, drawing aggro and letting allies shoot safely. While blocking, you can perform a shield bash to knock enemies back. This setup turns you into a pure tank – great in choke points or when your team needs to hold a position. Offensively it’s slower (damage output isn’t as high as cleaver/club), so it might not be optimal for killing things, but if your goal is survivability and team support, the shield is unmatched. Many Ogryn players swap to shield for specific high-difficulty missions or when the team lacks defensive tools. Just remember you can’t block forever (stamina will drain), so time those bashes and let your team capitalize on the openings.
- Other Melee Options: Ogryns also have pickaxes, which are actually monsters in the right hands. The Karsolas Mk II (heavy cleave) and the Branx Mk I (huge single-target damage) pickaxes are both rated S-tier by some, due to their ability to delete elites with charged hits. They’re slower and a bit trickier (you may need to animation-cancel heavy attacks for max DPS), but they can be very effective. If you like big single-hit “BONK!” weapons, give the pickaxe a go. The Battle Maul (unshielded) and Heavy Knife (Cleaver) we already covered, and there’s also the Achlys Power Maul (essentially a powered club that shocks enemies – fun and good for stuns, though currently not as meta as cleaver/club). Generally, you can make almost any Ogryn melee work now, but for all-round performance, the Cleaver (Mk IV) and Bully Club (Mk IIIb) stand at the top, with shovel or pickaxe close behind.
Ranged Weapons for Ogryn
- Foe-Rend Ripper Guns (Mk II, V, VI): The Ripper Gun is iconic Ogryn firepower – essentially a slab-like triple-barrel shotgun. It excels at close-to-mid range devastation. All variants let you either hip-fire in bursts or brace it to unleash sustained fire. The recent patches gave Rippers a nice boost: the whole family can now roll the “Can Opener” blessing, which applies stacks of 2.5% Brittleness (increased damage taken) on an enemy when you hit with the weapon’s special attack. This means you can greatly soften up big targets: tagging a Crusher or boss with a Ripper’s bash can stack a huge damage debuff on it (up to +40% damage taken), making both your shots and your team’s attacks far more effective. As for which mark is best:
- The Mk VI Ripper fires a tight double-burst hipfire and a triple-burst when braced, with low recoil and good accuracy. It’s great for stagger – in fact, it’s noted as the “best stagger stick” of the Rippers. This is useful for locking down charging ragers or mutants by peppering them.
- The Mk V Ripper has a wilder triple-burst hipfire and full-auto braced mode. It boasts the highest DPS potential of the bunch, but with hefty recoil to manage. Many Ogryn veterans consider the Mk V the top damage dealer (if you can handle its kick). Basically, it shreds anything at short range – just be ready to yank your aim back down due to the recoil.
- The Mk II Ripper is a bit slower firing and less popular – it’s generally considered the weakest variant (slower bursts, moderate recoil), so stick to Mk V or VI if possible. All Rippers are at least B-tier effective in the current patch, meaning they’re fine for most content. Use the hipfire for quick snapshots (two or three-round bursts can delete common shooters or a poxburster), and brace (aim down sights) for a tighter spread and sustained fire to mow down groups or heavier targets. And don’t forget the special: the Ripper’s bayonet stab which triggers Can Opener. Stab a boss, then unload magazine after magazine – it will melt noticeably faster thanks to the brittleness stacks. Ripperguns are just plain fun, combining the feel of a shotgun and a heavy machine gun. If you like the “DakkaDakka” approach, you can’t go wrong carrying a Ripper.
- Lorenz MK V Kickback: The Kickback is basically a sawed-off Ogre-sized shotgun (think double-barrel shotgun but for an Ogryn). It’s fantastic in close quarters – a single blast can obliterate a cluster of basic enemies or heavily stagger an elite, and it comes with a bayonet for stabbing in a pinch. The Kickback counts as a special weapon with limited range and a long reload, but Patch 1.7 introduced talents that heavily complement it for a “Gun Lugger” build. For example, the “Run ‘n’ Gun” talent lets you move faster while braced or reloading, and “Keep Shooting” reduces reload time after a kill. With those, the Kickback user can blast, reload on the move, and blast again without feeling too sluggish. The “Blaze Away” blessing (ramped damage the more of your magazine you empty continuously) also pairs great with Kickback’s two-shot mag – basically encouraging you to mag-dump both barrels for maximum effect. In practice, Kickback is an A-tier weapon in most content and even S-tier in the hardest mode (Auric) with the right build. It shines as a hybrid of crowd-clear (the pellet spread is wide and lethal up close) and a CC tool (it flattens even Chaos Ogryns for a moment with sheer stagger force). Just mind the ammo – it’s easy to burn through shells because it’s so satisfying to BOOM every few seconds. Consider pairing Kickback with melee weapons that handle what it can’t (it’s less useful at range, obviously). If you see a cluster of Scabs around a doorway, by all means, give them both barrels and watch the body parts fly.
- Lorenz MK VI Rumbler: If explosions are more your style, the Rumbler is your best friend. The Rumbler is a grenade launcher that fires impact explosives – think of it as a portable mortar. Recent balance changes have made the Rumbler exceptionally strong (arguably over-tuned) – one community guide straight-up calls it a “busted S-tier broken toxic weapon” (half-jokingly, because it’s so good it might trivialize content). Why is it so good? The Rumbler’s shots deal heavy impact damage, AOE blast, massive stagger, and even leave a small smoke cloud that obscures enemies’ sight. This means:
- It blows up hordes with ease (you can one-shot a clump of 5-8 poxwalkers in a blast).
- It stuns anything it doesn’t kill – even Crushers will stumble from a hit.
- It damages bosses and monstrosities quite effectively, especially if you direct-hit weak spots.
- It can stop shooters from firing – the suppression and the visual smoke cloud deny enemy ranged units for a moment.
Basically, Rumbler is the ultimate utility gun: crowd control, damage, and even some support by denying enemy actions. The only downsides: it has travel time and a bit of an arc (so you need to aim/lead shots), and the explosions can obscure visibility for you and your team (the “team vision killer” aspect). Also, its ammo is not infinite, so make shots count. If you take Rumbler, be mindful not to blind your allies with constant smoke – with great power comes great responsibility! But used well, the Rumbler can make a mission dramatically easier by keeping hordes and specials under control from a safe distance. It pairs wonderfully with a melee-centric build because it covers your one weakness (ranged crowd control). Just note: for pure ranged DPS, other guns might outshine it, but as an all-rounder tool, it’s hard to beat.
- Blastoom Mk III Grenadier Gauntlet: Another unique Ogryn toy – basically a hybrid of a grenade launcher and a knuckle-duster. The Grenade Gauntlet was buffed recently, making it a solid A-tier choice as well. It fires arcing grenades (one per reload) that explode on impact like mini-frag grenades. It won’t carpet-bomb like the Rumbler, but it will one-shot specials like Poxbursters reliably, and it’s excellent for shutting down groups of gunners: lob a grenade into a cluster of shooters and they’ll be thrown around, often killing a couple outright and stunning the rest. The gauntlet’s range is decent (about 40 meters max, as noted in guides), though you have to arc shots for distance. Where it shines is as a support tool for a melee Ogryn – e.g., if you’re mid-horde fight and some Maulers start firing behind them, you can quickly pop a grenade into them to stop that. It also doubles as a melee smash (you can punch things with it for heavy stagger/damage up close). While not as outright powerful as the Rumbler per shot, it has great utility and can fit into any build where you want some ranged explosive punch without sacrificing too much melee focus. It’s particularly fun for objective play (you can solo destroy those Demonic Growths in missions easily by shooting grenades, as one tip notes). If you like a boomfist approach, the Grenadier Gauntlet is extremely satisfying.
- Heavy Stubbers: Ogryns can lug around massive heavy stubbers – essentially heavy machine guns with huge mags. They lay down suppressive fire and sustained DPS. The Krourk Mk IIa and Achlys Mk II stubbers are notable. Stubbers got indirectly buffed by the rework too (some talents improve ranged crits, and base ranged damage went up in certain builds). They excel at continuous fire – mowing down hordes of softer enemies and suppressing gunners so they keep their heads down. With talents like Suppressive Fire (Coward Culling) you even deal extra suppression now. However, stubbers can be a bit unwieldy: you move slow while firing, and reloading a 100-round belt mid-fight can be risky unless you have cover or the “Maximum Firepower” talent which speeds reload on kill. Stubbers synergize with the right-side (Gun Lugger) talents: for instance, Blaze Away blessing (also on stubbers) gives stacking damage the more you fire, and Heat of Battle talent adds fire rate as you build stacks. If you go all-in on a Dakka Ogryn, heavy stubber can be your main weapon – just be sure your team doesn’t mind you stealing all the ammo crates! For general play, stubbers are fun but maybe less flexible than a Ripper or Rumbler. Still, nothing says “suppressing fire” like an Ogryn with a heavy stubber: the sheer volume of fire will keep hordes at bay and pin enemies down effectively.
Weapon Synergy & Final Tips: No matter what weapons you choose, remember to adjust your talent nodes to amplify them. For example, if you love the Ripper or Kickback, invest in ranged talents like Mindblower (bonus crit chance on close range shots) or Back Off! (chance to trigger your ranged bonuses after a melee kill). If you stick to pure melee, stack all those melee and Toughness talents to become an unkillable brawler. A balanced approach (melee core with one or two ranged boosts) is very strong in most cases – you’ll primarily fight up close, but can whip out the gun for emergencies (like sniping a distant sniper or blasting a mutant charging at your squishy Psyker). Communicate with your team about your role: as Ogryn you can say “I got the hordes, you guys focus specials,” or “I’ll babysit the Demonhost with shield, you do objectives,” etc. A coordinated Ogryn is a nightmare for the enemy: they can’t bring you down easily, and you enable your allies to do their jobs safely.
Lastly, keep the Ogryn mindset: simple, direct, and overwhelmingly forceful. When in doubt, CHARGE something, SMASH something, or SHOOT something (the bigger the target, the more enthusiastic your response should be). The Emperor gave you a big body – use it to block bullets and break bones. And most importantly, have fun being the massive, kind-hearted (and thick-skulled) slab of muscle that keeps the team alive and the heretics on the floor. In Darktide’s highest challenges or just a casual Malice run, a well-played Skullbreaker is an absolute blast (sometimes literally!). Now get out there and show the heretics why size does matter – for the Emperor! 💥👊
Sources: The information above is based on the latest Darktide patch notes and community guides, including GamesLantern’s updated Ogryn class data and build insights for Patch 1.7.6, as well as firsthand game experience. Always refer to in-game descriptions and current patch notes for the most accurate details, as balance changes can adjust these recommendations. Now go forth and crump some skulls, Reject – your Ogryn awaits glory! 🪨🔨