
Table of Contents
Class

Weapons


Haymaker
+4% to Instakill human-sized enemies on Chained Heavy Hit. Stacks 5 times. Note that other potential triggers will not be activated on Instakill.
Thrust
Up to +20% Strength based on the charge time of your heavy attacks. Stacks 3 times.

Adhesive Charge
Your Grenades stick to Ogryns and Monstrosities. +15% Damage vs Ogryns and Monstrosities
Shattering Impact
Target receives 4 Stacks of 2.5% Brittleness on direct projectile hit. Debuff lasts for 5 seconds and can have a maximum of 16 stacks.
Curios

+17-21% Max Health
+17-21% Max Health
+17-21% Max Health
Talent Tree
Description
This build has been tweaked and changed based on some personal testing as well as the wonderful resource that is the Ogrynomicon. Check out that guide on the Steam Community forum for some fantastic info.
The aim for this build is to be a powerful allrounder for dealing with any heretical situation that may be thrown at you. It does fantastically well in Damnation and Auric Maelstrom difficulties while also being pretty darn fun. It throws in some party buffs to help out your fellow rejects along the way.
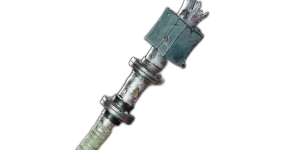
Part I: Walk Softly, and Carry and MKII "Brunt's Pride" Bully Club.
The swing, whack, crack, and slap of this build. For the majority of the mission you'll be using it for horde clear. To maintain Heavy Hitter you'll be doing the first heavy attack followed by the second quick attack. Both are wide sweeping cleaves that damage 4-6 enemies and stagger many more, depending on your stacks of Thrust. For the most part this won't kill much on the first swing, but that's trick. You want them to bleed out for a second or two so they can think on their heretical life choices. It also gives you bleeding stacks for the 60% damage reduction off of Delight in Destruction, but you don't care about that. You're only looking for your next ration and it's less messy when it has no blood.
Elites and specials are what give flavor to your Bully Club spit roast. Your second heavy attack is a downward smash which deals a large amount of damage to one target. This will get around 800 damage on flak targets with minimal charge, and 1000-1400 on carapace with a full charge (depending on your stacks of Heavy Hitter and Furious). This means you'll be going around one-shotting everything that isn't a Mauler or Ogryn. This includes mutants, but those require some practice as you'll need to queue up and time the second heavy swing. Those that are still alive after the first swing will drop after the second, or if you're not fully charging them it'll take 3 or 4. If you're up against groups of flak armored enemies, a fully charge heavy 1 will send all of them cartwheeling. If you're bored, just hold left click! You'll walk around dropping fully charged heavy attacks that have "Crunch!" as well as all 3 stacks of thrust. This will send any heads with the misfortune of being in front of you either to orbit, or deep into the crust of Atoma.
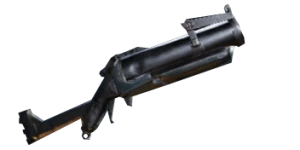
Part II: I'm Here to Kick Ass and Shoot Nades, and I've Got Plenty of Nades.
The icing and delicious berry assortment on the cake that is this build is the Rumbler.
Currently in progress