
Table of Contents
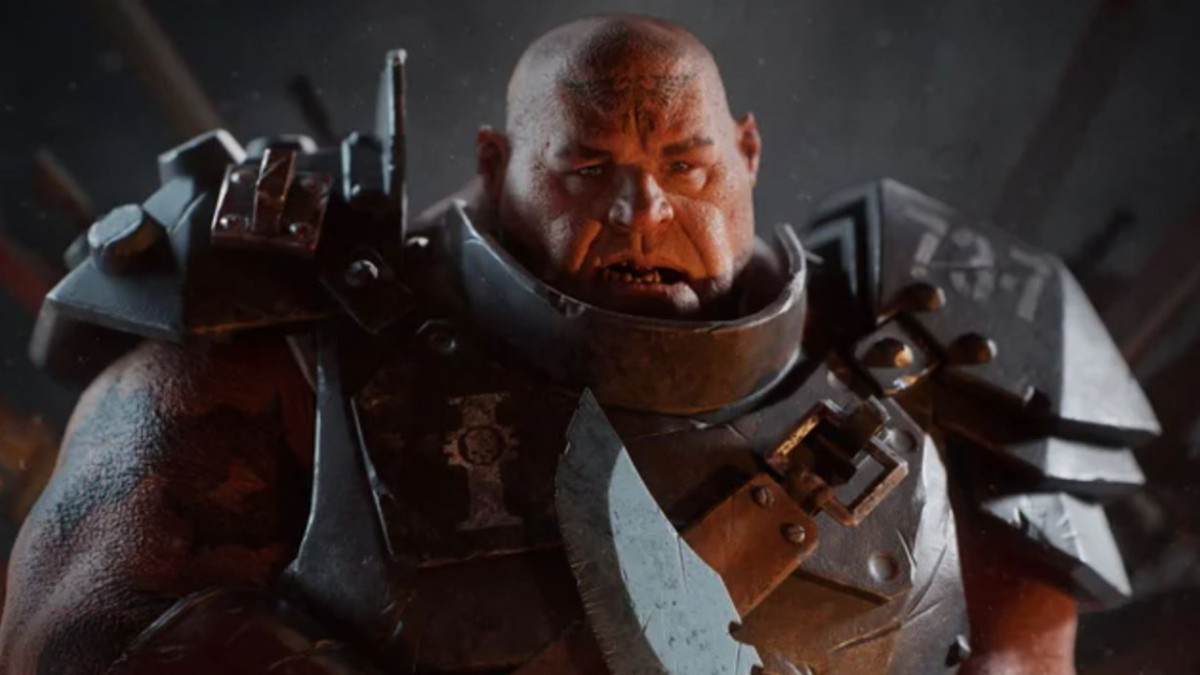
Class

Weapons


Thrust
Up to +20% Strength based on the charge time of your heavy attacks. Stacks 3 times.
Skullcrusher
Target receives 4 Stack(s) of +10% Damage if already Staggered. Lasts 5s.

Ceaseless Barrage
+20% Suppression and +7% Damage against Suppressed Enemies for every 2.5% of magazine spent during continuous fire. Stacks 5 times.
Charmed Reload
5 bullets loaded from Reserve on Critical Hit.
Curios

+17-21% Max Health
+17-21% Max Health
+17-21% Max Health
Talent Tree
Description
Tired of the game's hidden rng chance to win based of your random team mates you got paired with? Or even of being the last one alive in most games? Well look no further than the best guide on how to carry your entire team, even if it's a toddler playing! Down below is an explanation of every part of the build, gameplay tips, and general knowledge of how to start carrying your rng team.
Bully Club - Truly the most dangerous weapon to be used against heretics, by using the simple Special Attack Key. You are able to stagger any heretic by giving a good wake up call slap too the head, monsters included. Your club is going to be what you primarily use, the slap ability is mostly good against monsters, as your heavy attacks already have enough stagger force to even stagger Crushers, though it is still good to use against crushers cause not all the time are you able to get a stagger hit in. And with Attention Seeker (Pushing enemies taunts them for 8s) be sure to push if you notice your team mates are taking too much heat. It's especially useful to always taunt crushers, maulers, and raggers, and be sure to ping to help tell your team to focus on the enemies on you.
Bully Club Comboing - The MK 1 is imo the most effective club, light into heavy (repeat), is great for horde clearing, or if you need to get quick heavy attacks off on elite enemies to stagger them around. Heavy into heavy (repeat), is great for killing single targets, or stacking bleed on the heretics. On bosses your combo will be heavy, into light, than a slap. Be sure to charge your club at max before swinging to get the full damage output you are able to deal. This doesn't mean holding heavy until your character swings, your character's arm will come to a sudden stop, after which you can let go of your attack key. But also you don't always want to prio maxing out your swing, only if you are able too in time.
Bully Club Combo Switching - Sometimes you need to switch from just horde clear to single target damage, or the other way around, to go from horde too single target, you want to do another heavy after going into a heavy, this will start your single target combo. To switch back too your horde clearing, you want to do a light attack after your do your heavy swipe attack, after doing your light, you're back into horde clearing.
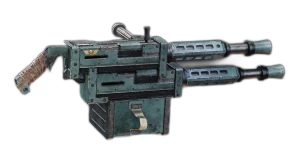
Mk IV Stubber - Out of all the ranged weapons I've gone through, this feels the best for dealing with gunners, specialists, and with raggers. Your range weapon will be primarily used for killing the above mentioned if you're not good at rock throws, or if you are even out of rocks. Specialists are dangerous to your team, bombers able to section off your team, flamers able to blind you and delete any and all toughness you have, the horrors of which you are able to stop for your team, especially if your entire team is Zeolots. The Stubber is also excellent at removing any pesky ragger hordes, able to make them not exist in entire seconds.
Why rock? - The rock is the easiest and quickest way to deal with flamers, mutants (able to straight up one shot mutants), trappers, and bombers, and if you are just that good, snipers included, making sure your team doesn't ignore the big red laser aimed at them, since you have already rocked the sniper. Also the benefit of getting a new rock every 45 seconds, allowing more grenade stashes to go too your team. Rocks are also really good if you are caught out in the open with a gunner firing at you.
Bull Rush - In my opinion, the most important part of the build, able to guarantee a stagger on any enemy, even monsters that have ahold of one of your team mates, extremely useful to get them out of Beast of Nurgle when swallowed. It's also extremely useful at dealing with flamers while not having any rocks and not able to use your range weapon, also it's useful to revive downed team mates, with the extra revive speed allowing you to pick up your team before a Crusher has time to recover. You are also able to cancel the ability any time by moving backwards, allowing you to charge and push a flamer or trapper, but then stop to clobber them. It's also extremely useful if you're ever out of position from your team, allowing you to quickly rush too them if you're ever in trouble.
Why Feel No Pain? - Simple, your number one goal at all times is just to not die, how are you able to carry your team when you're the one dead? Also able to knock pox hounds off of you is able to save games that you'd other wise lose.
Curios - Your main goal once again is not to die, but also keep your team alive, which also includes keeping them up and fighting, and due too our default health pool being so large, 15% extra health is big for the big man himself. Now your number one enemy at any time, and even to your own team is the dreadful gunners, tending to be in groups, able to melt down your health, and delete your team. Having resistance on gunners will help give you the time to get into cover, or even advance up onto them while getting through cover. Bombers are also dangerous, able to split off your team at times with a wall of flame, having the resistance will make bull rushing through not hurt as much, but also lets you quickly run through if able too.
Different Blessing&Curios Recommendation - If you feel like you are taking too much damage, you can replace your Bully Club's "SkullCrusher" with "Momentum" allowing your heavy cleaves to give back an insane amount of toughness back, even allowing your light cleave to also give toughness back in return, this will help you tank hordes of enemies in return of being able to deal extra damage to basically everything. For curios, if you feel like you're unable to keep your toughness up, than replace as many health curios as needed, at least try keeping one while changing the +5% health too thoughness instead.
Main Gameplay of The Build - You're not meant for dealing extremes amount of damage (Only when you are meant too), most of the damage output will be relied off of your team, now you may ask, "Well how am I supposed to carry if I'm not the one killing everything?" Which is simple, it's a team based game, as long as you are able to stay alive, keep your team up, and keep any dangerous enemies aggro'd, it will allow your team to focus on outputting as much damage as needed. But it is not too say you are unable to deal the damage needed, you are able to put down any Crushers pretty easy since your club can stagger Crushers out of their over heads. But if needed, you can slap them if you can't get a charged heavy in time, or if your heavy didn't stagger. You are also extremely good at dealing with the most dangerous enemy type, that being monsters, with the slap ability you are able to stun lock any monsters with the right timing, even demon hosts if someone has their music blaring and no spatial awareness. Because of this you able able to solo monsters if you ever need, being able to do up too 195% bonus damage on a fully charge heavy attack after staggering the boss (Not including headshot dmg), this also includes the 20% damage for 5 secs upon taking damage. The same goes for Crushers and Maulers, being able to nuke large portions of their health with each heavy hit. Be sure to also stay next to at least 2 players, always be aware of your team positioning, now you may ask why not stay with the lone player if they are split off from the team? It's as simple as they are most likely as good as dead, and you risking your life to keep them alive, while also then leaving two team mates alone, remember this is a build about carrying your team, we have next to none expectations of our team. It's best to let one team member die, rather than two, or even your entire team die cause their damage sponge/distraction is gone. While staying with your two team members, hopefully the crippling loneliness they start feeling will make them want to stay apart of the group again and not splitting away from the group by themselves. But if you feel confident in your two randos to stay alive, as you go over to keep your other team member alive, it can be worth the risk, since then you won't be down a team member, and not needing to go save them. It's also important to wait for any stragglers before dropping down to advance forwards, your single team mate could get trapped or hounded and being unable to be saved completely, being unable to traverse back in the map.