Table of Contents
Class
Weapons
Curios


Talent Tree
Description
Ogryn Bulwark
A pretty standard Tank Ogryn build, but why fix what isn't broken? The Orox Mk II Battle Maul & Mk III Slab Shield is one of the best weapons the Ogryn has available, able to taunt ranged enemies simply by raising it up along with Attention Seeker, which forces most ranged enemies to drop their weapons and engage in melee, trivialises most ranged encounters. Along with Batter, our shield can deal with even Crushers in a timely manner, and stands knee-deep in chaff to constantly regenerate our Toughness. I used to prefer Indomitable, but I have grown to love the extra damage and disruption that Loyal Protector can bring.
Playstyle
You are designed to be the vanguard of a squad. When entering ranged firefights, raise and block with your shield until you can get into range to start smacking them. Most ranged enemies will drop their weapons and rush to try and attack in melee. Snipers will get locked into a kicking animation, stopping them from being a threat. The only enemies that will not stop shooting are ones which lack a melee animation, such as gunners and reapers. You can use your ability to pull ranged enemies in from a distance, as well as use it to stagger enemies. Crushers can be cancelled out of their overhead swings, and it can be used to help save teammates when they are in a pinch.
In melee, you have two options. Either continually spam heavy attacks, or reset your attack animation so that you can spam Heavy-1 over and over. Heavy-1 attacks have absurd cleave and stagger values, but doing this means that you attack slightly slower (and require more brain input). A big chunk of your damage comes from bleed damage, so I find it better to just chain heavy combos for the majority of the mission. There might be times, such as when you are facing crushers, however, when the extra stagger and cleave comes in use. Monstrsoities should be taunted, amplifying your team's damage whilst you focus on applying bleed and keeping it's aggro off of your allies.
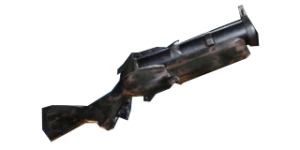
The Lorenz Mk V Kickback is a highly versatile weapon with a generous amount of ammunition. It is primarily used to take out specials. Aiming down the sight reduces the spread of the pellets fired. I guess our Ogryn squeezes the barrel so tight that it makes it more accurate. Some Ork logic going on there. Regardless, due to its incredibly high damage, it can one-shot most threats from a fairly hefty distance away. Nothing quite like counter-sniping with a blunderbuss.
Weapons
Whilst you are sacrificing some raw DPS over other options, the utility the shield offers is second to none. And in all honesty, it still deals insane damage. Just constantly spam heavy attacks to keep your toughness high and stun everything in your path. The only time you should be using light attacks is if you took the keystone modifier Brutish momentum, and you don't need to be topping off your toughness. Also when there are a lot of disablers around, especially packs of pox hounds, so you can more easily dodge disables and eliminate them swiftly.
The first heavy attack is a strike down. If you want to maximise your damage against tougher targets, attack once, block and then attack again. Admittedly, most of your damage will be coming from bleed so it's not super necessary to succeed, and this means our overall heavy attack volume is decreased. Heavy-1 does have ridiculous cleave, however, so use it when there is a huge pack in front of you to deal with. I like to run extra damage to carapace and flak armoured enemies, as Scab Ragers, Maulers, Crushers and Scab Captains are the main threats you want to increase your DPS against. Extra damage versus maniacs is also viable.
Skullcrusher is a fantastic blessing for making enemies take more damage from all sources. You are going to be constantly staggering enemies anyway, so it will proc constantly. It synergises well with Batter to increase our bleed damage. Confident Strike just adds to your already ridiculous toughness replenishment, although you can make one of the other blessings work just fine too. In fact, with the unlocked and loaded patch, I prefer grabbing Opportunist to further increase our damage, especially when dealing with Crushers and maulers and the like. Keep your guard up whilst advancing on ranged targets to get into the swinging distance, or rely on Attention seeker to bring them to you.
Curios
After 1,000+ hours in Darktide, I have a few simple rules when it comes to Curios. Melee classes (Ogryns and Zealot) should take 2x Toughness and 1x Health Curios to give a good mix of defensive stats. Veterans should take 3 Toughness Curios, as they benefit more from Toughness than other classes, owing to their larger toughness pools and skills such as Iron Will. Psykers should run 2x Toughness and 1x Stamina curio to make up for low Base stamina, and to benefit from their faster stamina regeneration. Obviously, there are some caveats to that. A melee centric Veteran might want to run 1x Health Curio and certain knife and stealth builds might want to run a stamina curio. But for the most part, I find this a good rule to stick to to ensure you have curios that are effective for the vast majority of your builds, especially when starting out when it is difficult to find any curios, much less good ones. Oh and Wound Curios should only ever be used on Zealot Martydom builds. Having Wound Curios actually means that health stims will now heal less on you. I know some people like to take a wound curio 'just in case they go down', but in higher difficulties, there is no guarantee your team can pick you up. It's far better to invest in defensive abilities which prevent downs as much as possible.
For Perks, Always take Extra toughness and gunner resistance. Gunner Resistance is the most useful resistance node as it applies to Scab Gunners, Scab Shotgunners, Dreg Gunners, Dreg Shotgunners and Reapers. This is the largest collection of enemies out of any of the resistance perks. These enemies can absolutely shred you in seconds, and make up a significant portion of the enemies encountered in Auric Maelstroms. The ability is multiplicative, so does have some diminishing returns. 0.80×0.80×0.80=0.512 meaning that we end up with a total gunner resistance of 0.488, just below 50%. I can certainly see the argument to only running two gunner resistance curios (with an overall damage resistance of 36 %) and opting for something else (potentially sniper OR Flamer), but I still value that extra 12.8%.
For the final perk, it depends on your build. If you are using a build which relies heavily on your ability, then run cooldown reduction to more frequently make use of said ability. I find this to be especially powerful on builds which make use of Voice of Command for instance. If your build is not too heavily reliant on your ability, then run for extra health. Again you can tweak this to suit individual playstyle (and the mercy of the RNG-gods as Hadrons bricks yet another piece of equipment), but this is a pretty good rule to aim for.
Questions & Answers
Question: Why do the stats, weapons, and abilities in the video not match what's written in this guide?
Answer: I am constantly evolving and refining my builds. As patch notes are released, certain weapons and abilities may change in effectiveness. Additionally, as my skills and knowledge grow, my preferred builds can shift. I aim to provide videos demonstrating the effectiveness of my builds in a Damnation level Auric run as proof of concept. However, these videos may sometimes be outdated. While I strive to keep everything current, Darktide is my hobby, and I may not always have the latest updates in the videos. The information in these guides reflects my most recent thinking and should be considered more accurate than what is shown in the videos.
Video

Azyr Psyker | Smite | Venting Shriek | Empowered Psionics
By Crukih • Updated 1 year ago


Sister of Battle | Immolation Grenade | Chorus of Spiritual Fortitude | Blazing Piety
By Crukih • Updated 6 months ago


Aqshy Psyker | Brain Rupture | Telekine Shield | Warp Siphon
By Crukih • Updated 6 months ago

Ulgu Psyker | Assail | Telekine Shield | Disrupt Destiny
By Crukih • Updated 1 year ago

