Table of Contents
Class
Weapons
Curios


Talent Tree
Description
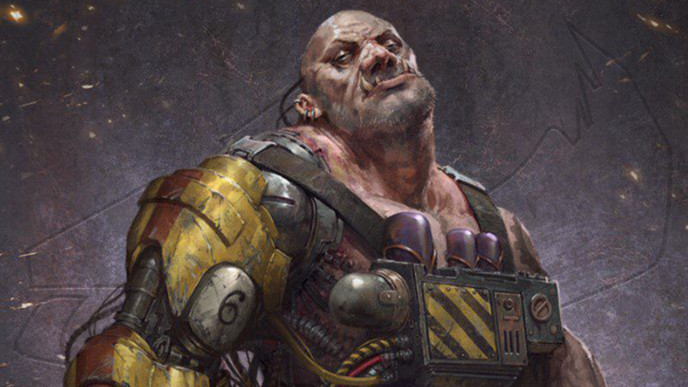
Bone 'ead
I like to take this build specifically into Auric Maelstrom C-I-VI (Waves of Specialist Enemies. Only Scab faction). Your shovel is capable of one-shotting a crusher if you wind it up and deal Horrifying damage to Monstrosities. The Brute-Brainer Mk V Latrine Shovel is superior to the Brute-Brainer Mk XIX Latrine Shovel owing to its Horizontal Heavy attacks. With Brutal Momentum, Normal heavy attacks when aimed at head height, can decapitate entire hordes of enemies. The special attack, when fully charged with Crunch can kill a Crusher in one hit. Brutal Momentum has sadly been nerfed so it can no longer kill an entire pack of Crushers in one swing, but still remains a great way to decapitate swathes of lesser enemies, including multiple Maulers and Ragers.
Playstyle
Your role is to take down Crushers and Maulers as soon as possible. The shorter time they are alive, the less likely they can 1-shot your teammates. Folding the shovel and then waiting for it to release, will provide a massive damage boost thanks to the combination of Thrust and Crunch! This is sufficient to kill a crusher in 1-hit, even without landing a weakspot hit. Bulwarks can be dealt with by jumping at the last second, to bring the shovel down over the shield and straight into their skull. With Brutal Momentum, You are able to kill multiple marauders in a single swing (although sadly no longer multiple Crushers), if you can land headshots. When facing a large group of enemies, slide backwards after delivering a successful blow, to give you space and time to re-prime your shovel. This attack can also do hefty damage to monstrosities, and normal heavy swings can decapitate half a dozen poxwalkers with every swing. Our ranged option is used sparingly (as there are no ammo pickups), to take out distant ranged enemies. Try to use your rocks as much as possible to save ammunition. Despite being 'mostly melee', as it is a scab-only run, you will encounter quite a large number of snipers. Both the Kickback and the Blastoom Mk III Grenadier Gauntlet are good for this, as they have generous ammo reserves and can take targets out even at mid to long ranges. I personally favour the Blastoom Mk III Grenadier Gauntlet as it has better penetration against armour, but the kickback can absolutely work too. I would steer clear of Stubbers and Ripper guns, however. Their ammo economy and accuracy at longer ranges make them unsuited to these runs.
Build Path
We took the usual smatterings of talents at the top of the tree. Heavyweight is great both offensively and defensively, given the large number of Ogryns we will be encountering, and helps you reach the 1-shot breakpoint on Crushers and Reapers. Lynchpin is kind of mediocre, to be honest, but we take it so we can pick up the extra +25 Toughness node. Smash 'Em! and The Best Defence are two nodes so integral to the Ogryn identity, that I struggle to ever not take them. Whether you are hitting one enemy, or several, provided that it is a heavy attack, you will be replenishing a hefty portion of toughness. Furious is kind of meh, and it doesn't really provide much of a boost, but it is sadly required to pick up The Best Defence.
Big Friendly Rock is hands down, the best blitz for this type of mission. Usually, I don't like taking it, because it locks us out of taking Soften them up, which is one of Ogryn's best abilities. However, since we will be killing most things in one hit anyway, it's not really necessary here. Having a renewable ranged option is absolutely valuable in a mission without ammunition, and prudent use of our rocks can drastically extend the operating time of our ranged weapon. Note that a new Rock is produced every 45 seconds, so you will likely see between 30 - 40 rocks generated on an average run, plus the 4 you start with. So you will get approximately 35 - 45 rocks to throw throughout the course of a mission, enough to deal with a significant portion of specials like Flamers, Snipers and the like, which would otherwise put you in a compromised position.
Slam is...another mediocre node. It does feel like the Ogryn tree has more of these 'tax' nodes, although maybe that's just because of the smaller overall size of the Ogryn tree compared to the other classes. Indomitable, should always be paired with Stomping Boots & Pulverise as it synergises well with talents we will pick up later. Trample is incredibly underwhelming, and does not help us reach any significant breakpoints, whilst also being unreliable as a form of damage increase. Indomitable allows you to make a break for it when you find yourself hemmed in, and can be used to knock over a line of Crushers and stun monstrosities when they pose a threat to you or your team. It's honestly the Ogryn's most versatile ability, only helped by the fact that it has a very short 30-second cooldown.
Crunch! is pivotal in being able to land our killing blow. It will take some practice as you need the heavy swing animation to perform by itself. I would recommend heading over to the Psykhanium to practice your timings here. Most things will be going down in one hit, but Batter can assist when dealing with mixed hordes. When there are ragers are maulers mixed in with pox walkers, heavy swings will decapitate the lesser enemies, but only hurt the elites. Adding bleed stacks helps to drain these guys of more health. Both the next node and Bonebreaker's Aura synergise together to add 20% damage to our heavy swings. As you can see, the theme here is maximising our heavy attacks.
Delight in Destruction synergises with both Batter & Pulversie. when you're in a bad situation, you will want to use your ability to rush through enemies. Not only will this give you some breathing room and stagger these threats, but it will also add up to an additional +60% damage reduction. Of note, this ability is damage reduction, NOT Toughness damage reduction, which means it applies to both your health and toughness, making it one of the best defensive nodes in the game. Dominate is a nice rending buff which applies to both your melee and ranged weapons. It won't be needed when using the shovel's special attack, but can add some extra damage with normal swings or when shooting. We won't continue further down this tree. Provided you have a good roll on your shovel, we do not require Heavy Hitter to hit breakpoints. I personally just don't think Heavy Hitter is a great keystone when compared to other options available.
Make sure you pick up the +10% Toughness Damage reduction before continuing down the middle tree. Get stuck in is a decent note, that provides a marginal increase to movement after using our ability. It can help you gain some distance, but is only a slight step up from a tax node. Bruiser on the other hand is brilliant. Indomitable is a get-out-of-fail-free card, and with the high intensity of elites seen on C-I-VI missions, you will be getting plenty of use out of it. We don't really block that often, so we benefit more from Won't Give in than No Pushover. However the creme of the crop, and the reason we go down the middle tree is for the Keystone, Feel No Pain. in a theoretical situation where you have 6 bleeding enemies, your toughness reduction is absurd. Let's crunch some math
Maximum Reduction = 0.90×0.90×0.75×0.40=0.243, 1−0.243=0.757.
6 Bleed stacks = 75.7% Toughness Damage reduction
Moderate Reduction = 0.90×0.90×0.75=0.6075. 1-0.6075=0.3925
0 Bleed stacks = 39.25% Toughness Damage Reduction
Minimal Reduction = 0.90×0.90=0.81, 1-0.81=0.19
0 Bleed stacks and 0 Feel No Pain stacks = 19% Toughness Damage Reduction
75.7% Toughness damage reduction means that you can block a Crusher overhead with your skull and still only take minimal damage. In most situations, it will at least be 39.25%. It's very difficult to get down to having 0 bleed stacks and 0 Feel No Pain stacks without already being dead at that point. With limited ranged enemies, and many opponents that hit hard but not fast, your Feel No Pain stacks will usually be quite high, making you on tanky big boi.
Weapons
I prefer running the Brute-Brainer Mk V Latrine Shovel over the Brute-Brainer Mk XIX Latrine Shovel. Whilst it does marginally less damage, it makes up for it with a superior moveset. Heavy attacks are both horizontal swipes, making it perfect for decapitating large swathes of Nurgle worshipers. Thrust is absolutely pivotal to reaching breakpoints. Brutal Momentum 'used' to let you kill multiple Crushers in one swing, if they were all lined out. That was patched out because, in all honesty, it was a little too strong. However you can still kill multiple Maulers if they are lined up correctly, as well as help with eave clear, so we still grab it. Crushers have carapace everywhere and Maulers have carapace on their head, so naturally we grab extra damage to Carapace. The other threats we can't kill in one hit are Bulwarks and Monstrosities. Taking extra damage to unyielding lets you 1-tap Bulwarks (although sadly not Monstrosities). If your shovel is not quite min-maxed in stats, you can usually rely on bleed stacks from Batter to help finish Bulwarks off.
Both the Lorenz Mk V Kickback & Blastoom Mk III Grenadier Gauntlet are viable for ranged options. I prefer the Blastoom Mk III Grenadier Gauntlet as it has better armour-defeating properties, and more splash damage. Enemies tend to group up quite a lot in these missions, so there are opportunities to get some serious AOE damage in. We pick up maniac damage to help deal with ranged specials, like Trappers, Flamers and the like. Extra damage to Flak helps you deal with Mualers, bombers and the occasional ranged enemy that found their way into our game mode. Pinpointing Target will add more power to your shot as you line it up, increasing the likelihood of a 1-hit kill, even if your aim is not quite on point. Shattering Impact can provide some reduction to enemy armour, providing some support utility to your team from a distance. Try to use your ammo sparingly, however, and rely on your rock as much as possible to make sure you can make it through the mission without running dry.
Curios
After 1,000+ hours in Darktide, I have a few simple rules when it comes to Curios. Melee classes (Ogryns and Zealot) should take 2x Toughness and 1x Health Curios to give a good mix of defensive stats. Veterans should take 3 Toughness Curios, as they benefit more from Toughness than other classes, owing to their larger toughness pools and skills such as Iron Will. Psykers should run 2x Toughness and 1x Stamina curio to make up for low Base stamina, and to benefit from their faster stamina regeneration. Obviously, there are some caveats to that. A melee centric Veteran might want to run 1x Health Curio and certain knife and stealth builds might want to run a stamina curio. But for the most part, I find this a good rule to stick to ensure you have curios that are effective for the vast majority of your builds, especially when starting out when it is difficult to find any curios, much less good ones. Oh and Wound Curios should only ever be used on Zealot Martydom builds. Having Wound Curios actually means that health stims will now heal less on you. I know some people like to take a wound curio 'just in case they go down', but in higher difficulties, there is no guarantee your team can pick you up. It's far better to invest in defensive abilities which prevent downs as much as possible.
For Perks, Always take Extra toughness and gunner resistance. Gunner Resistance is the most useful resistance node as it applies to Scab Gunners, Scab Shotgunners, Dreg Gunners, Dreg Shotgunners and Reapers. This is the largest collection of enemies out of any of the resistance perks. These enemies can absolutely shred you in seconds, and make up a significant portion of the enemies encountered in Auric Maelstroms. The ability is multiplicative, so does have some diminishing returns. 0.80×0.80×0.80=0.512 meaning that we end up with a total gunner resistance of 0.488, just below 50%. I can certainly see the argument to only running two gunner resistance curios (with an overall damage resistance of 36 %) and opting for something else (potentially sniper OR Flamer), but I still value that extra 12.8%.
For the final perk, it depends on your build. If you are using a build which relies heavily on your ability, then run cooldown reduction to more frequently make use of said ability. I find this to be especially powerful on builds which make use of Voice of Command for instance. If your build is not too heavily reliant on your ability, then run for extra health. Again you can tweak this to suit individual playstyle (and the mercy of the RNG-gods as Hadrons bricks yet another piece of equipment), but this is a pretty good rule to aim for.
Strengths
This build excels in close-quarters combat, offering exceptional damage output against high-priority targets like Crushers and Maulers. The Brute-Brainer Mk V Latrine Shovel, with its Horizontal Heavy attacks, allows for effective decapitation of hordes, making it ideal for crowd control. Brutal Momentum enables decapitating multiple enemies with headshots, while the combination of Thrust and Crunch! ensures one-hit kills on Crushers. Additionally, the build’s versatility in handling both melee and ranged threats, thanks to the Blastoom Mk III Grenadier Gauntlet, adds to its robustness in various combat scenarios.
Weaknesses
This is a specialised build designed for C-I-VI missions, and as such, will struggle in other mission types. In a mission with a plethora of ranged foes, for instance, you would probably much rather have a shield, Its reliance on precise heavy attack timings, requires practice and familiarity with the shovel's mechanics for maximum effectiveness. Furthermore, the build may struggle in encounters with diverse enemy types, especially if they are mixed with lesser foes, as the shovel’s heavy attacks primarily focus on head-level targets.
Questions & Answers
Question: Why do the stats, weapons, and abilities in the video not match what's written in this guide?
Answer: I am constantly evolving and refining my builds. As patch notes are released, certain weapons and abilities may change in effectiveness. Additionally, as my skills and knowledge grow, my preferred builds can shift. I aim to provide videos demonstrating the effectiveness of my builds in a Damnation level Auric run as proof of concept. However, these videos may sometimes be outdated. While I strive to keep everything current, Darktide is my hobby, and I may not always have the latest updates in the videos. The information in these guides reflects my most recent thinking and should be considered more accurate than what is shown in the videos.
Video

Azyr Psyker | Smite | Venting Shriek | Empowered Psionics
By Crukih • Updated 1 year ago


Sister of Battle | Immolation Grenade | Chorus of Spiritual Fortitude | Blazing Piety
By Crukih • Updated 5 months ago


Aqshy Psyker | Brain Rupture | Telekine Shield | Warp Siphon
By Crukih • Updated 5 months ago

Ulgu Psyker | Assail | Telekine Shield | Disrupt Destiny
By Crukih • Updated 1 year ago

