
Table of Contents

Class

Weapons

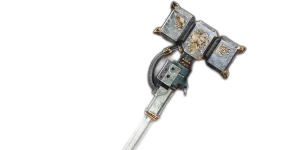

Headtaker
+5% Strength for 3.5s on Hit. Stacks 5 times.
Thrust
Up to +20% Strength based on the charge time of your heavy attacks. Stacks 3 times.

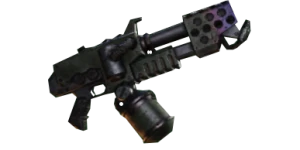
Inspiring Barrage
+4% Toughness for every 10% of magazine spent during continuous fire. Stacks 5 times.
Blaze Away
+8% Strength for every 10% of magazine spent during continuous fire. Stacks 5 times.
Curios

+1 Wound(s)
+1 Wound(s)
+1 Wound(s)
Talent Tree
Description
A Martyrdom Zealot build that strikes a good balance between melee damage and survivability.
In terms of damage, Sustained Assault and Martyrdom combined give you an extra melee damage bonus of 20% - 68% (depending on the number of wounds missing), while Fury of the Faithful, Faithful Frenzy and Maniac can give you a combined melee attack speed buff of 54%. All this doesn't take into account Thrust and Headtaker, which will increase your melee damage even further.
As for survivability, you have the obligatory Until Death and Holy Revenant talents, as well as Bleed for the Emperor which goes well with Martyrdom. Shield of Contempt allows you and your team to avoid quite a bit of damage (as long as you stay near them), and Thy Wrath Be Swift prevents you from both from being stun-locked when you're hit and suffering a large amount of screen-shake when using the Thunder Hammer's special attack.
What really allows you to lean into Martyrdom relatively safely, though, is the talent Vicious Offering combined with the toughness damage reduction from the Benediction aura and I Shall Not Fall. This effectively turns you into a mini-Ogryn, allowing you to regenerate a large amount of toughness from heavy attacking at a horde (especially if it's a charged attack with the Ironhelm!).
Because of this, the preferred rotation for horde clearing with the Ironhelm is Weapon Special > Heavy > Heavy > Repeat, though Light > Heavy > Repeat also works if you're engaged with a group of Elites and want to keep everyone staggered.
You also have a couple of "emergency buttons" in the form of the Artemia Flamer and Stunstorm Grenades. The Flamer with Inspiring Barrage is pretty good for clearing out a room of shooters and gunners. It performs pretty well against mixed hordes and allows you to shrug off attacks from any strays that don't get suppressed. The Stunstorm Grenade is a solid choice for enabling clutch revives, and can be used in tandem with the Flamer in a pinch.
The main downside to this build is range - by picking this build, you are committing to close range combat. If you want to deal with Snipers, you'll have to either stray out of coherency, or ping it and rely on your teammates to take it out (the latter of which tends to be more reliable, as long as you stay close and protect them). But in exchange, you're able to deal with just about anything that gets in Thunder Hammer range.

