Table of Contents
Class

Weapons


Brutal Momentum
+15% Weak Spot Damage. Weakspot Kills also ignore Enemy Hit Mass.
Skullcrusher
Target receives 4 Stack(s) of +10% Damage if already Staggered. Lasts 5s.


Blaze Away
+9% Strength for every shot fired during continuous fire. Stacks 5 times.
Run 'n' Gun
You can Hipfire with this weapon while Sprinting. +15% Close Damage while Sprinting. Also reduces weapon spread at all times by -30%.
Curios

+13-17% Toughness
+13-17% Toughness
+13-17% Toughness
Talent Tree
Description
(Recently updated for the crafting overhaul update and the Havoc update)
WARNING:
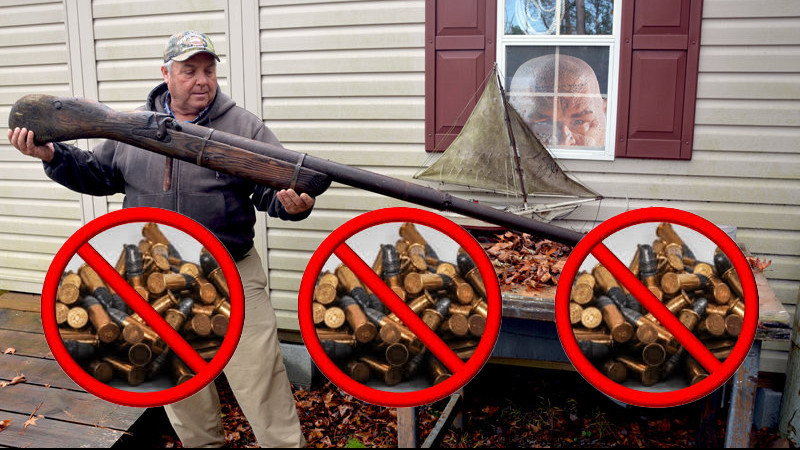
This build was severely nerfed by Veteran's Survivalist Aura being time-limited between kills, but it can still be viable if your teammates know to let you take most or all of the ammo pickups. Especially great choice if there is at least one Psyker. You will easily break 1~1.2m damage dealt in most end game runs. If you ever do run out of ammo, you're kind of just screwed most of the time.
Kickback stats must be as close to perfect as possible in order to hit breakpoints and be able to instantly delete mixed groups from longer ranges. Damage > Range > Reload Speed > Stopping Power > Mobility (dump). Bonus Maniac and Flak damage are there to hit a breakpoint on Muties and further extend the deletion range against thick Flak groupings.
GENERAL STRATEGY:
- Kickback
- Point in the general direction of enemies and click
- Clicking in the direction of a larger group of enemies allows you to fire faster thanks to Pacemaker's reload speed boost when you hit 5 or more enemies at the same time
- Keep clicking to build Blaze Away stacks, to activate Reloaded and Ready, and to suppress enemies since it makes them take more damage
- If there is a high density of elites or a big mixed horde, tap F and keep shooting until the screen is empty
- Prioritize killing elites in general to maximize your Point-Blank Barrage opportunities via Bruiser
- If you get separated from your group for whatever reason and need to build up toughness safely, just brace your weapon, and it'll come back pretty fast thanks to Steady Grip
- Use the Kickback's special attack swing against enemies to get yourself 20% chunks of your massive toughness pool back on each hit
- Slab Shield
- Mainly used to protect yourself from gunners and prevent yourself from being punished for being out of position or making bad decisions
- Abuse Attention Seeker by shoving groups of melee range enemies and blocking shots to force shooters to drop their guns and run at you in a predictable manner instead of strafing around and causing problems for the rest of your team
- Try to pay attention to your No Pushover cooldown and save the "big shove" for forcing Bulwarks to drop their shield or knocking over Crushers
- Take advantage of the +20% bonus damage from Payback Time to instantly delete the orange-highlighted grouping that will be now running at you in a straight line with the Kickback; activating Point-Blank Barrage after blocking an attack is ideal to maximize your initial damage output
- If you ever are forced into actually killing stuff with melee from being out of ammo, you should be able to rely on Heavy -> Block Cancel -> Heavy to tide you over until you find some ammo to eat while regenerating chunks of toughness along the way
- Aim for heads with Heavy 1 in order to maximize the amount of targets you cleave and stagger thanks to Brutal Momentum and set all of them up for taking extra damage thanks to Skullcrusher
- Frag Bomb
- Used as emergency nuke button insurance in bad situations or to give you an opening to pick up teammates who are downed
- A long time ago, it felt like most teammates were grenade-hungry, so I'd bring the grenade box just to give myself more "insurance" chances in order to potentially save runs on the verge of failing
- Nowadays it feels like Zealots and Veterans never pick them up because of the builds that they are generally running, so you'll get to have multiple Frag Bombs per run easily which is great
KEY POINTS:
- Why Run 'n' Gun?
- This may seem like a pretty strange choice considering this gun has a magazine size of 1 and the damage bonus only applies at close range while sprinting, but the real practicality comes from its hidden stat which tightens the cone of fire on the Kickback
- The tighter cone of fire dramatically increases the range at which single shot and double shot breakpoints are consistent and makes the Kickback very reliable at deleting Elites and Specials tucked inside mixed hordes without needing you to be right up in the face of the horde
- Changing Times
- The recent round of buffs, nerfs, overhauls, and node swaps for Ogryn that came with the crafting update have definitely affected the build greatly
- Hitting all 3 of the +10% Toughness Damage Reduction nodes like the build previously had is no longer possible thanks to the node swap on the Gunlugger side of the bottom tree which pushed the Suppression node up to the top and tucked the Toughness Damage Reduction node closer to the keystone area
- Healthstacking made a lot more sense when it was easy to get a lot of value out of a very small amount of toughness thanks to the reduction nodes (keeping toughness low let you get back to 100% faster in coherency since coherency regen is a flat #/sec), but now it doesn't seem as great
- With the buff to Steady Grip from 3% to 5% regen, you can actually regenerate toughness by bracing your weapon faster than being in coherency if your base toughness is high enough just due to the fact that Steady Grip is %-based instead of a flat amount
- (Apparently it is bugged right now and actually gives a whopping +17% per second regen which makes it even more of a must-bring)
- Thanks to the crafting overhaul, it should be pretty easy to just go and get three +17% toughness main +5% toughness sub curios and hit that nice ~250-ish toughness stack to get the most value out of the tools of his that did get buffed
- As a result of following the path to get both +25 toughness nodes, you end up hitting Smash Em' and The Best Defence which is great for regenerating toughness using Heavy Block Cancel combos or even the Kickback special attack swing
- Point Blank Barrage's previous sub-node that nobody used (+15% close range damage and reduced braced movement speed penalty) apparently just got added to Point Blank Barrage's base effect
- This has actually created some new breakpoints at close range when under the effects of the ability, which is great
- Dominate has been nerfed constantly to the point where it isn't super necessary, and the +15% close range damage has allowed previous breakpoints to be hit while under the effects of Point Blank Barrage + Hail of Fire without needing Dominate's +10% rending
- While this wasn't super relevant to the build, the node Delight in Destruction which had to be passed to get to Dominate also got nerfed, so you don't get as much mileage out of teammates' inflicting bleed
- Overall, ends up saving you 3 nodes here
- The overhaul to No Pushover is actually a massive buff to this build, since it lets you open up packs of Bulwarks without having to waste Kickback ammo or grenades by forcing their shields to drop with the "big shove"
- Since timing shoves has become a lot more important as a result and the stack restoration on Feel No Pain is only 3 seconds, the stack restore on shove from "Strongest!" is a bit redundant which saves another node point
- Changing Times (Havoc)
- Ogryn's tree received some "minor" rearrangements that were only really minor on paper and actually have affected many non-specialized and hybird builds for the big man
- Towering Presence has been shifted up to be the first node on the right where Reloaded and Ready used to be which has added an effective "node tax" to this build since you must take this path to get access to Steady Grip and the Toughness boost while avoiding the useless coherency toughness replenishment boost from the Lynchpin node
- Big Boom has been moved up to where Pacemaker used to be, but can fortunately be avoided as you can still path through Ammo Stash
- Pacemaker's and Reloaded and Ready's respective new positions require you to path into the beginning of the bottom right tree
- Overall this results in 1 less free node which gets wasted on Towering Presence; I ended up sacrificing the Toughness Damage Reduction node and keeping the +15 Toughness boost instead since it has better synergy with the %-based toughness replenishment talents like Steady Grip and The Best Defence
- A lot less wiggle room now without sacrificing more toughness or toughness replenishment, but the build can still work
- The regular trash mobs being replaced by the ones with Flak armor in Havoc ends up encouraging you to bring a Flak bonus on the shield to better deal with them, so this has been reflected in the build
- Adding in the Carapace bonus to the shield helps out in Havoc as well when dealing with packs of Crushers so you can save your ammo on the Kickback for when you can get the highest value out of each bullet when cleaving through a crowd since ammo is much much more scarce in the higher difficulties of this mode