
Table of Contents
Ogryn Build - Warhammer 40k: Darktide
SmallieBig's 'Bully Protector' HH
Ogryn Build - Warhammer 40k: Darktide
Class

Weapons


Thunderous
Hitting an enemy gives them 4 stacks of +2.5% Brittleness. Debuff lasts for 5 seconds and can have a maximum of 16 stacks.
Skullcrusher
Target receives 4 Stack(s) of +10% Damage if already Staggered. Lasts 5s.

Surgical
+10% Critical Chance for every 0.2 second while aiming. Stacks 10 times. Discharges all stacks upon firing.
Inspiring Barrage
+4% Toughness for every 10% of magazine spent during continuous fire. Stacks 5 times.
Curios

+13-17% Toughness
+13-17% Toughness
+13-17% Toughness
Talent Tree
Description
A build crafted to 'finish off' my taunt builds with the last melee weapon that doesn't have one, the Bully Club. This one ended up being a lot more fun and effective than I originally envisioned, turns out Heavy Hitter plus Hard Knocks can work pretty well with the Bully Club making up for basically any 'talent lose'. Due to the bully club not being the MOST effective at least on the first swing, it farms staggers like nobodies business. This lets Hard Knocks Thrive, and lets you run 'Go Again!' on it's own and basically still fund Loyal Protector activations on repeat. If one feels like they aren't getting it enough, you can swap 'The Best Defence' for Bruiser then take Confident Strike instead of Skull Crusher. But as this build wasn't able to go for 'Beat them Back', I thought I'd make up the different with one point where after a heavy (which is more often than not a stagger), do 40% more damage and basically always kill on the second or third hit.
To that end, I took the Bully Club I, partly for variety, but partly because it does the stagger hits basically as good as the II but reverse all the hit directions. Your main combo is light into heavy string, or push attack into light into heavy string. Your heavy is a straight downward strike down that goes into a diagonal strikedown if you chain heavies, which lets you absolutely destroy Crushers/Maulers rather quickly, along with one shot any other special type. If you string the horizontal heavy into the diagonal light though, you usually 'hit and stagger' with the first hit, then finish them off with the second, allowing you to farm bleed and staggers for Delight in Destruction and Go Again!, and get use out of Hard Knocks as well. No Pushover then just becomes added insurance to make use out of your Slam procs, and keep giving you needed space as the horde rushes you. I also take Thunderous, as it's nice as you're able to do a 'heavy strike, slap, heavy strike' and apply all the brittle you need to drop basically any target in the game, and the fact that it applies on slap means you can slap things to death with the added cleave from Heavy Hitter if you need to and just let the bleed melt everything (while also very much not needing the rending pip on the left, thus making it make even more sense to not worry about Beat Them Back).
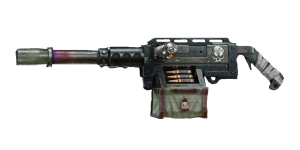
I use Inspiring Barrage on the stubber to make up for not having Steady Grip, using taunt also tends to keep your toughness topped off so it's mainly there just for emergencies (bursters/snipers), or for keeping you alive while fighting monstrosities. Otherwise just pot shot all the specials you need to and drop them pretty quick, especially if you're able to wait for a crit. Bomb Box is for spacing, stagger farming, and for clutch revives when needed. And everything else is pretty self explanatory (I take Bonebreaker Aura over Stay Close! because you attack fast enough you normally don't have an issue keeping your toughness up. If one does/feels themselves taking to much chip damage, you can swap back and the build functions the same). Hit fast, hit hard, and get everything to target you at it's own detriment, while knocking and bleeding it all away.
Other builds by MixedLetters


Adora's 'One Hit' Invis Martyr T-Hammer
By MixedLetters • Updated 7 months ago
Price's 'Martyr Relic Blade' Chorus
By MixedLetters • Updated 1 year ago


SmallieBig's 'Indomitable Spam' Kickback Pickaxe BLO
By MixedLetters • Updated 1 year ago

Gandalf's 'Unlimited Powerrrrr' Empowered Smite Electro Scriers
By MixedLetters • Updated 1 year ago