
Table of Contents

Class

Weapons


Skullcrusher
Target receives 4 Stack(s) of +10% Damage if already Staggered. Lasts 5s.
Thunderous
Hitting an enemy gives them 4 stacks of +2.5% Brittleness. Debuff lasts for 5 seconds and can have a maximum of 16 stacks.

Opening Salvo
+20% Strength on Salvo's First shot.
Surgical
+10% Critical Chance for every 0.2 second while aiming. Stacks 10 times. Discharges all stacks upon firing.
Curios

+13-17% Toughness
+13-17% Toughness
+17-21% Max Health
Talent Tree
Description
DISCLAIMER: This is not a meta build. This build was not made while considering a coordinated 4-man premade when you're the only ogryn on the team. If you're min-maxing ogryn in premades, A more solid choice can be to do a tank build with slab-shield. If your team already has a tank-oriented ogryn in it, consider using this build as 2 tanks is unnecessary, and the extra damage and stagger potential can help your team out a lot. I would also like to note I am not the final voice on what is and isn't viable in this game. At the end of the day it's about what works for you personally and what you find fun. Don't be a meta slave, play the builds you want to play and get so good with them you'll end up making them viable through sheer skill.
Special thanks:
- I would like to plug the Ogrynomicon, which is the be all end-all for teaching you about anything ogryn related when making builds and discovering playstyles. I've used said guide extensively when making this build, and would heavily suggest you give it a look when deciding to use this guide or not. https://steamcommunity.com/sharedfiles/filedetails/?id=3044646170
General info:
- This build was created with one idea in mind: jack of all trades. As such, it doesn't excel massively in any area. What it does do is always leave you prepared for any kind of situation. It's a worst-case-scenario build for when you're matched with possibly uncoordinated teams and aren't sure if your allies will be able to fulfill their roles correctly. The keyword is consistency.
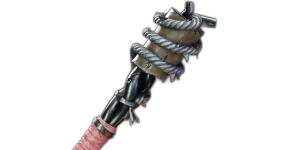
Melee weapon:
- General info: your melee is the "Brunt's Basher" Mk IIIb Bully Club . This club mark offers heavy stagger values and great horde-clear potential, which is why I've chosen it. This build relies a lot on attack speed buffs which will help the Bully Club to stagger any enemy you come across very fast. The light attack chain is: wide hitting stagger > wide hitting stagger > single target damage > wide hitting damage. You'll mostly be spamming the light attack chain to maximize damage and stagger. When fighting one heavy enemy (Crusher & Scab Mauler ) you'll do the following combo: push attack > light attack > heavy attack. This combo can be tricky to pull off, but will do devastating single-target damage.
- Blessings: the two blessings you'll use are Skullcrusher and Thunderous . Skullcrusher is the bread and butter of this weapon. Since this club variant offers fast staggers, you'll quickly benefit from the crazy damage increase this blessing offers when hitting staggered enemies. You'll have a nice mix of reliable disables, paired with quickly stacking damage increase for moderately fast kills. Thunderous offers a solid damage increase per hit, which you will build up fast due to the quick swing speed, which will help you deal with Crusher & Scab Mauler much faster. It's also very helpful to kill bosses quicker.
- Perks: For my build, I've chosen carapace and unyelding. The goal is to help this weapon kill big enemies and bosses faster, since it's already quite decent at dealing with smaller enemies. However, you can mix and match the perks to help kill other enemy types faster if that's more important to you. Mainly, I'd recommend you to swap out carapace for flak-armoured if you want to make any changes.
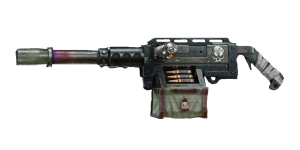
Ranged weapon:
- General info: your ranged is Gorgonum Mk IIIa Heavy Stubber . The heavy stubber will fill in the gun-shaped void the rest of this build leaves. Your melee is sufficient to deal with any melee threat you can find, but your ranged weapon will be used solely to snipe out mainly specialists, and very occasionally gun elites. Nothing more. In an ideal situation, you'll have a vet or psyker with a great long-range damage option, giving you the opportunity to use the rumbler grenade launcher for extra horde-clear. But this isn't always the case. The reason I go with this particular variant of the stubber is because it offers the best balance between damage and versatility. The heaviest variant is too clunky and cumbersome to use, leaving you too open for too long to secure the kill without getting hit. The lightest variant doesn't offer enough accuracy and damage on bracing to justify using the weapon for the purpose I have given it in this guide. Whenever you see a Specialist: quickly take out your gun, brace, stand still, wait half a second to steady aim, one-shot (hopefully), go back to your melee and smash away.
- Blessings: For the purpose of this gun, our blessings are Opening Salvo & Surgical. We aren't looking to stand around with our gun, spraying bullets left and right. Our goal is to whip it out, kill one or two high priority targets as quickly as possible, then swap back to melee. Opening salvo's damage, combined with the crit chance of surgical, allows you to often times one-shot any smaller enemy you fire at, allowing you to quickly swap back to your melee again.
- Perks: Your two perks will be 10% damage to specialsts and 25% damage to maniacs. The maniac damage will help us more quickly kill specialists like Scab Trapper Dreg Tox Flamer Scab Flamer Mutant . The extra 10% damage to specialists will further help us kill these specialists, and also all the other ones on top of that.
Talents:
- General info: This build focuses mainly on beefing up our melee damage and attack speed, while offering good tank potential and mobility, and also offering great horde-clear. We're left with a robust build that covers everything we need to adjust to any situation.
- We acquire all the skills in the middle of the tree for starters. These are the best possible skills you can acquire at this point, period, as they are far more impactful than any other choices. Heavyweight is an insane amount of damage boost / damage tank against ogryn enemies. Smash 'Em! & The Best Defence will increase your toughness replenishment across the board, and will increase in potential with attack speed increase as well, which we acquire several of in this build.
- Bombs Away! is picked to give our horde-clear and AOE disable potential a needed boost.
- Next we acquire several important tanking/damaging talents. Soften Them Up is basically a massive damage increase that's always available. Payback Time will almost always be active due to the intensity of higher-level missions, giving you a constant massive damage increase much like Soften Them Up does. Strongman Will almost always be up on higher difficulties due to the sheer volume of specials and elites, giving us an almost contant 10% damage decrease on both health and toughness. Pumped Up Isn't as consistent as previous talents, but the level of protection it grants is enough to warrant getting it anyway. If you can manage your stamina well, you will get rewarded.
- Indomitable is used to give us everything we could need. mobility through the forwards charge and movement speed boost (enhanced by the movement speed from Get Stuck In ). A great disable in an AOE. An attack speed boost. Toughness replenishment (through the Stomping Boots augment). A damage boost (through the Trample augment.) You can easily swap out the Trample augment for the Pulverise augment if you wish to assist zealots with more damage decrease from surrounding bleed stacks. But do note that the bleed time only lasts for 1.5 seconds, and starts before your charge ends, which means that your own damage decrease from Delight in Destruction will barely utilize this augment. It doesn't benefit you during your charge either, as you already gain damage invulnerability during your charge.
- Bonebreaker's Aura Is the best offensive aura in the game, helping your team reach certain thresholds for kill potential. It's made especially good since it shares the side which you'll acquire Batter on the skill tree, making it perfect for any melee-oriented ogryn build. Batter Is one of the best talents the ogryn has, as long as you combine it with Delight in Destruction. Every enemy you hit will get bleed stacks, and will decrease the damage you take by massive amounts. It's highly consistent, impactful, and always available.
- Heavy Hitter and chosen augments offer us further boosts in almost everything and complements everything this build sets out to do. More damage for faster kills. Faster attack speed for faster kills and quicker staggers with Just Getting Started! . Tanking boost with Don't Feel a Thing. Higher stagger potential with Impactful. Down here we'll also find the Frenzied Blows talent, which further assists us in surviving, damaging, and staggering enemies by offering a massive attack speed increase.
- Lastly, we invest points in the middle tree for 3 must-have skills. Bruiser Is simply required at havoc-level play, since you'll face off against enough elite enemies to allow you to spam your abilities endlessly. No Hurting Friends! gives you 12.5% strength and 15% toughness damage reduction at max stacks, which will be incredibly easy to keep up since you and allies WILL be hit by enemies constantly. Attention Seeker since it's an on-demand, always ready, aggro manipulator for the most durable class in the game.
Curios:
- Since stats stack with diminishing returns, we'll want to only do toughness increase for two curios, and health increase for one. We add ability cooldown on all 3 curious as this build benefits massively from spamming our ability. 2 gunner damage decreases as this covers many different enemies and is the main thing that'll burn through your toughness and health. 3 toughness increases as this further increases our survivability. 1 sniper damage decrease as a mere 20% goes a long way considering how much damage the sniper does.
Playstyle:
- Make no mistake, you aren't a slab-shield Loyal Protector ogryn. You won't be the designated tank. What you are, however, is STRONK. You'll be sticking with your melee for the most part, making sure to keep vulnerable allies like ranged psykers and vets safe by sticking close and staggering any enemies that come close to them with your club. You will want to prioritize Dreg Rager Scab Rager Scab Mauler Crusher as these enemies can easily rush your team down. Use your club to stunlock them. You might even want to forego a killing blow in order to shift focus to another enemy to deliver staggers, as to give your team more breathing room to do their thing. Don't forget to use your block-shove to ensure you have the aggro.
- Your ranged weapon should only be used when you don't have anything important to whack with your club, or when the rest of the team is already too preoccupied to deal with high priority targets. If you see a sniper that no one else's spotted yet, snipe it first. If you see two trappers gunning it for an unsuspecting teammate, whip out your gun and take care of them. The general idea is you don't want to stay on your gun for too long, as it's been customized into a sniper rifle. Just equip, fire, unequip.
- Make sure to spam your ability as much as possible. It buffs literally every aspect of your kit. The more time spent utilizing your ability, the less damage you'll take, and the more dead your enemies will be. Just don't use your ability to leave your team behind. Rush forward a bit through a horde, then once you stop, immediately do a 180 and move towards your team while smacking the poor heretics you just put in the dirt.
- You don't possess a shield, so you'll have to get creative in ways to not perish to ranged fire. The most useful movement tech in this game is dodge-sliding. Simply initiate a dodge, then crouch immediately after in order to initiate a slide, which will give you complete i-frames from ranged attacks. This can be spammed plenty. It's also great for extending the length of your dodge when evading things like dogs and trapper nets.
And that's that! I hope you find my guide useful, or at least fun. If you happen to read this and find ol' Bash Smashington out in the wilds, make sure to let me know what you thought of my guide :)
(Bash Smashington is the smiling ogryn on the preview image for this guide. I always run him looking like that.)