
Table of Contents
Class

Weapons


Confident Strike
+8% toughness on Chained Hit.
Skullcrusher
Target receives 4 Stack(s) of +10% Damage if already Staggered. Lasts 5s.


Overwhelming Fire
+10% Strength for every 4 Single Target Hits. Lasts 2s and Stacks 5 times.
Charmed Reload
5 bullets loaded from Reserve on Critical Hit.
Curios

+13-17% Toughness
+13-17% Toughness
+13-17% Toughness
Talent Tree
Description
My personal flexible Gunlugger, which I enjoy and do more with than any other build
OVERVIEW
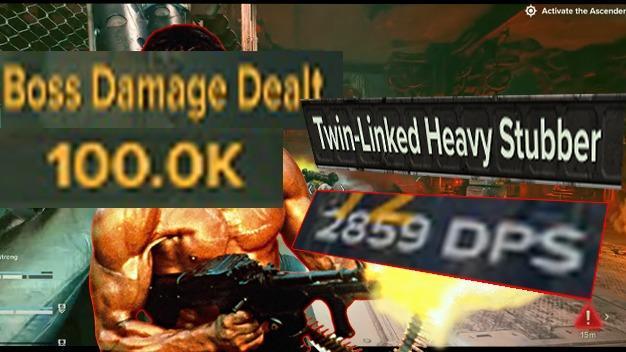
UNIVERSAL SCREEN MULCH®(™) primarily works by stacking an enormous amount of damage on the infamous Achlys Mk VII Twin-Linked Heavy Stubber through combining the "+ Critical Hit Chance" weapon perk, Massacre , Good Shootin' ,Lucky Streak and mainly Charmed Reload together with it's absurdly large ammo capacity of around 700 in total at 80% and max power, leading to near never needing to reload manually as our ability refills the whole magazine that constantly regenerates it's own ammo through an onslaught of crits.
- This damage skyrockets even higher than it already is with Point-Blank Barrage activated, where it becomes able to solo kill multiple Damnation-level bosses in the same fight as well as create enough toughness regeneration through Bullet Bravado to be capable of facetanking full daemonhost combos while killing the said daemonhost in question. With Light 'em Up , we build a DoT on all targets we hit that starts to do lethal damage all on it's own that also helps save ammo when clearing trash. ( see https://forums.fatsharkgames.com/t/light-em-up-gunlugger-change-is-mostly-a-buff/105894 ) Maximum Firepower and Bruiser keep this 80 second cooldown at more like 45 seconds or less.
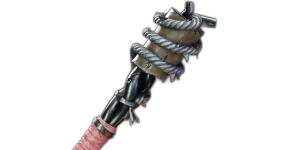
When out of ammo or in a pinch, "Brunt's Basher" Mk IIIb Bully Club is chosen for it's fantastic fast horizontal strikes against hordes, effectiveness against armor, and most importantly mobility leading to more effective re-positioning or item scavenging which are both more crucial to survival than better defense or offense. The blessings we take are centered around ease-of-use, effective movement (to the ammo) through lots of enemies and general survivability. Smash 'Em! and/or The Best Defence combined with Confident Strike mean as long as you can swipe at something, you have a good chance of surviving, with Frenzied Blows and Skullcrusher increasing this immense sustain when we can't rely on Steady Grip
By committing a point to Dedicated Practice , it becomes easier to react to important threats like the Pox Hound ,Scab Trapper ,Mutant, Poxburster or even a flanking Dreg Tox Flamer /Scab Flamer that could catch you out of position and instantly down you, invalidating your immense power. Reacting to 1 hound in time could be the difference between a win or a loss. You're going to be doing a massive percent of the killing and may even have to carry a lot of games by yourself. Even though it's a team game, you have to survive on your own and "Win your 1's".
We take Bombs Away! combined with Big Boom and Fire Away for emergencies. The killing power of Bombs Away! is actually quite low without these upgrades, and what often happens is that multiple of these default grenades have to be used for a Frag Bomb level of effect. The circle the grenades form is small, and only enemies in the epicenter or hit by the thrown projectile usually instantly die. This means that without these upgrades the most it will do will be is only stagger the whole horde and it's ragers, elites, which may not be enough for your squad to survive or for you to revive 2+ players. To be able to keep 3, mass clearing and game saving grenades instead of 1 with Frag Bomb ( which always leaves you thinking you would have survived with Bombs Away ) the instakill epicenter of the main and all subsequent explosions have their radius increased by a sizeable margin, while also maxing burn stacks on every enemy in the area of explosion since each grenade applies it's own stack to all enemies. Even if they don't die they will be taking a very significant amount of damage.
Core Synergy includes Telekine Dome Psykers and Survivalist Veterans
Good Synergies include fire staff Psykers, Melee teammates, Smite Psykers Chorus of Spiritual Fortitude Zealots or another Ogryn using Loyal Protector
---
HOW TO USE / PLAYSTYLE
- The obvious #1 thing is to melee enemies in melee range when you're not under pressure. You are a 10 foot tall war beast who has massive regen and probably 500hp, you can put the gun away to melee one scab hitting you from behind. You have a fast weapon swap.
- Once you hit 100 rounds, the gun goes on the back and it's now for emergencies unless you are literally in said emergency. Big difference when the pox hound pack comes and you have a little bit of ammo left as opposed to 0.
- With this build, you are the lead freak. I don't care that your other rock-chewing Ogryn lieutenant has a kickback and 4 shots left or the Psykker has been looking for it all mission. A small ammo pack is almost 100 bullets for UNIVERSAL SCREEN MULCH®(™) with Point-Blank Barrage. That's more output than any one mag of anyone else's gun. I've noticed in missions with higher level players, people see the performance of this build and willingly will coordinate that I will get the lion's share. ( my "I NEED AMMO" spamming successfully intimidated them ) If you get a squad that does this and can also fend for themselves, you could probably have a good chance of beating any challenge the game throws at you.
- Scavenging, like taking an extra side path and quickly walking through eye-scanning everything, is an important little trick. You are gonna want to find every ammo pickup you can, but you have to remain conscious of where your team is going. Sometimes you're just going to run out, especially on long holds, and it sucks. If you find an Ammo Box and the whole team is not out of ammo by the time you are, throw it down during a hold even if just for yourself, but don't waste that thing. Get caught out and I guarantee you the game will spawn a Hound or Trapper on you, and that's a possible death. When scavenging, think "along" your team not far behind or in front.
- While doing this, if you see a speed stim that clearly nobody else is going to get, just pop it and pick the one you had already ( hopefully combat ) back up to cover more ground.
- Do not just keep shooting because there's a lot of enemies. Shoot because there's too many enemies.
----
OTHER NOTES
Bulwarks will close the distance on you with their invincible shields and cover for other fortified melee enemies. If they spawn in a wall with bombers, its a great time for a grenade.
Hounds, in any amount, are a lot more manageable if you have a corner on them. The Stubber shreds them before they can pounce, and they have to slow down to make the turn.
Constantly spam ping elites to get better vision of them through the red outline.
Ensure if you're going to shoot, you're going to spend the ammo, not waste it.
This is all my preference. Feel free to move some points around. i.e Dedicated Practice for Dominate | Frenzied Blows for Strongman | Fire Away for No Hurting Friends!
DISCLAIMER : On ultra-high or max difficulty, like high havoc level damnations or Auric Maelstrom, you will need more gun damage. Swapping off the bonus grenades and switch speed is advised. Otherwise you will consume too much ammo and prove other builds superior. BUT NONE AS FUN.
---
Enjoy the madness of UNIVERSAL SCREEN MULCH®(™) today!