
Table of Contents
Class
Weapons


Thrust
Up to +20% Strength based on the charge time of your heavy attacks. Stacks 3 times.
Uncanny Strike
Hitting an enemy's weakspot applies 8 stacks of 2.5% Brittleness. Duration 5 seconds. 16 max stacks.

Blaze Away
+8% Strength for every 10% of magazine spent during continuous fire. Stacks 5 times.
Penetrating Flame
Direct hits apply 4 Stacks of 1% Brittleness for 5s. Stacks 20 times
Curios

+13-17% Toughness
+13-17% Toughness
+13-17% Toughness
Talent Tree
Description
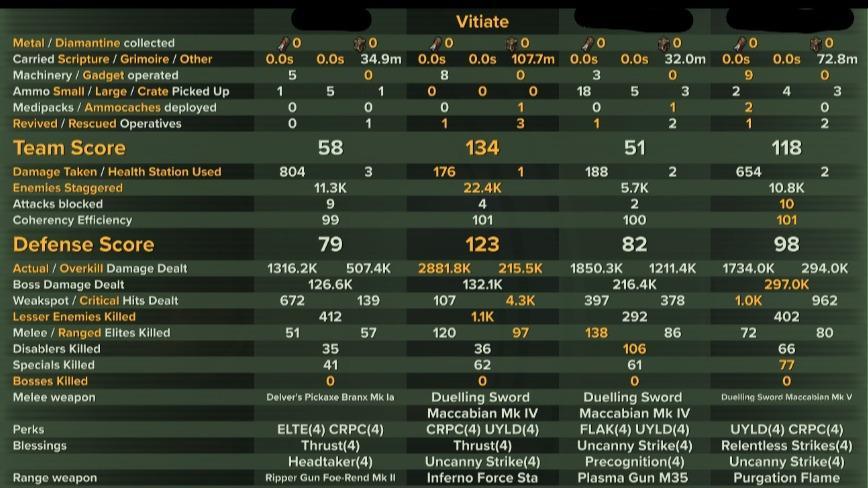
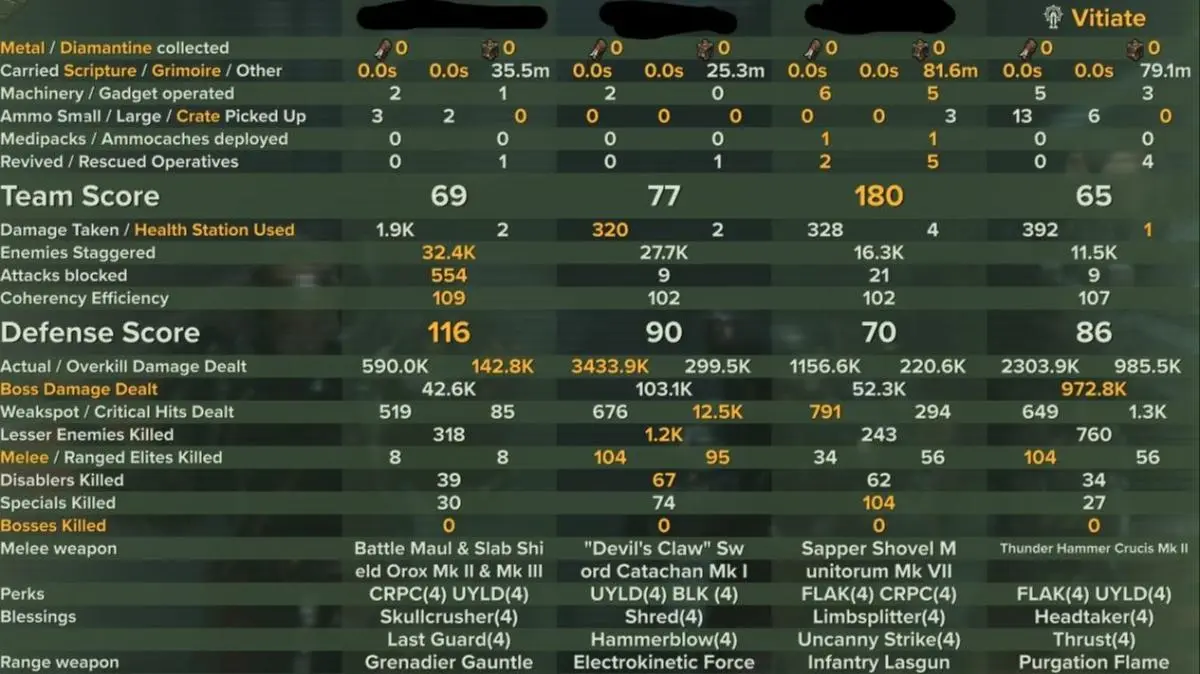
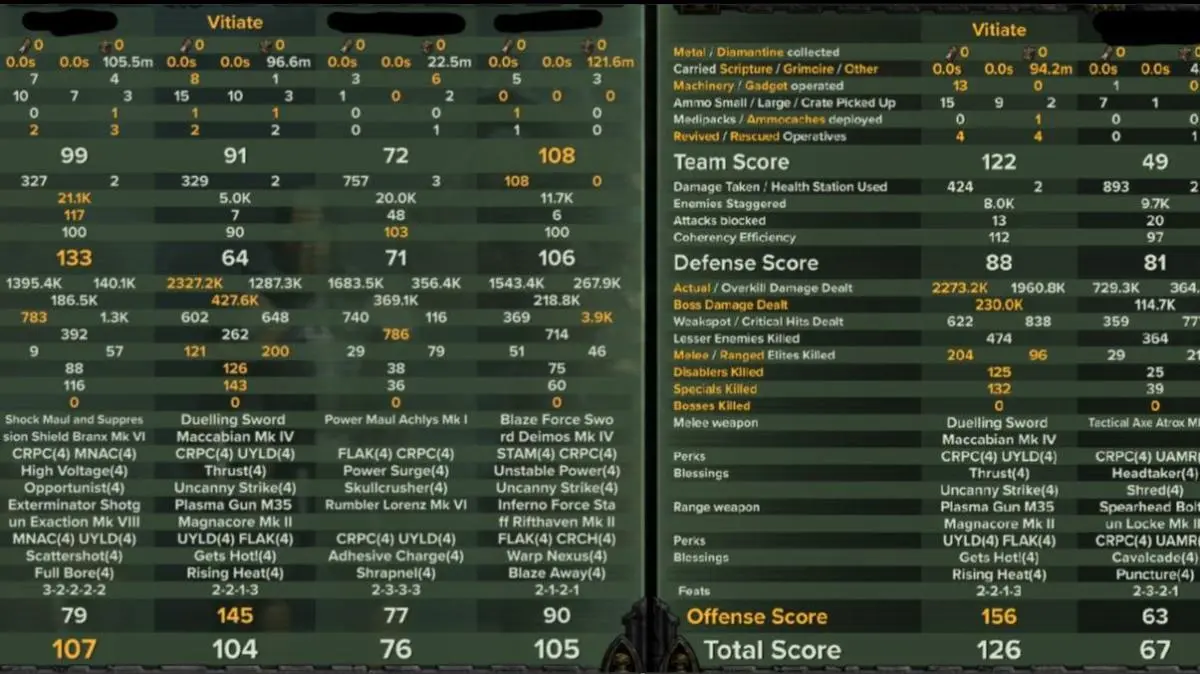
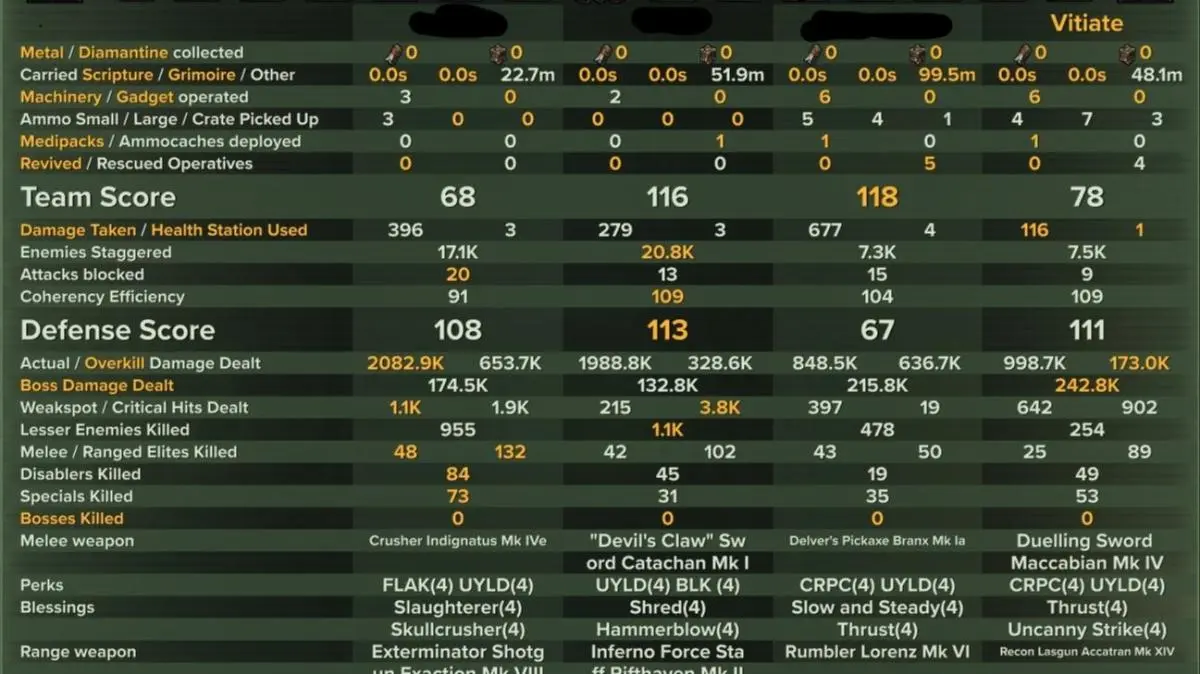
HAVOC 40 | 3M BUBBLE FLAME PSYKER
Here is my H40 build for Support Psyker in terms of spamming Bubble & Flames. The goal of this build is maximizing uptime on Bubble to the point you have multiple Bubbles at once, while still hitting very high damage i.e. 3 Million damage.
Shriek Psyker I'll build separately for max damage. That will be a separate write up. The goal of that build is to push 4-5M.
BUILD CONSIDERATIONS
BUBBLE vs SHRIEK
- Bubble - For H40 pubs and max tankiness and team support
- Shriek - For max damage and playing with coordinated teams/friends
See H40 Tips down below on how to maximize usefulness.
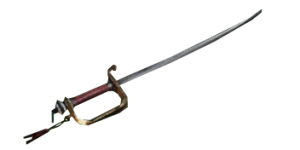
MELEE
Now most importantly: This is not your primary damage dealer. Your Flame Staff is.
These are the different playstyles and schools of thought as to why you're taking a certain melee weapon.
- DS4. Carapace, (Unyielding or Maniac), Thrust and Uncanny.
- This will give you a weapon for a quick attack to kill Carapace, Bosses, Mutants, or Ragers coming after you.
- Thrust attacks will take care of Crushers, Maulers, Ragers, and free people from Mutants
- Parry Attack will help provide Boss survivability if it aggros to you
- Also, the sprint+slide mechanic provides a solid movement tool for a painfully slow character
- This will give you a weapon for a quick attack to kill Carapace, Bosses, Mutants, or Ragers coming after you.
- Combat Blade. III or VI. +2 Stamina & (+20% Sprint Efficiency, +20% Block Efficiency, +25% Flak, +25% Maniac), Lacerate, Mercy Killer, or Uncanny Strike
- This is to maximize movement speed and agility. Nothing more.
- You will sprint+heavy+slide move your way through the map to retreat and relocate your Bubbles
- In other words, you move like a Speed+Stealth Zealot but instead of knifing people you drop Bubbles
- Deimos OR Obscurus Force Sword. +2 Stamina, Maniacs, Deflector, Uncanny Strike
- This is to maximize defensive capabilities of blocking and shoving enemies back while seeking to relocate and Bubble
- Deflector will make you tanky against ranged, and the force blocking and pushing mechanic of Force Swords can stagger most enemies in the game
Devil's Claw. +2 Stamina, Maniacs, Savage Sweep, Hammer Blow
- This is to maximize defensive capabilities by parrying Ragers and Bosses
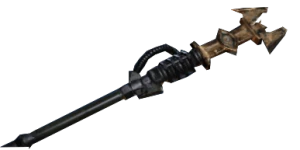
RANGE
- Purgatus Flame Staff. Flak, Carapace, Blaze Away, Penetrating Flame (Or Warp Nexus)
- Deal extra damage to Crushers, and Flak helps stack Perilous Combustion stacks from Gunner kills.
CURIOS
- +17% Toughness - Combat Ability, Stamina Regen, Gunner Resist
- +17% Toughness - Combat Ability, Stamina Regen, % Toughness
- +17% Toughness - Combat Ability, % Toughness, Gunner Resist
Options on Gunner Resist to change to more Toughness or Stamina. I just run these to make my Psyker less squishy once the Bubble goes down and if no Empathic Evasion procs.
I actually avoid Revive Speed on Psyker. I'll elaborate further in the H40 Tips, but Psyker's are the worst revive class in the game. However, they are one of the, if not thee best support character next to you when reviving. This build will solidify as the best partner in reviving another downed character.
DONT
- Get caught up or overdo trying to melee or Brain Burst enemies.
- Those are more situational tools whereas your screen, and everyone around you should see Blue Flames all the time. The best players using this build are effectively a walking, blue flaming moat. There is a non-stop buffer between you and many of the enemies in the game.
H40 TIPS
A few tips when playing the character
- Spamming vs Channeling - Spamming I'll define as the basic primary attack. Hopefully you have the "Full Auto Mod" installed. Channeling I'll define as holding up the attack to spray flames. Luckily, in both you can maintain uptime on Blaze Away very easily. Here are the general rules.
- When to Channel -
- Building up flame stacks on the swarm
- First swarm swarm engagement
- While Channeling -
- Make sure to spray in all different directions to cause stagger
- When to Spam -
- Maximizing Empryic Shock procs after saturating stacks in the mob
- Bursters
- Pushing Gunners and Reapers to stagger
- Pushing other Specials to stagger then finish with melee or Brain Burst
- Pushing to revive
- When to Channel -
Front Lining & Advancing Your Team's Position - One of the biggest mistakes people make with this build is playing passively. Unless you have a Chorus Zealot, or Mine Arby it's very likely your team is going to follow you everywhere you go. When advancing the position, if they see you movement sprinting and sliding, then you can bet that they are right behind you. Once the Bubble drops your teammates will come in from behind you and start killing everything.
- One other big mistake people make is doing this into a Gunner mob. If you do push Gunners, do pay attention to how quickly your teammates kill them. If they're slow, prepared to watch your shield melt.
- If you do push forward and realize no one followed, immediately retreat. Don't bother hanging out in the shield because even if you do manage to kill the initial wave, then the reinforcements will break the shield and take you down.
Positioning (Relative to Team) - You are going to be anchoring the team, therefore most characters will be directly in front of you or orbiting around you. Once you establish the choke point, or where you pushed to, then your teammates will start frontlining for you.
- Positioning (Where to Drop Bubble) - It's very easy to get tunnel visioned when playing the Psyker. Statisically speaking, you'll probably lead in damage (even when Bubblin'). But do note that in big horde fights when and where you drop Bubble matters.
- Chokepoints - It's very tempting to put it in front of you and stand outside of it. If you do that be mindful of what Specials can spawn in behind you.
- Backs Against the Wall - If you do put a Bubble down and managed to get push back, do try to advance the line forward. Even if you drop multiple Bubbles and create a venn-diagram at the very least give your team some space. Remember things can't spawn behind it, and everything is probably in front of you and so any little breathing room matters especially if moments later you get hit by a bomber.
- Boss Fights - Find a sequestered area and drop the Bubble to create your makeshift octagon for teammates to fight.
- Boss Fights - Other than placing the Shield to stop your teammates from getting hit, its your job to protect the team from incoming threats such as Gunners, Reapers, Trappers, and Hounds. Spam flames to close the distance or shew them away and kill with your melee weapon or Brain Burst.
- If the boss does aggro you just block or dodge away. You don't even have to bother engaging. Your job is to keep the team alive. They will do the rest.
- If you are finding yourself fighing the boss... well I'm going to guess that you're about to be wiped.
- Revives - Unless you're the last one alive or no one else is around, it's someone else's job to revive the character. Switch to spamming Flames, and Bubble on the downed guy. This will ensure a pretty smooth revive, and stagger or knock back any enemies attacking your teammates.
Other builds by Vitiate

Havoc 40 | Zealot | 2M/1M Hammer Time
By Vitiate • Updated 4 months ago

Havoc 40 | Vet | 4M Nade Weapon Specialist
By Vitiate • Updated 6 months ago

Havoc 40 | Arby | Smash & Bolt
By Vitiate • Updated 3 months ago
Havoc 40 | Vet | 1M Smoke "Bubble" Las' Support
By Vitiate • Updated 6 months ago