
Table of Contents

Skitarii Build - Warhammer 40k: Darktide
Hybrid Skitarii build for dummies
Skitarii Build - Warhammer 40k: Darktide
Class


Weapons



Perfect Strike
Critical Hits ignore Hit Mass bonus from Armour. +10% Melee Critical Hit Damage.

Rampage
Hitting at least 3 enemies with an attack, increases your damage by 18% for 3.5 seconds.

Dumdum
+4% Close Range damage on Repeated Hit. Stacks 5 times.

Enhanced Voltaic Arcs
Arc lightning gains +10 jump angle and +1 jump distance, and can jump 1 additional times.
Curios

Talent Tree

Description
A Skitarii guide for dummies like me
INDEX
-GUIDE ON SERVO SKULL AND PERKS THAT WORK WITH IT (talks about servo skulls and perks that works well with it)
-GUIDE CHORD STRIKE, AURA, AND KEYSTONE
-GUIDE ON WEAPONS
-GAMEPLAY
How to read my guide: Notes will be on top to explain the thingy at the bottom, and press ctrl f and paste the index to find what you need
Guide to Skitarii and build
Note: You don't need to use the build I'm using, you can always tune the build to your liking. And also, this build isn't focus on high dps like some of the other builds but rather focus on survival.
Info: The reason why I built this build is because I notice beginner are struggling with the Skitarii. The Skitarii class is a glass cannon and isn't the most durable class in the game, sharing the same stat with the Psyker. Being only around 150 health and a 100 toughness which isn't a lot compared to the other class. The build allows you to clear hoards of enemies, gain captaciance quicker, spam chord claw (nuke damage), deal bosses and monstrosities while being more durable. I'll go over the keystone and weapons and everything you'll need before trying out.
_____________________________________________________________________________________________________________________________________________
- GUIDE ON SERVO SKULL AND PERKS THAT WORK WITH IT
Note for servo skull: If you're making any tweaks to the build, DO NOT REMOVE THE SERVO SKULL, it's the reason why this build works. I'll explain it down here.
Servo Skull: The servo skull is one of the best blitz in the game, and is the reason why this build functions pretty well. The main important thing about the servo skull is that any enemies it kills counts as a range kill. This means that perks like Hybrid Combat Covenant and Threat Detection Imperative which require ranged kills will be effected. As long as there's enemies for your servo skull to shoot, the duration of these buffs will last forever. The perks in the build will give you extra melee damage, increase damage to enemies, debuffing enemies, replenish toughness, and reduce incoming damage to toughness. So in combat these buffs will apply and you don't even have to kill the enemy with ranged weapons to activate it. As an added bonus, your servo skull deals fire damage and do those mini games. So it short your servo skull will activate perks without you being activate. The Noospheric Command allows you to dish out a ton dps and applying stacks of fire. It allows you to kill threats with you having to kill them. The Noospheric Command will be explained more in the combat section on how to use it.
Note for flame skull: You don't have to take the flame skull, you can choose a different perks if you like. BUT KEEP THE SERVO SKULL
Another note: Don't waste all your flame skulls, keep at least 2 or 3 incase if you need to use the Medicae Servo-Skull
Purgator servo skull: I understand that not everyone likes the flame skull, but I'll explain why I use it. Although it doesn't deal a lot of damage the flame skull is great at hold a point and removes hoards of enemies pretty quickly, unlike Immolation Grenade where enemies will walk around the flame to avoid it. Enemies will walk through the flame skull while taking damage. With the Weakness Analysis Doctrineanalysis doctrine they'll take 10% more damage as well. Against a swarm of pox hounds you can place the skull under legs so that if a pox hound pounce on you, the fire will take care of them. During a boss fight, you can put down a servo skull to kill all trash enemies and focus on the boss and other threats instead. The flame skull counts as range kills which means ranged kill perks will buff you. This is great for keeping your toughness up.
Note for Medicae Servo Skull: Be carful when using the Medicae Servo-Skull on a down player, you might accidently use the flame skull instead
Medicae Servo Skull: Medicae skull just heals downed allies, that's it. Simple as it is, it's really good to have and can turn a game around, there has been so many times where the servo skull prevented me from losing a game. If there a downed player to hard to reach you can just send the healing skull to help them and grants them toughness back as well.
Small Note: The east side of the node tree is meant to pair up with Servo skull
_____________________________________________________________________________________________________________________________________________
- GUIDE CHORD STRIKE, AURA, AND KEYSTONE
Small note: The north keystone is only to help you debuff enemies, apply electricity and pairs well with chord strike.
Note for Chord Claw Strike: You can remove satiated steel for slice and dice if you want more dps. Do not remove Axial Slash for crowd clearing. Do not save your chord claw keep spamming them, they'll replenish pretty quick.
TIP: While holding your ability you can walk around while having your chord claw out, running around with a chord claw makes you pretty fast which is useful for mobility or trying to catch up with your teammates.
Chord Claw Strike: The chord claw is the most broken ability in the game, even when it has been nerfed it's still pretty good. It can one shot crushers and deal a lot of damage to a boss. Having satiated steel allows you to gain back your ability charge by 25% and Axial Slash allows you to hit multiple enemies in a horizontal slash. Against a swarm of enemies, just press your ability and flick your mouse to the left to slice even more enemies. you can, try pushing enemies with your melee first so that can gain cleave, this allows you to hit more enemies and deal more damage. Cleave works by increasing how much enemies you can hit with a sweep. Against single target enemies like Ogryns, hold down your ability before releasing it to do a single attack which one shots them. Against bosses shoot them first with your arc rifle 4 times to apply stacks of brittleness to them. This weakens the boss or other armored enemies and allows them to take more damage, then use your single claw strike attack to deal a impressive amount of damage. Brittleness only applies to armored enemies which makes their armor less effective and taking more damage.
KEYSTONE: I choose redline for this because it allows us to get one charge and the resource optimization canticles which allows use to one more extra charge. This allows us to have a total of 5 chord claw strikes and have more resource to use on the servo skull Noospheric Command . And with the chosen keystone modifiers, every time we spend or gain a claw back, we're getting reduction in toughness, increase strength, and gaining capacitance back. It also stacks so keep on spam them claws.
Aura: For the aura I choose resurgence this way even in combat you and your teammate can passively regenerate toughness back, even in combat. The way toughness works is if your fighting or within enemy range, you can't regenerate toughness passively. Make sure to stick to your teammate or be near them for this aura to work or else you won't gain toughness back.
_____________________________________________________________________________________________________________________________________________
- GUIDE ON WEAPONS
Small Note: Arc rifle doesn't deal weak spot damage, so don't bother aiming for the head.
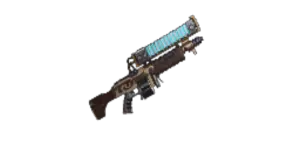
Arc Rifle: The arc rifle is one of the best secondary in the game, simply its a efficient gun. It does good boss damage, it has a lot of ammo, it can arc behind enemies and hitting multiple enemies. Being a electricity weapon this works well with the perks at the north area. It we shoot at enemy it applies brittleness to them the max being 40% if you shoot them 4 times. And you deal more damage to them because of the other perk that allows status effects (including electricity) to damage them by 8% even more. To make hoard clearing even easier you can use the enchained voltaic to increase the arcs to hit them by one more. It also makes it easier for the arcs to hit more enemies. Dumdum is really good as well as it increase the damage if you shoot enemies at a close distance and it stacks. This allows you to deal even more damage to enemies. The only draw back using the arc rifle is the slow reload speed, to fix this you can use the charmed reload which adds one more ammunition to the magazine with each crit. This allows you to shoot for a longer period of time with having to reload.
Note: The transonic blade has two mods, one mode for clearing enemies and one mode for dealing with armored enemies. To tell which mode you're in, look at the vibration of the blade, if it's going up its great for horde clearing. If the vibration is going down it great at single target and deals solid damage against armored enemies.
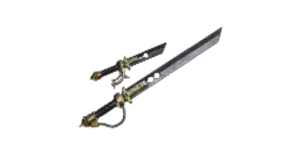
Transonic blade: The transonic blade is a jack of all traits melee, it has a high attack speed making you feel like a blender, it tears trash mobs with eases and deals a good amount of damage while dealing juicy crits which is important for getting captaciance back. It's a versatile weapon that can deal both armored and light enemies. Against a swarm of enemies, you can just use your default settings which will clear enemies with ease as long your hitting their weak spots. Against single target or armored enemies use your special to change the blade mode to strike from an over head. This mode deals more damage and is effective against armored enemies where as the normal mode does not. Depending on the situation you can find yourself switching on and off. Remember that one of our perks allows use to do more cleave if we push an enemy. But also, each swing we hit the first enemy will take electricity damage and applies brittleness to them. I like running the transonic blade because it has great movement and it's the Swiss army of melees.
Alterative weapons choice:
Catchacan Knife: If you're using the knife, please use the VI. It's great at crowd clearing by the main reason why you want to use this melee is because it applies bleed, and rapid crits which is great at getting more captaciance.
Arc Maul: Arc maul is fine choice but you're sacrificing mobility which is important for survival. You can take advantage of the perks that effect electricity damage. It does have a lower skill ceiling
Phosphor Pistol: The phosphor pistol is a solid choice it deals a lot of damage, does brittle, damage over time, and is over all a great secondary. It has a fast reload speed although it doesn't have that much ammunition.
SMALL NOTE: You are not a Sicarian Ruststalkers, you're really squishy, expect yourself to be downed if you don't pay attention. I learn that the hard way.
_____________________________________________________________________________________________________________________________________________
- GAMEPLAY
Note: I won't be able to cover how to play the Skitarii but I'll try my best. Movement is really important, if you're starting out darktide learn how to dodge and slide around to avoid getting shot. You're pretty fast with a high mobility so take advantage with that.
Combat: Don't try going for melee combat first unless the enemy is right next to you or you're with your Teammates. What I usually see from beginners is they always go to melee combat first without their teammates leading to them getting downed easily by gunners within the first couple minutes of the game. Use your range weapons if you can and when engaging melee stay next to your team mate so that your resurgence aura grants you toughness recovery. With arc rifle you don't have to aim for the head or weak spots, as it doesn't really weak spot damage. If you have Dumdum take advantage of that by shooting them up close. For melee combat be swift and move around to avoid getting hit, against armored enemies block -> push to apply brittleness before strike them down.
When to use claw: Use claw at anytime but mostly on crowds, high priority targets like bombers or pox hound, armored enemies, Ogryns, and boss. A tip is not to rush to kill Ogryn, with reapers and crushers just hold the claw before tearing their face. The reason why you don't want to rush is because if you don't pay attention to your surroundings other enemies will take advantage that you're open. If there's multiple crushers use your claw before dodging back to give you more space and avoid you from getting one shot from them. With bulwarks wait for an opening or attack them from the sides to one shot them. As a reminder, the claw has a pretty high mobility so you can run around at high speeds while holding the claw out.
Noospheric Command: Use Noospheric Command to kill enemies you don't want to deal with so you can multi task or dish a large amount of dps to an enemy and apply debuff.
Note: I'm just repeating myself again
Purgator Servo Skull (if your using it): If there's a ton of pox hounds coming after you and you can't handle them all, place the fire spiny skull next to you so if the pox hound do manage to pounce on you, the fire should finish them off or push them back out. You can use the fire skull to hold a location and make enemies take more damage with Weakness Analysis Doctrine. With the spin mode it cover a good amount of area and the focus mode is great for holding narrow and chock point areas.
Against boss or heavy enemies: When fighting against a boss to deal max amount of dps, use the servo skull and follow up with Noospheric Command , apply electricity damage, and then claw them to death. This stacks brittleness and they'll take more damage from statis effect, and also the servo skull will only prioritize the enemy you ask them to kill.
Note: If a Poxburster is next to your teammate or to you DO NOT SHOOT THEM, PUSH THEM INSTEAD
What kills me the most: I'm gonna explain what kills me the most so you can avoid the same mistakes as I did, Poxburster caught me and most other beginners off guard, to deal with them push them with your melee instead of shooting them if they're close to you or teammate. Pox Hound they're easy to avoid but don't get to cocky, just dodge to the side but if you can't deal with them use the Noospheric Command. Scab Sniper will kill you if you're not carful, if they're a laser aimed at you, move and dodge or find cover. Take them out ask quickly as possible they'll deal a LOT of damage and if you don't take them out, you might get carried away with other combat without realizing you're about to be sniped. Crusher, they're pretty slow but if you're not carful they'll just one shot you ending the game pretty quick. Most of these deaths can be easily avoid by have good situational awareness, just hear for any sounds like the pox hound or buster coming right at ya.
Threats: These enemies are not going to kill you instantly but they're still a threat should be taken with cation or eliminate them first.
ts is not done