Table of Contents
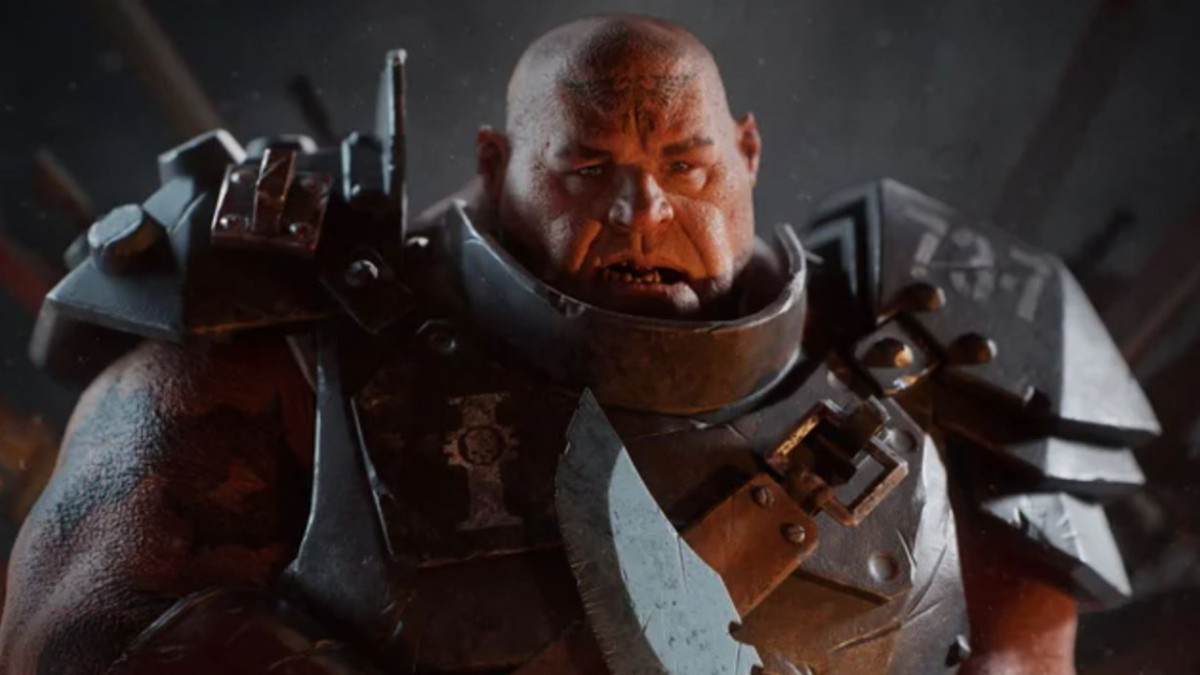
Ogryn Build - Warhammer 40k: Darktide
Bullyknight
Ogryn Build - Warhammer 40k: Darktide
Class

Weapons


Thunderous
Hitting an enemy gives them 4 stacks of +2.5% Brittleness. Debuff lasts for 5 seconds and can have a maximum of 16 stacks.
Skullcrusher
Target receives 4 Stack(s) of +10% Damage if already Staggered. Lasts 5s.

Pinpointing target
+8% Strength every 0.4 seconds while aiming, stacking 5 times. Discharges all stacks upon firing.
Gloryhunter
+35% Toughness on Elite Kill.
Curios

+17-21% Max Health
+13-17% Toughness
+13-17% Toughness
Talent Tree
Description
How to play a BullyKnight
"Luv me club, luv me bombs, luv me rashuns, luv me Emprah, and luv me <UNLOCALIZED TRAIT NOT FOUND>"
This build used to be OP and now it's really mid but fun. If you're just learning Ogryn, I recommend a Shield heavy hitter build to help you stay alive. (https://darktide.gameslantern.com/builds/9bf953e3-da12-4321-8795-1d68dbb3aaaf/shield-sniveler-stomper). This build is more for Ogryn who want to play around with shovel III and bully clubs.
Club and Shovel III blessings and perks
- Thunderous + Skullcrusher: great for light attack spam
- Haymaker + Skullcrusher or Thunderous: Haymaker RNG is infuriating sometimes but it's a good choice if you want to use lots of heavies. Enemies killed by it don't count against your cleave which helps massively with clubs' low cleave numbers. Very satisfying to kneecap a mutant, rager, or mauler with it. Also Haymaker kills don't count against your cleave which means you hit more stuff.
- Thrust + Brutal Momentum (Shovel): The heavy 1 + Punch combo does more dps than charging up Heavy 1, even with Crunch!. This blessing combo is better suited for Shovel V but is still decent here if you roll Thrust IV.
Smackdown + Perfect Strike. No. Maybe if they ever buff slap to fix its delay and stagger value, but it doesn't stagger jack shit and 2 seconds of extra crit (~3 heavy attacks) doesn't make using slap worth it since it takes a heavy attack worth of time out of your combo.
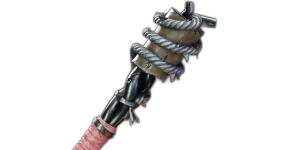
Melee Options (WIP)
Shield (strong in most builds) > Club IIIb = Shovel III > Krourk IV Cleaver > Club II > Club I > BB Cleaver > Shovel V > Shovel XIX
Bully Club IIIb has the best horde clear and is a great multi-target option, with a small amount of cleave on both heavies and it still deals good single target damage due to debuffs. Incredibly good fast lights for horde clear if using Skullcrusher/Thunderous, especially after a charge, and you can mix in heavies to keep 5 stacks of heavy hitter. It also has a fast heavy combo, meaning you build up bleed stacks and Heavy Hitter faster. For heavy builds, Haymaker is pretty great because you can hit max stacks instantly by hitting a horde and the stacks fade one at a time, but the RNG is pretty frustrating sometimes for taking down Maulers and Muties so it comes down to personal preference. Highly recommended as its the easiest club to use and works well in other builds too.
3b also has a block animation cancel since its block animation is very short. On FNP builds, you can block animation cancel after the first heavy, and you can block animation cancel after the first two lights for faster horde clear (since the third light is single target). You can also tap block while moving with minimal speed loss. This is a fairly minor tech that gives only a slight increase in attack speed so it's not mandatory.
Shovel III is the best single target option. The best single target is Heavy 1 + Punch, but Heavy 1 + Heavy 2 is close behind. or Heavy 1 + Heavy 2. Horde combos are [spam lights], or Light 1 + Heavy 2 or Light 1 + Heavy 2 + Light 1, 2, 3, 4. You can sometimes staggerlock a chaos spawn if you charge, then combo Heavy 1 + Punch on its weakspot before it recovers from the first stagger.
Krourk IV is a really unique weapon that can be built a number of ways. Unstoppable Force is a unique blessing that gives it infinite cleave on fully charged heavies, and the weapon's heavies charge fairly fast compared to other ogryn melee. You can combine it with Thrust to make a heavy-focused weapon that can cleave through a horde of Crushers...but isn't particularly effective against carapace. Still, with Crunch and Slam it has a lot of stagger and you can back it up with a Ripper with Can Opener for a very flexible weapon. You can also build it with Slaughterer and Confident Strike and ignore the armor cleave function.
- Single target combo: (Heavy 1 + Light + Light) repeat
- Ripper Special attack + (Light + Light + Heavy) repeat
- Multi-target combo: Push attack + (Heavy + Light) repeat
- Some actions, such as ripper's special attack or performing auspex, will count as Heavy 1 for the weapon's combos when you swap to it.
Bully Club II is the most complicated club to use, but still decent. Heavy 1 is multi-target and Heavy 2 is single target. The lights aren't as good as IIIb's, but you can use your 25% heavy every once in a while to deal heavy damage to a beefier foe or huge damage to a wide area. It's main strength is its unique attack patterns. There's 5 basic attack patterns: Heavy 1 + Light 2,3, Slap (best stagger and will apply 40% brittleness), Heavy 1 + Light 2,3,4 (best small group dps), Chain Heavies (builds heavy hitter, best single target once debuffs apply) or Heavy 1 + Light 1 and Heavy 1 + Slap (to build heavy hitter while clearing horde). Recommended that you pick up Hard Knocks
You get the best mileage out of it by running Thunderous and Skullcrusher and debuffing everything with those combos. Haymaker doesn't work too well with the surprisingly low target cap. The main thing holding it back that Heavy 1 is really slow, which makes you vulnerable to trappers, dogs, and other hits while charging it and makes attack speed buffs almost useless on Heavy 1, but attack speed makes a huge impact on the lights. Doesn't need Brutish Momentum (keystone modifier) but it's still very useful.
Bully Club I is pretty much inferior to Shovel III right now. It has no good qualities now that slap is nerfed. The main thing holding it back is that the light combo has a huge delay after the last hit and is too short, so it's unusable.
Shield performs extremely well with some slight changes to the build. See: https://darktide.gameslantern.com/builds/9bf953e3-da12-4321-8795-1d68dbb3aaaf/shield-sniveler-stomper
Bull Butcher and Krourk VI offer great horde clear thanks to the Slaughterer blessing and their lights benefit greatly from the attack speed sources in this build. Unfortunately, their heavy attacks are agonizingly slow thanks to a stupidly long delay so attack speed barely affects them which means it's hard to build up heavy hitter. Either build it up with your ranged weapon's special or by just toughing it out with regular heavies. They are also nearly useless against armor so Ripper with Can Opener is highly recommended. Good choice if you have trouble with hordes normally
Shovel XIX / V is a great anti-armor and anti-boss weapon, but it's incredibly slow. This makes it hard to keep stacks of Heavy Hitter up (especially when a teammate kills the enemy you're swinging at), and hard to apply stacks of bleed quickly. Shovel XIX and Shovel V really need a specialized build, like this one:
https://darktide.gameslantern.com/builds/9ac782df-e70a-4cc3-9bab-1f85d243185a/ogryn-shovel-knight
Power Maul is better than it used to be... but it's still outclassed by Picks and Slab Shield at everything. It has the highest crit and weakspot bonuses of any Ogryn weapon melee, but that doesn't amount to much. Brutal Momentum makes the heavies good at clearing hordes and the power attack will usually stagger crushers. Rending on stagger or Brittleness on special lets you kill crushers fairly fast. Single target either do light + light or Heavy + light + light + light
Pickaxes work in basically every Ogryn build ever, but I've created a separate build to talk about them in detail: https://darktide.gameslantern.com/build-editor?id=9c60559a-45fc-46c6-9f5a-878eb1e99d33
generally for perks: Flak is almost a must-have. +Elite, +Carapace, +Unyielding and +Maniac are good options. +Unarmored isn't terrible with club III to make breakpoints for dreg shooters and scab brutes.
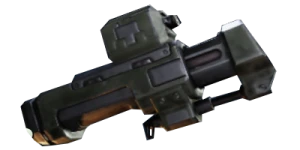
Ranged Options
In short, if you're using frag bomb, go with Ripper, Rumbler, Gauntlet, or Kickback. If you're using rocks, go with Kickback, Rumbler, or Stubber. Rocks and kickback are the best weapon combo, but Soften Them Up is more useful than Slam. Slam is still useful against Ragers but makes little difference everywhere else.
All Ogryn ranged weapons count their melee special actions as HEAVY ATTACKS. Rumbler and Kickback have insanely fast heavy attacks that can be used to build up Heavy Hitter stacks quickly or refresh the bonus while/after shooting.
The Grenade Gauntlet is very reliable for taking out trappers, bombers, flamers, snipers, and opening up bulwark shields. It's basically a rock that can be reloaded, if you can get a good roll. Don't use unless you can get the breakpoints to 1-shot flamers and gunners. The special attack is great against flak and mixed hordes and triggers heavy hitter.
Ripper with Can Opener is a great choice to buff your anti-armor capabilities.
Ripper V in particular has great hipfire damage at medium and even long range, more so than kickback, due to minimum pellet count mechanics, but you have to control the recoil yourself.
Kickback is strong in basically any Ogryn build. For Kickback blessings, Blaze Away III is great for chaining shots, the only downside is that you'll lose heavy hitter while making use of it. You can also use Surgical, Expansive, Punishing Fire, or Inspiring Barrage. IB doesn't give you much toughness, but it's enough to keep you topped off while taking chip damage, preventing health damage from an unexpected melee hit. Surgical can 1-shot a Mutie on crit weakspot, which is great if you aren't taking rocks. It doesn't have any synergy with Blaze Away, but having both is still good. With both Surgical and Blaze Away, the Kickback will be very strong on the first shot and even stronger in continuous fire. Alternatively, Expansive + Punishing Fire is a fun combo if you don't like Blaze Away. Full Bore sounds fun but it activates very rarely in optimal play and still infrequently when you're taking every opportunity to get it. Note that Blaze Away does increase the damage of the special melee attacks but Inspiring Barrage does not work for the melee attacks despite its icon appearing.
For Kickback Perks, Maniacs is the top choice to be able to kill trappers, bombers, and flamers from further distances with one shot. For the second perk, Flak and Reload Speed are the best options. I prefer reload speed to have less downtime between shots and shoot faster during times when blaze away can do work. Flak breakpoints aren't as important on the kickback since you'll usually handle armor with your melee and if you're shooting gunners or scab shooters with it the breakpoint doesn't matter as often.
Rumbler is probably going to be the top pick if it gets a larger ammo pool. It's a reliable weapon held back by terrible ammo economy and just being unreliable with the 1-shot on trappers and gunners.
For Rumbler blessings, go with Blaze Away III for the first and Adhesive Charge III for the second. Prioritize your perks instead. The other blessings mostly suck. Gloryhunter is okay because it will replenish your toughness in a pinch. Shattering Impact is overrated because it only applies 10% to one target, but it's better than nothing. Pierce II is actually not bad. It allows you to apply bleed on up to 3 maulers or crushers at once which isn't really useful in a vacuum but when there's a horde mixed in you'll stagger everything which is quite useful.
Stubbers are fun weapons but they're eclipsed by the Kickback right now, which fills the same niche but is faster to pull out and use against a surprise threat. It works fine if you have a good one though.
Monstrosities
Chaos spawn and Daemonhost can be situationally stagger-locked. See below.
Chaos Spawn: Chain heavies to build up bleed. It has three attacks and each requires a different response. On the slow lunge attack you should dodge. On the chain attack you should dodge the first, block the last two. When it tries to grab you, dodge and slide backwards at the same time. Dodging to the left or right only sometimes works because it has a huge horizontal reach and duration that exceeds the dodge frames. Shovel III can staggerlock it immediately after charging if you have the slam talent or very high Crowd Control stat (near 80). It's inconsistent, but has the best success if you hit it with the charge, immediately heavy attack, pause a moment, then punch its weakspot. Continue the stagger by Doing Heavy 1, a brief pause, then punch its weakspot. After ~3 times, you can stop pausing and just bully it to death.
Plague Ogryn: Block its charge, get in close, crouch, and dodge backwards every attack. As dodges run low, block the 3-attack combo. Dodge and block when it does the ground slam if you are near an abyss or too close to dodge out. Charge before it can ground slam if allies are in danger of being knocked off. Otherwise, save charge for if it changes targets from you.
Beast of Nurgle: Your main goal is to hit it as much as possible without getting puked on. It will only eat you if you have the debuff from being puked on. Beware the tailswipe attack which will instantly delete your toughness and knock you back. You can still stagger it, however, with Heavy 1 -> Heavy 2 -> Slap if all 3 hit the weakspot. If another teammate hits it with you, you can stunlock it. Generally, the best strategy is to dodge its puke from close range, then block its AOE melee attack, then wail on its weakspot when it tries to puke on you again. If you get puked on, charge into it then run away, or charge away. Beware: sometimes charging into it can fail to stagger it.
Remember that a rock or box to the weakspot will always stagger it and can save a teammate that has been eaten. You can also hit it through walls or across obstacles to safely apply bleed but if you get too close it can eat you through some walls.
Daemonhost: Daemonhosts can be staggerlocked with Shovel 3 and Clubs but it's difficult. You have to either use Slam! or hit them with Indomitable's charge for its insane stagger. To start, the first swing and slap both have to hit the weakspot, and to maintain the stagger each swing has to hit somewhere and each slap has to hit the weakspot. The target's head is tall, it moves quickly, and has a lot of knockback which makes it hard to hit with slap due to its very short range.
With Slam! talent: Alternate between Light 1 and Slap. Club IIIb is fast enough to start with Heavy + Slap combo. Once you've found a rhythm, you can switch the light attack to a heavy attack on Club I. Shovel III doesn't work with this method unless another teammate applies a lot of stagger, at which point alternate between Heavy 1 and Punch.
Hit them with Indomitable: after they're staggered by this ability, follow the same patterns as in the Slam version. alternate between a single light attack and a slap. If you're not the target of the daemonhost, you can alternate between a heavy and a slap to get more damage in but it's riskier since the daemonhost will be moving and if you miss your teammate could die, so the light + slap combo is safer. Rock and Loyal Protector can both stagger it, but not enough to allow a staggerlock unless someone else is also applying lots of stagger at the same time.
You can still tank a Demonhead with other weapons but its tough. use stamina to block as long as you can, then chain heavies to restore toughness as she hits you. Repeat once your stamina is full. Use your charge to regain the initiative if your toughness is depleted. Having a stamina regen and block efficiency perk on a curio makes this much easier.
Armor Packs
Certain enemies reduce your cleave. Your attack stops cleaving entirely once it hits a monstrosity, Ogryn, Mutie, or Carapace. If you hit a Mauler or scab Rager's flak, you can only hit 1 more enemy after. If you hit a dreg rager, you can only hit 2 enemies after. Blessings that reduce enemy hit mass, such as Brutal Momentum, can situationally negate this effect. Keep these enemies in mind when using cleaving attacks, as the angle of your attack will affect how many enemies you hit. Prioritize strikedown attacks or fast attacks with debuffs to take them out.
For huge armor packs take it slow and move over to the side so the team can see more easily. Chain heavies, or even better use Can Opener to instantly apply 40% brittleness to the enemy at the front and watch them evaporate. If you get overwhelmed then you can still charge.
For Ragers, Heavy 1 and Slap, but if they've already started attacking you, block and push first because they get stagger resistance once they start swinging. If they're attacking a teammate, use Light 1 and Slap instead because the first hit will not stagger them and your goal is to prevent damage from being taken. The point of the slap is to hit right after they get staggered to knock them down and apply Skullcrusher quickly.
Hordes
Use heavies to build up stacks of heavy hitter, then switch to lights unless you need to refill toughness or apply bleed for resistance.
Shooters
Slide everywhere. Slide towards them and chain Heavies to refill toughness. When gunners are also involved I like to Dodge->Sideslide (dodge + crouch at same time) if I need to change directions or close the distance while attacking. You can also dodge towards the enemy while winding up an attack.
Curios
I recommend 2x HP and 1x TN or 3x HP.
Toughness is important for your sustainability, since you can replenish it super fast, so having +5% Toughness perks on all 3 curios is important. You can even run an extra toughness main stat if you're really struggling with shooters but it shouldn't be necessary.
Curio Perk tier list (for this build)
S Tier (3 ideal)
- 5% Toughness
A Tier (2 ideal)
- Gunner Resistance
- Stamina Regen - having your stamina start regenerating sooner & faster can save you from a dog or burster and help you revive teammates.
B Tier (1 max)
- Sniper Resistance
- Corruption Resistance - helps a lot with surprise dogs, poxbursters (you're often in the front and sometimes teammates shoot them or weird stuff happens), grimoires, and poxwalker surprises (5 hitting at once from nowhere hurts). Some say it's a waste but I usually take more corruption damage than damage from gunners and snipers combined in the average mission. If you choose to stack 2-3 I won't judge you, it helps substantially with dogs and nurgle vomit, but you might spend 5 minutes in a Beast of Nurgle's belly.
- Toughness Regeneration Speed - TRS only affects passive coherency regen, not replenishment from talents, so if you're heavily relying on it you probably need to be more aggressive. More than 1 is overkill unless Shield.
- Combat Ability Regen - the best cooldown reduction still comes from Bruiser, which is percentage based so this won't help much, but this is B tier if you don't have Brusier.
C Tier (usable)
- Max Health (diminishing returns are rough)
- Sprint Efficiency
- Revive Speed - you will typically be able to pick allies up without it, if you can't it's usually because of gunners. Occasionally will help you rescue a teammate between flamer, bomber, or crusher attacks.
- Bomber, Flamer Resistance
D tier (not recommended)
- Mutie, Dog Resistance
- Block Efficiency - this build rarely blocks.
- Economic perks - okay, Ordo Dockets aren't bad but you should play the game for fun, not suffering yourself to be at Hadron's nonexistant mercy.
Blitzes
Rocks are very good against Muties/Snipers and for the game's grenade economy. You lose the 15% extra damage taken by your melee targets, but rocks are worth it. As useful as the other grenades are, zealot grenades are generally more efficient and it's best not to compete with them. They also synergize with more ranged options, since if you're not using rock you typically want Gauntlet, Ripper V, or Rumbler for a precision weapon. Biggest downside is that Slam is way worse than Soften Them Up.
Frag Bomb is a great get-out-of-jail-free card as long as your other weapons can handle snipers, bombers, and muties. Especially amazing if you have an Enhanced Blitz modifier (Maelstrom) or your team has few characters using nades. In general, the game usually only spawns enough grenades to really supply two players so if you're using Nuke use it sparingly around Zealots who get more value from each nade pickup. The base damage increase from Indomitable's Trample will increase bomb damage by up to 50% depending on how many enemies you hit, and heavy hitter can increase it further to 75%.
Big Box of Hurt is usable at best. Not as good as just killing with a Frag Bomb, but at least you have 2 of them and your allies can proc abilities that rely on them getting the kill (Psyker's team CDR, Vet's executioner's, Zealot's throwing knives etc.). Just treat it as a second Charge that you can use when your charge is on cooldown or as a panic button if you're stuck and can't move after charging. The damage is almost respectable with trample and Heavy hitter buffs, but still not enough to turn a completely fubar situation into a safe one like frag bomb. That said, my favorite variant of this build uses Box in order to pick up both of the nodes on the sides (Soften em Up and Slam).
Alternate Perk Options
Soften Them Up vs Slam
Soften them up is generally the better choice, but if you want Rocks you've got to take Slam. With Slam, a single heavy will stagger Ragers even while they're attacking. Without Slam, you'll need to follow up your heavy attack with a slap and dodge. It's a little slower and you're likely to take a little damage if there's several ragers attacking at different times if you don't block. If you go with Box as your blitz, you can take both, it's a valid Ogryn strat.
Loyal Protector vs Indomitable
Indomitable is generally the better skill for the faster cooldown and longer stagger duration and application of bleed, but Bully Clubs and shovels don't use push attacks very well so being able to taunt and apply a hefty debuff is quite valuable.
Crunch
only useful if using Thrust blessing.
Big Boom (explosion radius)
Not a bad option if using both Nuke and Rumbler or Gauntlet.
Hard Knocks is alright on clubs 1, club 2, and shovel, since those weapons make use of a light attack (or several) in between heavies. It's just rough to take the 5% health node to get to it.
With luv,
(kill some snivelers)