Table of Contents

Psyker Build - Warhammer 40k: Darktide
Boilerplate H40 Inferno Psyker
Psyker Build - Warhammer 40k: Darktide
Class

Weapons


Uncanny Strike
Hitting an enemy's weakspot applies 8 stacks of 2.5% Brittleness. Duration 5 seconds. 16 max stacks.
Agile
Refreshed Dodge Efficiency on Weak Spot Hit. +10% Melee Weakspot Damage.

Warp Nexus
Gain between 5% and 20% Critical Chance based on current level of peril.
Blaze Away
+8% Strength for every 10% of magazine spent during continuous fire. Stacks 5 times.
Curios

+13-17% Toughness
+13-17% Toughness
+1-3 Max Stamina
Talent Tree
Description
This is a basic H40 capable Purge and Shield build. Everything here has a purpose which aids in general synergy. Our goal with this build is first, to keep bubble up as often as possible, and second, to apply as many flame DoTs as possible while proccing Uncanny Strike to as many stacks as we're able (5 stacks == 120% Rending). Keeping Uncanny Strike up provides us with the equivalent of a global damage buff, increasing our AoE DoT damage by as much as 400%.
Let's cover the decisions made in this build bit-by-bit.
Gear:
1) We take Dueling Sword Mk IV for the immensely powerful Heavy-1 => Special Attack cycle, which is capable of delivering nearly 2,000 dmg/second to Crushers while providing us with stacks of Uncanny Strike. For hordes, we can use light attack spam to proc Agile, giving us unlimited backdash slides to evade groups of enemies. You should only take out your melee weapon when a) You are being surrounded by armored units, b) have applied nearly max stacks of Soulblaze to most enemies on screen (max stacks is usually 16) and now want to build Uncanny Strike stacks to augment your damage, c) are using the movetech of the weapon to evade and whittle away hordes of trash mobs.
Our best perks are some combination of Unyielding, Maniacs, Flak Armor, and Carapace. If you're comfortable with movement, you may choose Thrust instead of Agile for a blessing. Do not remove Uncanny Strike.
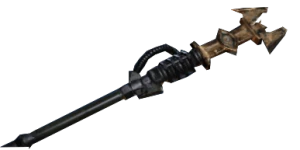
2) Our staff is the Rifthaven Mk II Inferno Force Staff, where we will be almost exclusively using chained charged blasts (RMB => LMB) to shower enemies with Soulblaze. The charged attack has infinte cleave and will apply approximately 8 stacks of Soulblaze a second, with up to 16 stacks of Soulblaze a second if we crit reliably. We use Warp Nexus to increase our crit chance and improve the rate at which we apply stacks, and Blaze Away to acquire a global damage boost which will apply so long as we keep emitting gouts of flame.
It is important to learn how to slide, dodge, and kite enemies all while emitting flames. You should be comfortable using the staff in melee range against difficult enemies to ensure that you're constantly applying Soulblaze.
Our Perks for the staff are any combination of Unyielding, Carapace, Flak Armor, 5% Crit Chance, and Maniacs.
When using the staff, we should occasionally quell (micro quell) to reduce our peril to between 80% and 90% at all times. This provides us with the optimum damage bonus from both Warp Nexus and Warp Rider. We should only quell to 0% before the onslaught of a massive horde. The ideal peril percentage is 86%.
3) We take two Toughness Relics, and one Stamina Relic. Additional blocks of stamina allows use to maintain sprint for longer periods of time, and at upper difficulties, avoiding attacks through evasive movement and push attacks is more valuable than reducing damage through toughness stacking. Our Relic Perks are x3 Combat Ability Regeneration (more bubbles), x3 Toughness 5% (makes up for the Toughness relic we've lost), x2 Stamina Regeneration (allows us to kite hordes more reliably), and any of the following: Gunner Resistance, Block Cost Reduction, Sprint Efficiency, Corruption Resistance.
Talents:
Quietude is superior to Warp Expenditure because we quell peril passively while moving. This means we're given a passive means of regenerating toughness even when isolated from our group and running from enemies.
Battle Meditation can proc Quietude, jump starting our passive toughness regen. Further, it allows us to keep emitting Soulblaze stacks while killing trash mobs without pausing to quell, preserving our Blaze Away stacks.
Mettle allows us to regenerate a massive 5% toughness per crit, and our Inferno staff's RMB attack can crit as many as four times per second. Taking this perk is a requirement for the build to reliably cap toughness since our crit chance with Inferno Staff will average to around 50%.
Perfect Timing is an effortless damage augment that will be capped for most of our play time. Take it. This damage augment *does* apply to our DoTs.
Perilous Combustion is our only method of pushing Soulblaze stacks above the soft cap of 16. The engine cap is 31, and each stack as an exponential effect on damage per tic. By 24 stacks of soulblaze, for example, we do over double the damage of only 16 stacks.
Brain Rupture + Kinetic Flayer is selected because it's the only Blitz available to us that provides a modest damage boost even while using our primary weapon, the Inferno Staff. This ability can jumpstart our Perilous Combustion, routinely giving us a head start on overstacking Soulblaze on dangerous hordes of elites.
Psykinetic's Aura is arguably the best team-support node in the game, easily reducing net team ability cooldown by 25% or more (the equivalent of adding six relic blessings to every member of the team). During intense waves on upper-level Havocs, this perk can single-handedly double the number of abilities your team can use every run.
Seer's Presence is similar to Psykinetic's Aura, but not as good. Still, it gives our team the equivalent of 2.5 relics worth of blessings, so we take it.
One With the Warp will average to about 20% to 30% Toughness DR during conflict. It's a strong defensive node, so we take it.
Empathic Evasion combined with the massive crit change on our Inferno staff and its multi-hit properties essentially makes us immune to ranged attacks so long as we have a horde to burn. This perk is mandatory in H40, but it can be passed up on lower difficulties if you'd prefer to save the point.
Telekine Shield => Dome => Sanctuary gives us the best idiot-proofing we have in the game. Even the most Adderol-addicted ADHD Zealot is going to be reluctant to ignore an immunity bubble thrown at their feet every ten seconds. Spam this ability, since our combination of Warp Siphon, Psykinetic's Aura, Seer's Presence and relic CAR means we're going to reliably field one or two of these at all times. Optimal use requires that we cover as much area as possible, linking these things together circumference-to-circumference. We're passing up the far superior Venting Shriek for this ability, so be sure to get your money's worth and SPAM IT.
Critical Chance Boost +5% is an easy node to grab, and increases our damage and survivability, so we pick it up.
Puppet Master is better than it appears on paper. It increases our coherency range making Pyskinetic's Aura and Seer's Presence more reliable, but also allows us to ensure that our teammates aura's affect us even if they're separated from us. This makes it both a selfish and supportive node, so we take it. Solidity may be tempting, but it's a bit of a noob trap because of some hidden mechanics which are infrequently discussed. Pass it up unless you know exactly what it does and the benefits it provides.
Empyric Resolve is controversial for good reason. Most builds want to build peril as quickly as possible and then vent it with Shriek. We don't -- we want to modulate our peril and keep it at a stable 86% for as long as possible. Emypric Resolve is going to help us do this. While the 30% reduction in toughness regeneration sucks, we have enough nodes providing redundant toughness regeneration that we can safely accept this penalty. If you really want to take Penetration of the Soul, go for it. For a Shriek Build, always take Penetration of the Soul.
Warp Rider is an effortless 20% damage bonus which applies to our DoTs. Taking it is a no-brainer.
Warp Siphon => Empyrean Empowerment => Warp Battery gives us a 24% passive damage bonus and a massive bonus in cooldown. By picking up In Fire Reborn, we're going to consistently benefit from six stacks during every horde encounter. Note that In Fire Reborn gives us a warp charge when an enemy afflicted by Soulblaze stacks dies, even if that enemy didn't *die* from Soulblaze damage. This makes the ability proc constantly, assuming we're doing our job.
If we could, we'd also want to pick up Soulstealer and Wildfire, but we can't afford it, so we pass it up for now. Kinetic Reflection is a good "fail less" choice that we would take if we had the points, but we leave it on the backburner for this build since we're providing defensive utility with bubbles.
Closing Thoughts:
This is the build that 90% of teams expect if you're bringing a Psyker into H40. That said, it isn't the *only* build that excels in H40, and you should always play what you want. This build is fairly easy to play at first, but has a high skill ceiling and provides room to grow as the player improves. Remember, our job is to keep our bubble fielded and to apply Soulblaze to enemy hordes. The more efficiently you can do these two things, the better you're utilizing the power of the class.
The Emperor Protects