Table of Contents

Class

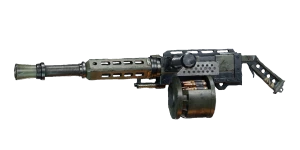
Weapons


Brutal Momentum
+15% Weak Spot Damage. Weakspot Kills also ignore Enemy Hit Mass.
Skullcrusher
Target receives 4 Stack(s) of +10% Damage if already Staggered. Lasts 5s.

Surgical
+10% Critical Chance for every 0.2 second while aiming. Stacks 10 times. Discharges all stacks upon firing.
Opening Salvo
+20% Strength on Salvo's First shot.
Curios

+17-21% Max Health
+17-21% Max Health
+17-21% Max Health
Talent Tree
Description
I recommend doing this build as is unless you're confident in any changes being made.
I'm sure there will be people who don't want to take "That One Didn't Count". Personally, I love Rock and this was more for Havoc anyway but I find the rock is quicker to deploy than switching to my gun and it's strong, all things considered, so I want a lot of up-time for the rock. You'll find that you really don't need to pick up ammo with this build unless you feel like going wild with the stubber.
This is a 'push bonk taunt' build. You will be spamming taunt. You will control the battlefield like no other class is able to do. You will clutch games. You will be the last one standing most of the time.
Team rez master: You will actually be able to pick people up so fast that you can taunt, pick up, and still be fine before enemies aggro you. That's only if 'For the lil'uns' is activated. The curios, by themselves, do a good job as well.
Combat: Lots of push attacks. You'll be taunting them while stacking brittleness, Skullcrusher, and regaining stacks of Feel No Pain. Head bonking works with Brutal Momentum.
Combat ability: Massive cool down. You'll be using this a lot and Get Stuck In is a nice complement to the team. 20% more movement speed is noticeable. Stun and suppression resist certainly helps as well.
Using the Rumbler is a good option, along with switching a few points into ammo and bigger explosion.
I've used this build a lot and clutch with it casually.