Table of Contents
Ogryn Build - Warhammer 40k: Darktide
Auric Maelstrom Mobile Lynchpin Tank
Ogryn Build - Warhammer 40k: Darktide
Class
Weapons
Curios


Talent Tree
Description
The whole idea of this build is to be the lynchpin of your team. This build is made to hard carry damnation auric maelstroms regardless of what modifiers are up and on it and be able to deal with whatever situation the game throws your way. Use your Indomitable more defensively than offensively, coupled with "get stuck in", it becomes a great tool to help your allies when they are in a bad situation. This build is all about support support support. You can deal with anything and everything, so use that to help out your tinies.
Also, one thing to keep in mind. Everything I say in here about playstyle, is about optimal play, and it's not realistic to always be on point at all times but rather something to strive towards. Heavy 1 into shield bash and repeat may be optimal but it's not realistic to expect to only ever use that throughout an entire game, the important thing is to be aware of the combo and that it's there. The same goes for everything else here. The most important thing is to find what works best for you, and what you most enjoy playing.
Weapons:
Orox Mk II Battle Maul & Mk III Slab Shield
Perks: These aren't really mandatory they just help clear up both flak enemies and ragers faster, if you're struggling with other enemies then prioritize perks that target those instead.
Blessings: Both Thunderstrike and Skullcrusher reapply with your bleed ticks. This means that if you have both at tier 3, each bleed tick applies 3 stacks until the enemy is at the max stacks of both, which is 8. This synergizes extremely well with this playstyle because by the time you land a second heavy hit, the enemy will be at 8 stacks of both and no matter what enemy it is, it will go flying.
You'll primarily be using the 1st heavy attack, followed by a shield bash into a heavy attack. If you're on mouse and keyboard with default settings, it'll be left mouse button, followed by right mouse button and left mouse button AS you see the attack connect, and as soon as you are looking through the glass of the shield, hold left click to charge the 1st heavy attack again and repeat the chain. That's all there is to it.
If you mess it up, you get a nearly free overhead smash attack that slightly delays your heavy attack, otherwise your heavy attacks with the shield bash are just as fast as if you're chaining heavy attacks, but you're getting the added benefit of taunting everything you're hitting.
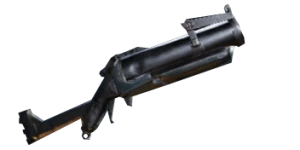
Lorenz Mk VI Rumbler
Perks: Carapice can be dropped as it's just a "nice to have", however, Unyielding is required. Unyielding on a max damage rolled rumbler coupled with "Heavyweight" from the talent tree lets you 1 shot reapers regardless of where you hit them as long as you hit them directly with the grenade. The bonus damage vs unyielding also gives you a large portion of your anti-monstrosity damage and will help you absolutely delete monsters whenever they make the mistake of appearing in the same game as you.
Blessings: Adhesive Charge and Shattering impact are both important and required to make it work as intended. Adhesive charge will make it stick to reapers and other Ogryn enemies as well as monstrosities and their weakpoints, significantly increasing it's damage potential. Shattering impact also boosts it's damage as the shatter impact brittleness applies on the initial impact and before the explosion.
This weapon is more than just a ranged weapon, it is your utility knife. The rumbler will solve any problem you require it to as with the addition of "Big Boom" from the talent tree it's explosion radius will break past 10 meters, giving it an insane amount of crowd control potential. See an enemy that is overwhelmed? Lob a single grenade their way, every enemy in a 10m radius is now on the ground for the next few seconds. Need to revive a teammate? shoot a grenade on the ground as you start to res, it'll explode mid-res and stop anyone from interrupting you. Need to headshot a sniper? It can do that. Break up a group of gunners? It can do that too. Just don't expect it to 1 shot every ranged elite out there, that's not it's job. It's job is to create breathing room and disorder in the enemy ranks. Use it as if it was the veteran's frag grenade but in a ranged weapon.
Curios
1 Toughness 2 Health to keep you healthy and upright as you pummel your way through anything that comes your way. The extra toughness helps, especially on auric maelstroms and since your toughness regeneration is absolutely insane with this setup and your keystone gives you +50% toughness replenishment, as long as you're hitting something it should always be topped off or nearly topped off. Triple toughness regeneration speed is there to help you top up when there aren't enemies to smash, and as you have increased coherency radius and +50% toughness replenishment, you get ALOT of value from this, again your toughness will almost always be full as long as you're near allies.
1 stamina regen helps keep your stamina topped up at all times as you'll be shield bashing quite a lot, if you feel you don't need it, then replace it for something else, however, the extra 12% is very noticeable.
Same with the +10% revive speed. This is something you'll be doing more often than you'd like. As the Ogryn, usually it falls to you to help get the tinies up on their feet and that extra +10% can help clutch in situations when it's not really safe to go for the revive but you're out of options. It's either revive or risk the wipe anyway. If you feel you don't need it, then replace it, but I find that it helps more than anything else I would have wanted to have there and I'm always thankful that I have it when I'm the last one standing and I get off a revive just as grenade lands or something else happens. 10% isn't a lot, except for when it is everything.
Blitz:
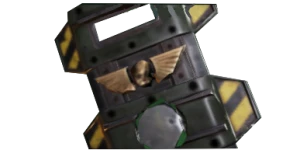
Frag Bomb
Your big panic button. With "Big boom" increasing its explosion radius by 22.5% it goes from 16m to 19.6m. As tempting as it is to use this to delete an entire wave of enemies and the two waves of specials and elites that came with it... don't. You need this for when things really go bad. If there's grenades a plenty, then sure have fun, but this blitz ability will clutch games for you.
When a horde, waves of specials and elites and a chaos spawn all swarms you while your team is at half health and the game throws whatever modifier it has at you at the same time, be it waves of dogs or mutants or whatnot.. that's when this thing saves the day. That's when it deletes everything that isn't your team, a chaos spawn or an enemy Ogryn. And as for the rest, you have your rumbler and Indomitable charge. Suddenly a situation that is a potential wipe can be saved without anyone losing HP as the rumbler can stun-lock the chaos spawn without it ever getting off an attack. If you go through an entire game without using the frag bomb, then it's been a clean and good game, and take solace in the knowledge that you had the save in your back pocket just in case it was ever needed.
Ability:
Indomitable
I forego Loyal Protector for Indomitable for two reasons:
- Mobility is king. More games have been clutched through positioning than anything else. Being able to be in the right spot at the right time, get out of a bad spot where you would be dead or downed without Indomitable or get to an ally that's in a bad spot before they go down is something that saves runs more than almost anything else.
- You shouldn't need to have to taunt with attention seeker and proper use of shield bash animation canceling after heavy attacks with the shield. The only enemy you can't taunt with your shield bash through attention seeker are monstrosities, and those you can stun-lock until dead with the rumbler and Indomitable if required.
Keystone:
Feel No Pain
This is the thing that makes you indestructible. +50% toughness replenishment +25% Damage reduction and you only lose stacks when you take health damage. You regain stacks whenever you push enemies. You are constantly pushing enemies, and even when you're in a bad spot you will be at max stacks. If you start taking a lot of health damage, throw out 3-4 pushes before going back to your normal heavy attack push routine to get back up to the cap. The +50% toughness replenishment is everything that replenishes toughness. Your heavy attacks, coherency regen, everything. This is why your toughness is always maxed out.
You have 25% damage reduction at 10 stacks, you also have 2 10% toughness damage reduction nodes in the build. With bleeding enemies nearby, you can also get up to 60% damage resistance, and given how your heavy attacks work, if there are more than 6 enemies nearby there are 6 bleeding enemies nearby. This along with the toughness regeneration aspect of your keystone helps make you the very last one to go down in your team. You can tank an ungodly amount of damage because whatever damage comes your way barely ever makes a dent in your constantly regenerating toughness.
Attention seeker
Proper use of this passive will make or break this build. If you're not utilizing this properly, you won't be taunting enough enemies to do the job properly and your tinies will suffer for it. When enemies are taunted by you they glow red, use this as an indicator to decide how to act. If you have allies nearby who are dealing with nearby enemies, let them deal with them and taunt more enemies, if not kill them. Your keystone makes you tanky enough to ignore enemies hitting you while your enemies kill them so you can deal with something of a higher priority. If they are melee elites or ragers, then kill them first. Horde enemies are always your lowest priority to kill but the highest priority to taunt because they are the ones that chip away at your teammates toughness and health. Another huge benefit with attention seeker is that it works with ranged enemies. nonelite ranged enemies and enemy shotgunners who shoot at you when you have attention seeker will get taunted and switch to their melee weapon if they have one for the full duration (8 seconds) of the taunt. Once they do this, you can stop blocking them and just kill them as you please. If you can't get to an ally to help them with attention seeker, use your rumbler to give them breathing room and space to deal with the horde or a melee elite.


